Pinup Survivor Painting Guide
Scott Hockley
Hi all,
Here is my next instalment in the Pinup painting series. As previously, any techniques not fully explained here can be found in the first article for the Architect.
Preparation
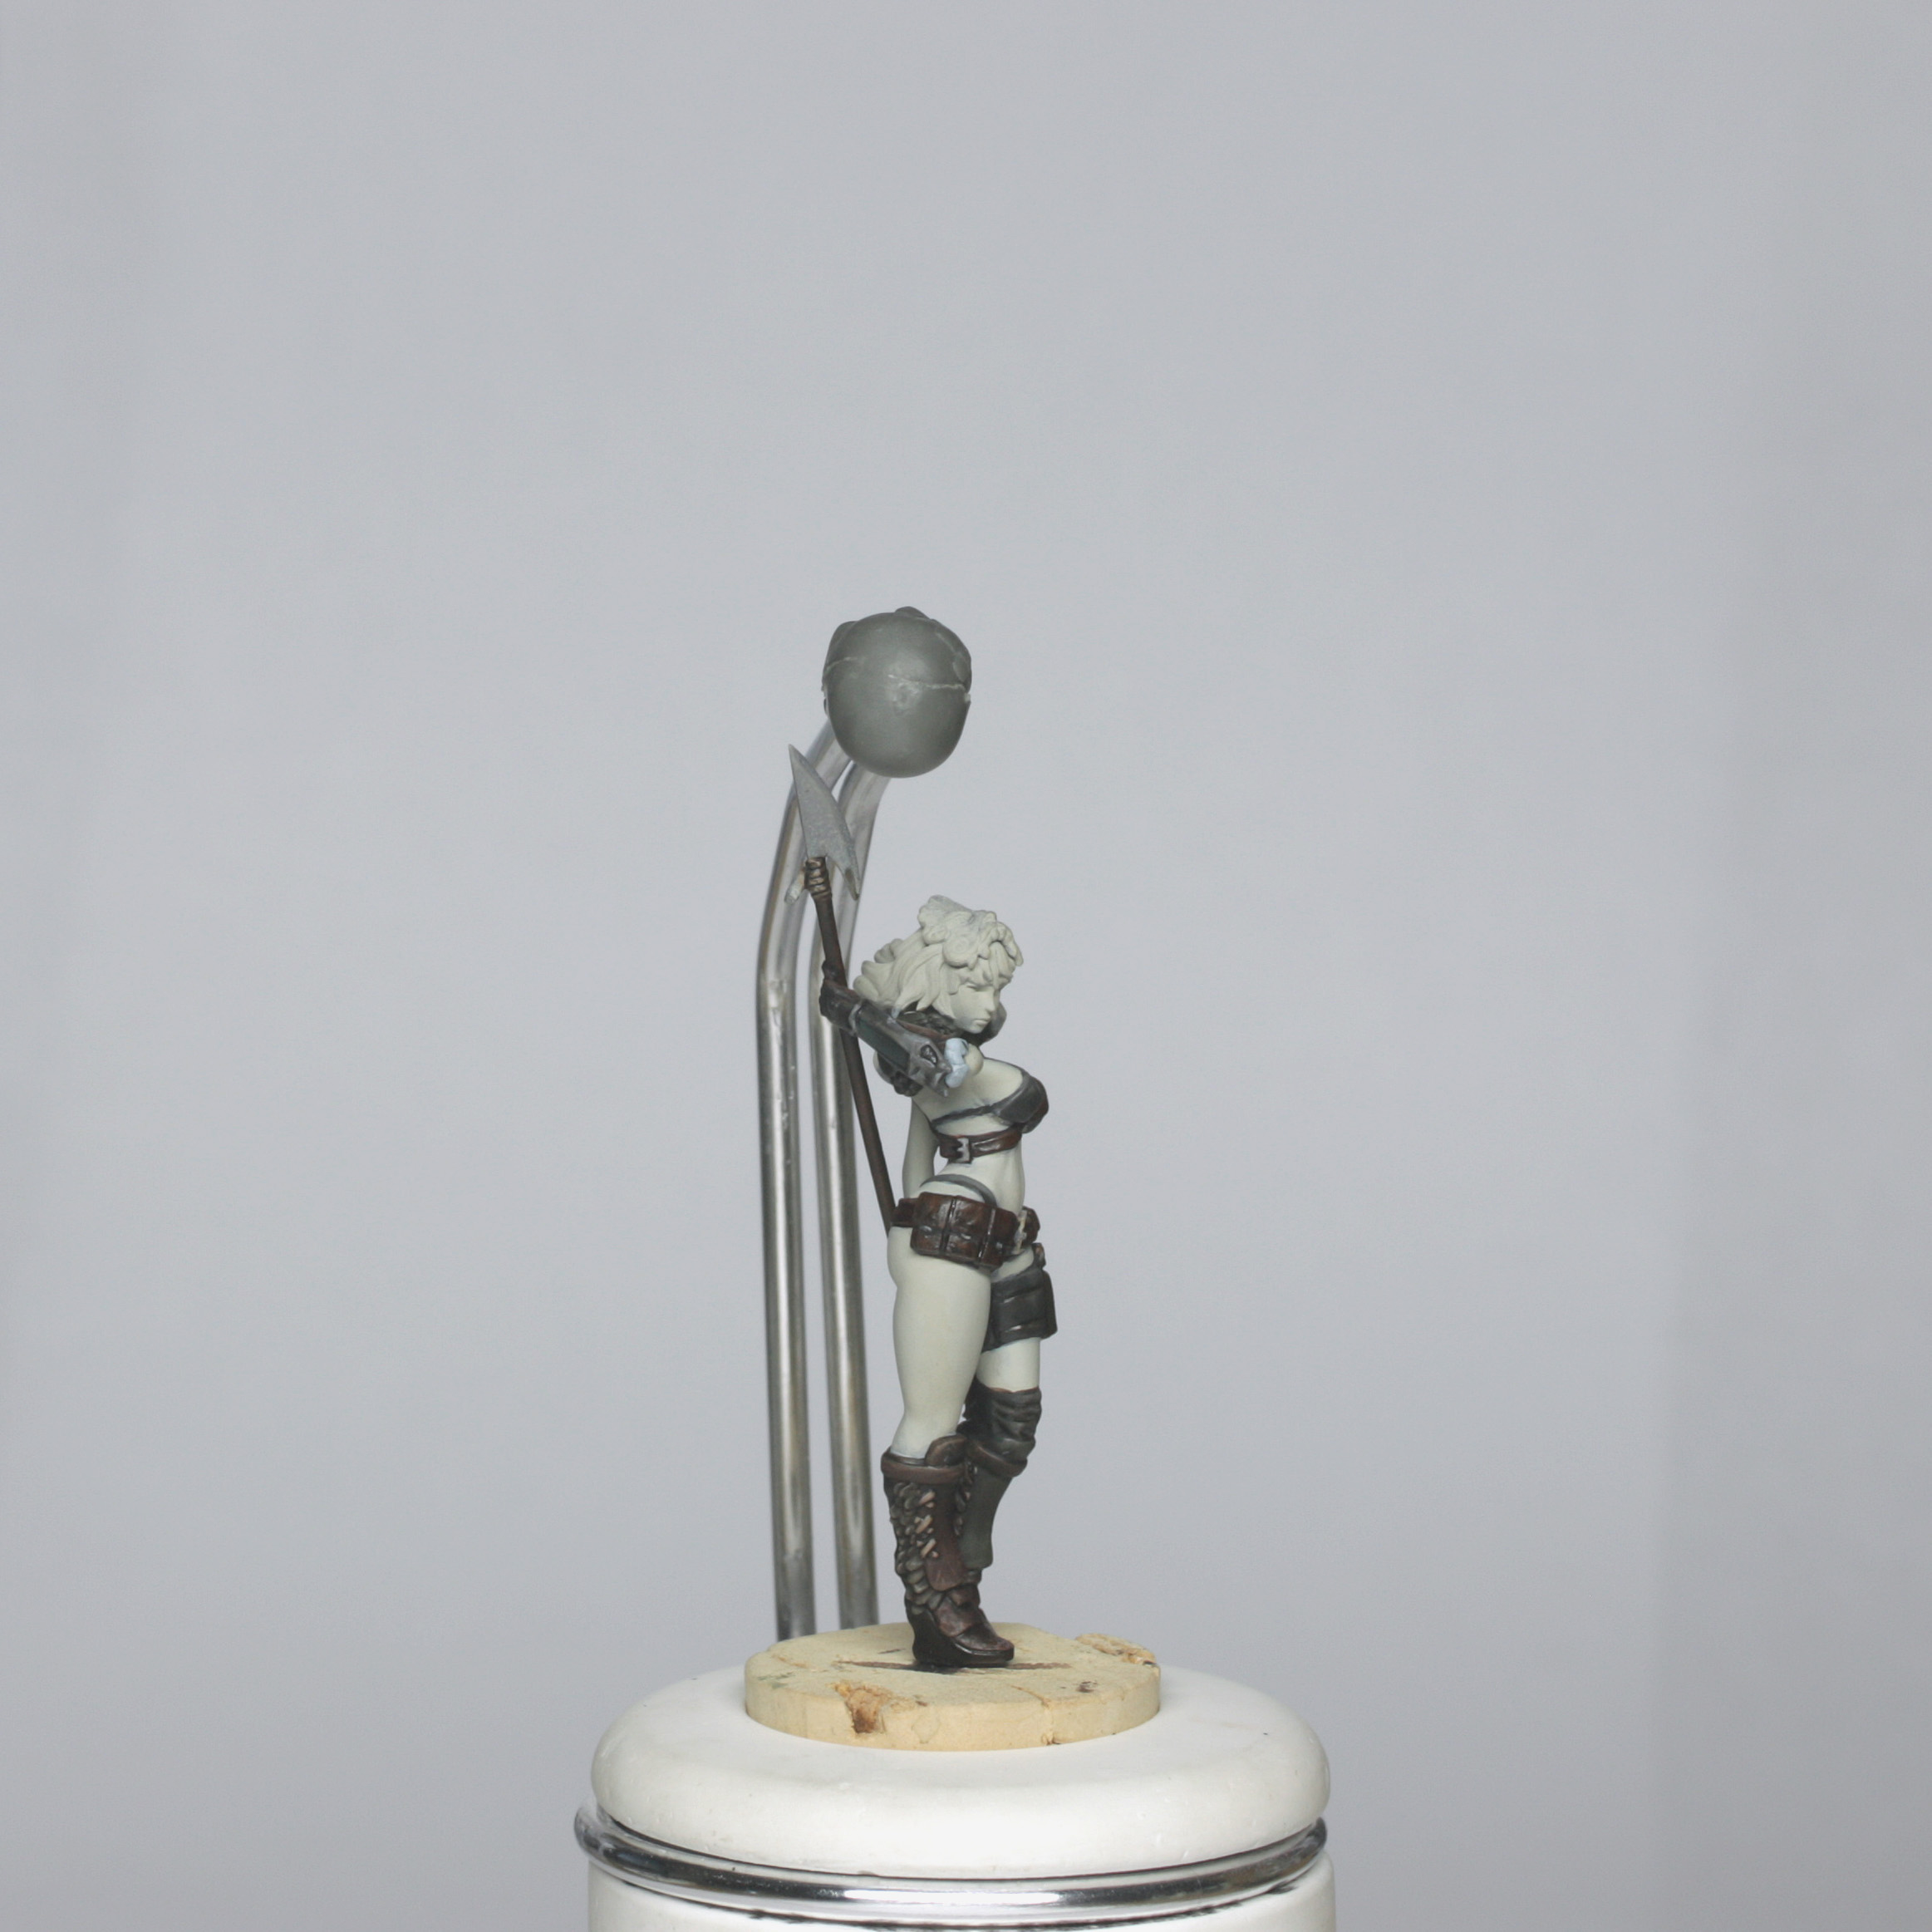
This plastic model is the Survivor Pinup This is another sculpt that varies slightly from the concept art in terms of posing, but not enough that I would need to take up any artistic license…
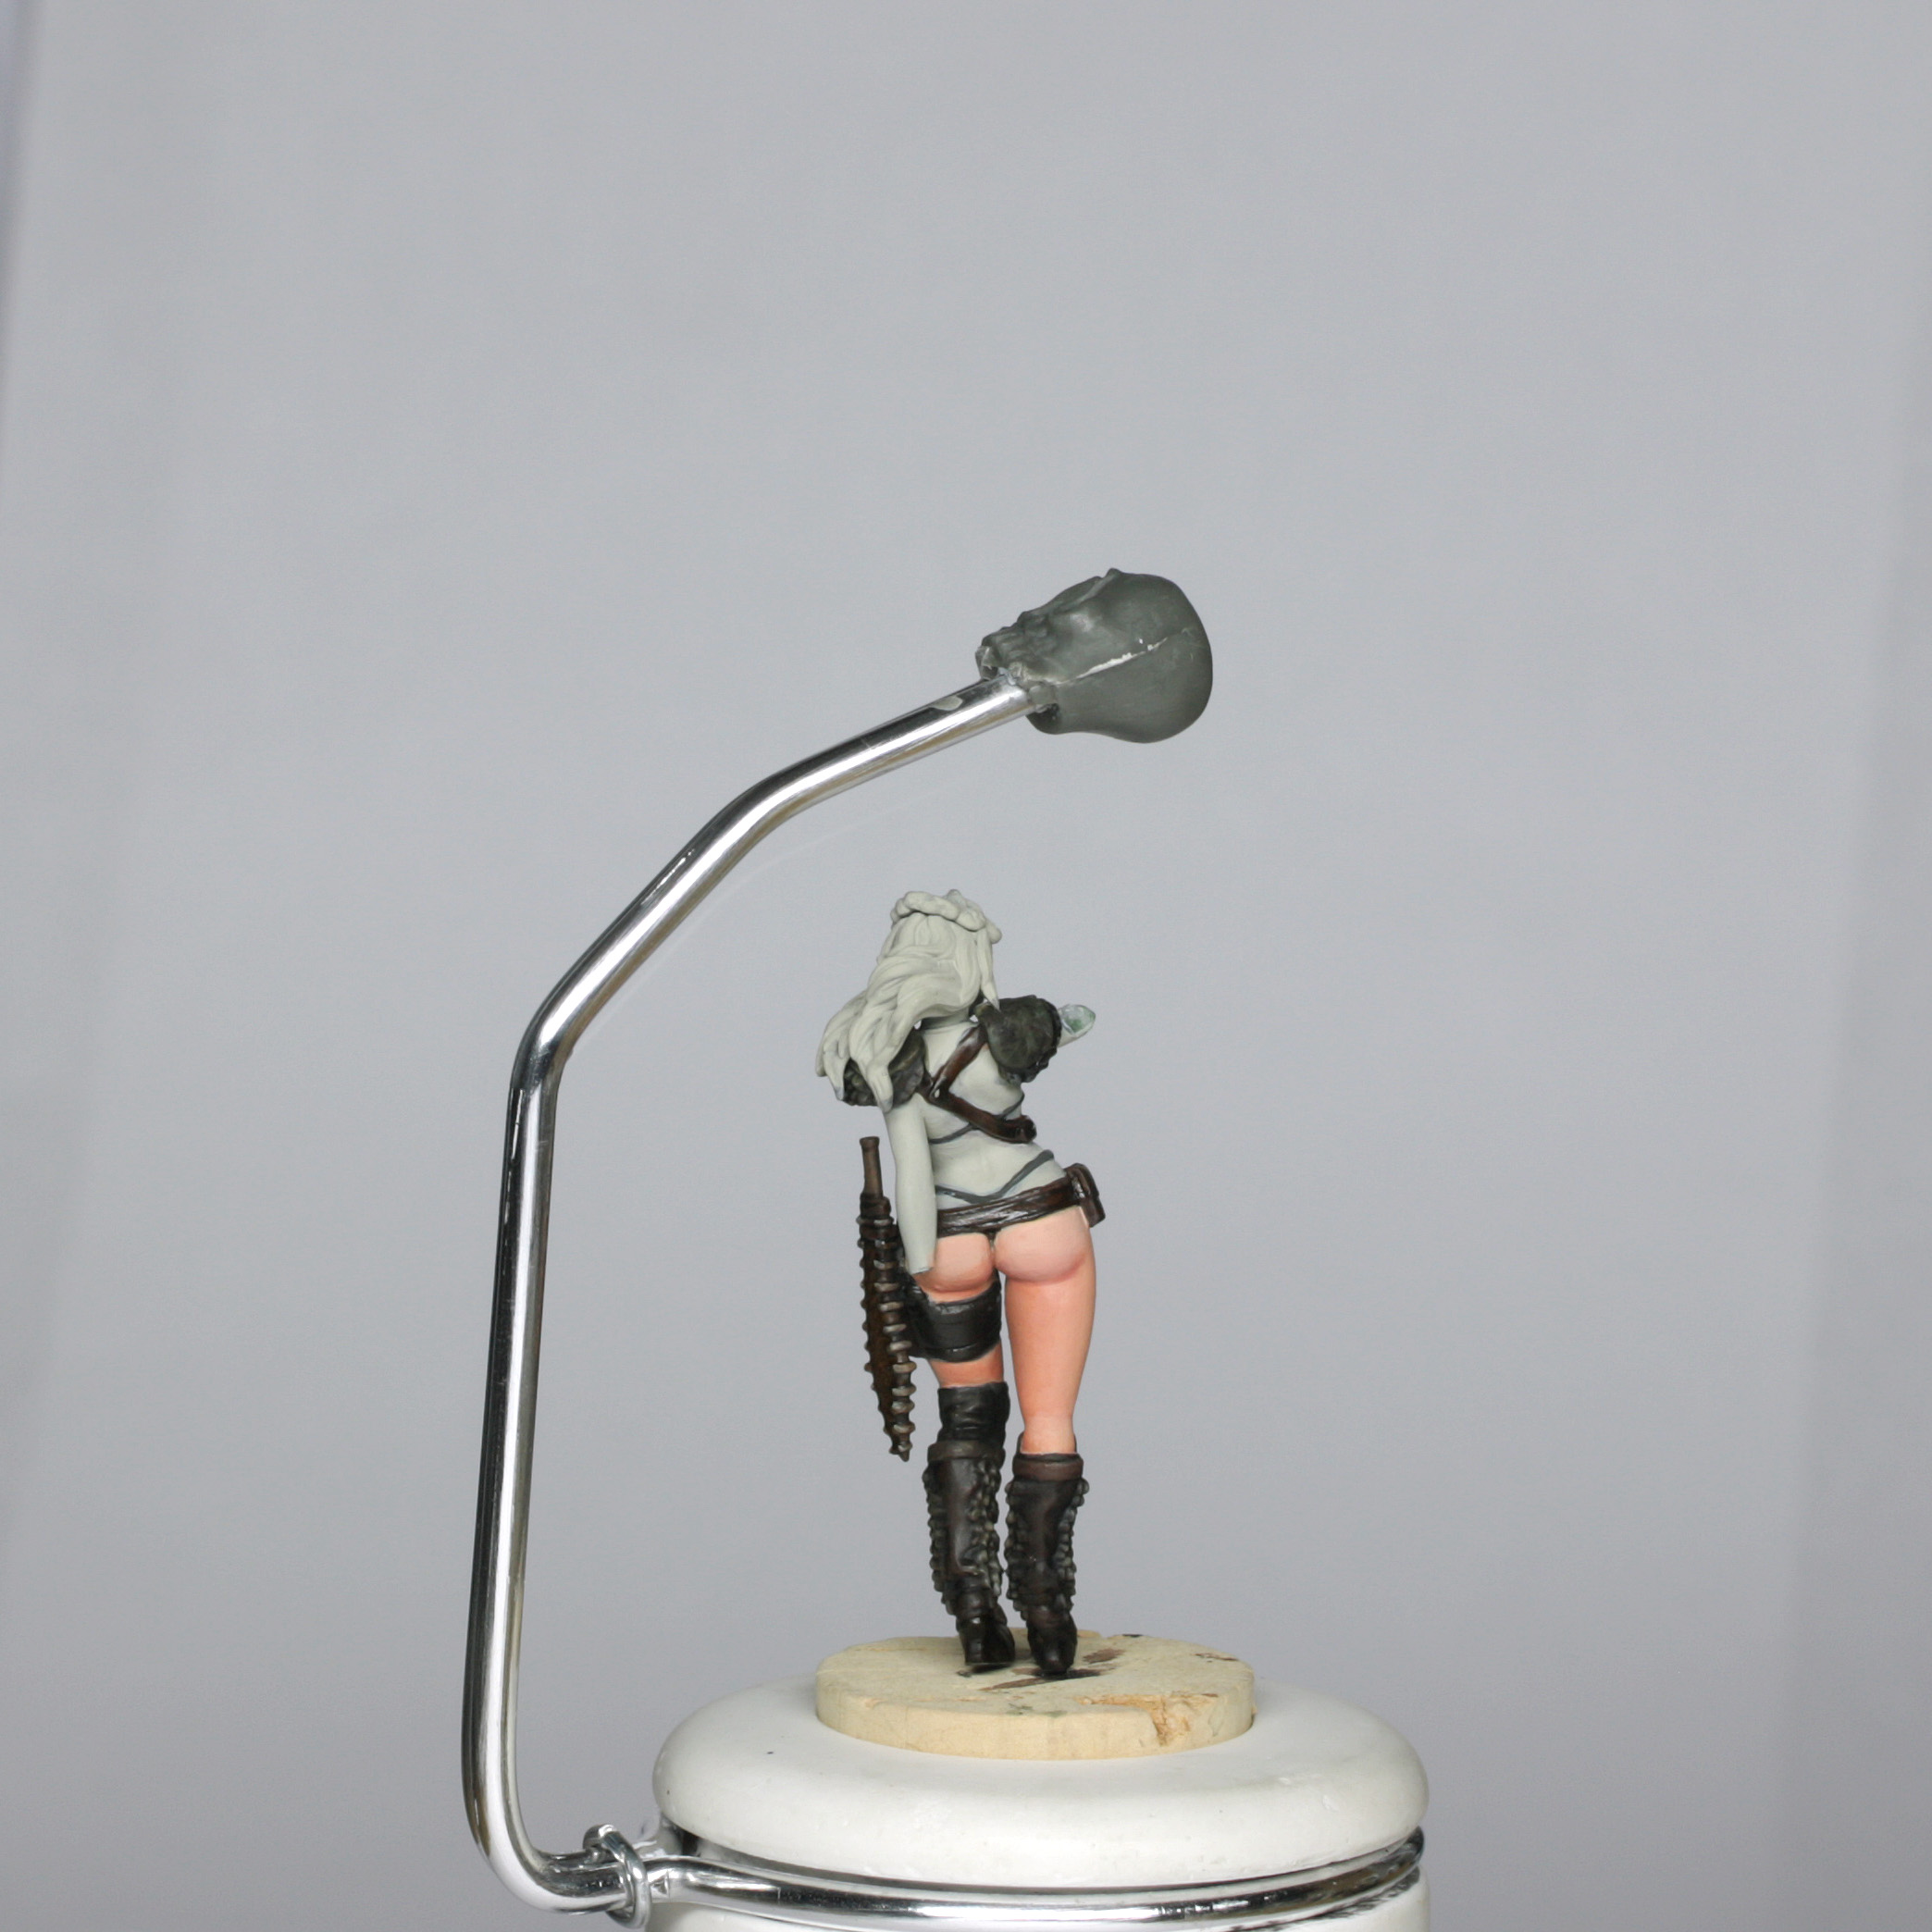
I clipped the model parts off of the sprue and popped them into a little box (see previous guides about losing bits!!). Each part was then trimmed with a knife to remove mould lines, and lightly sanded with some fine sandpaper/manicuring board. The model was assembled and glued leaving the spear and half arm unattached to allow access to the back of the model, and the hair was glued on once the shoulder pads were painted. The little lantern was left off until late on because it would definitely have been broken off by my big clumsy mitts during painting!
I airbrushed on a grey primer (just like the previous models), but not any pre-shading or any other additional airbrushing in this case. In theory I could have airbrushed the skin, but I actually wanted to paint the skin later in this case, which is more my usual way of working.
Colour Scheme
We are working to the concept art again for the Survivor. She has a pinkish pale skin tone with ginger hair – and lovely green contrasting eyes! Other than that there isn’t much more colour to her, as the leather is very dark on the whole. The mask is dark too, but there are some interesting colours which I wanted to make a little feature of later on.
Painting Preface
I will mention GLAZING a lot throughout the article. Generally my glazes are around 1 part paint to about 4 or 5 parts water, and often with a drop of glaze medium to keep the blends smooth. Stronger colours are generally MORE dilute in glazing, weaker colours LESS dilute. You can read more about glazes in the Architect guide.
I also mention SPRAYING with my airbrush. You will have your own feel for dilution of paint if you have an airbrush, but I tend to work around 1 part colour to 2 parts water and 2 parts thinner. Just like normal brushing, it is always better to have 2 or 3 thin coats to cover nicely than 1 thick coat, and you are less likely to clog your airbrush!
If you don’t have an airbrush, just brush on as usual. The airbrush just helps to speed up some of the less enjoyable base coating…
Priming the models
This was done using an airbrush in grey as done with previous models. If you don’t have an airbrush, Tamiya fine grey spray would be what I recommend. Sometimes this can be a little too smooth though, so if that happens I use some matt medium or varnish and quickly apply a wash to the whole model once the primer is dry.
Painting the Base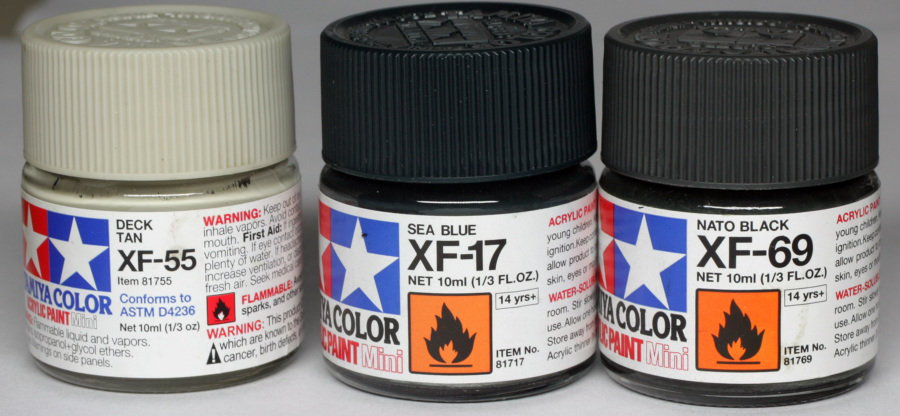
The base was painted in exactly the same fashion as the previous models, with a point of light slightly in front of her feet. The lightest point was sprayed with deck tan, shading done by successive thinned sprays of sea blue and then Nato black around the edges. The outer rim was just painted in black.
Painting the Leather
The colours used for the green leather are shown below…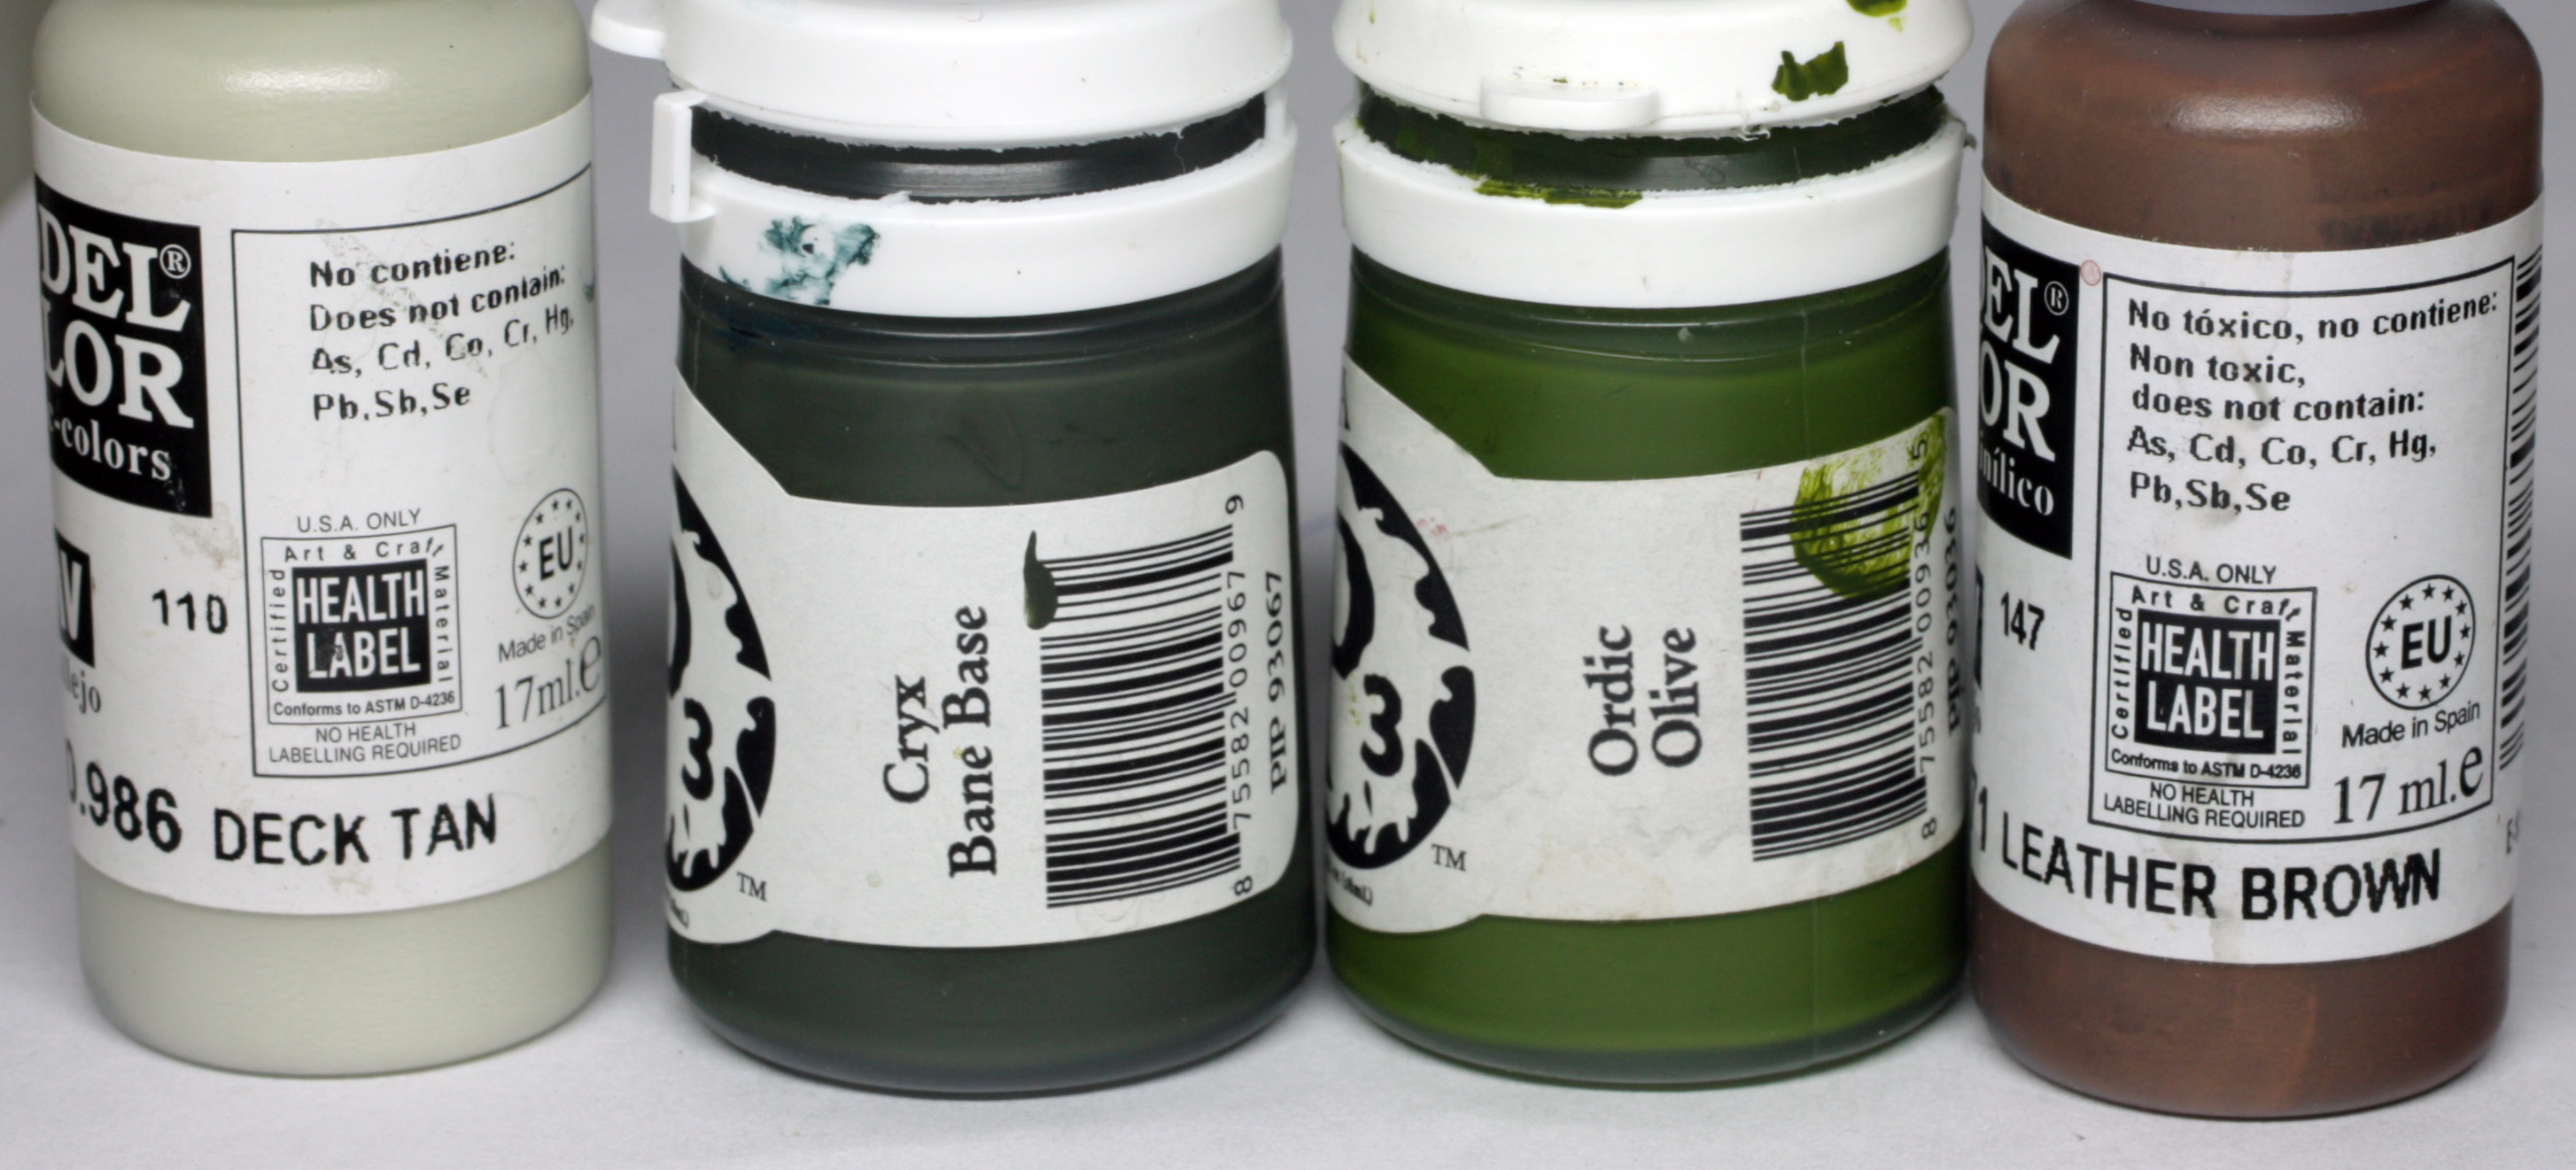
The colours for the brown leathers are as shown…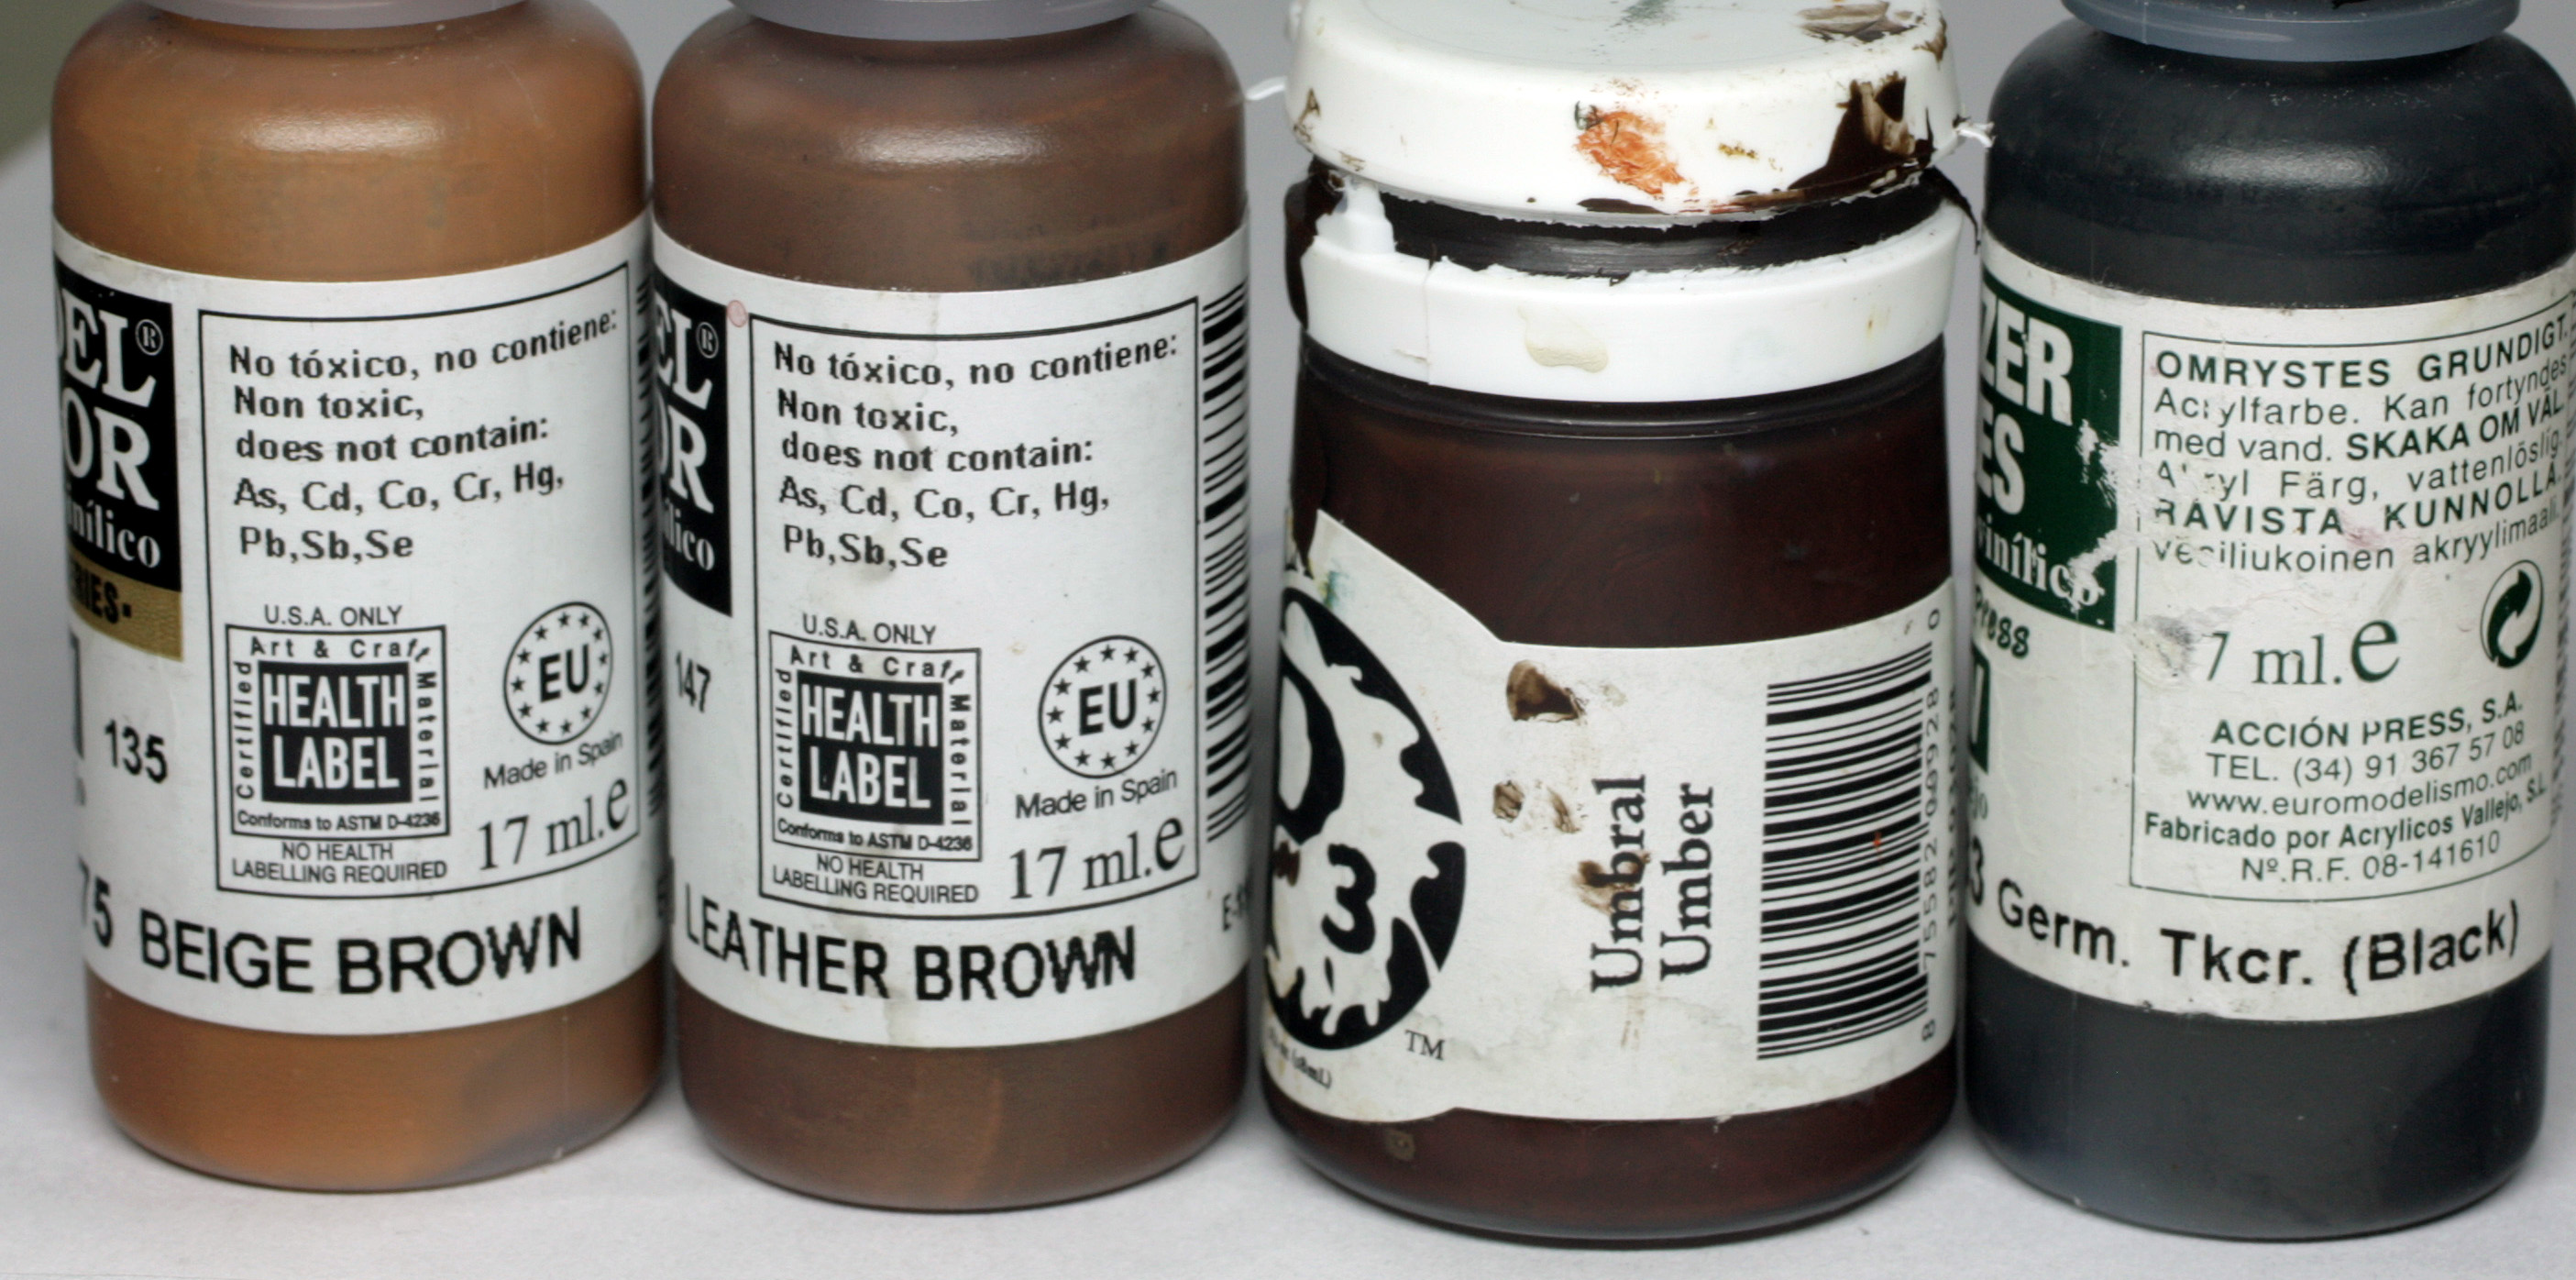
Further, there were some additional details added to the leather. I used a mixture of colours for stippling…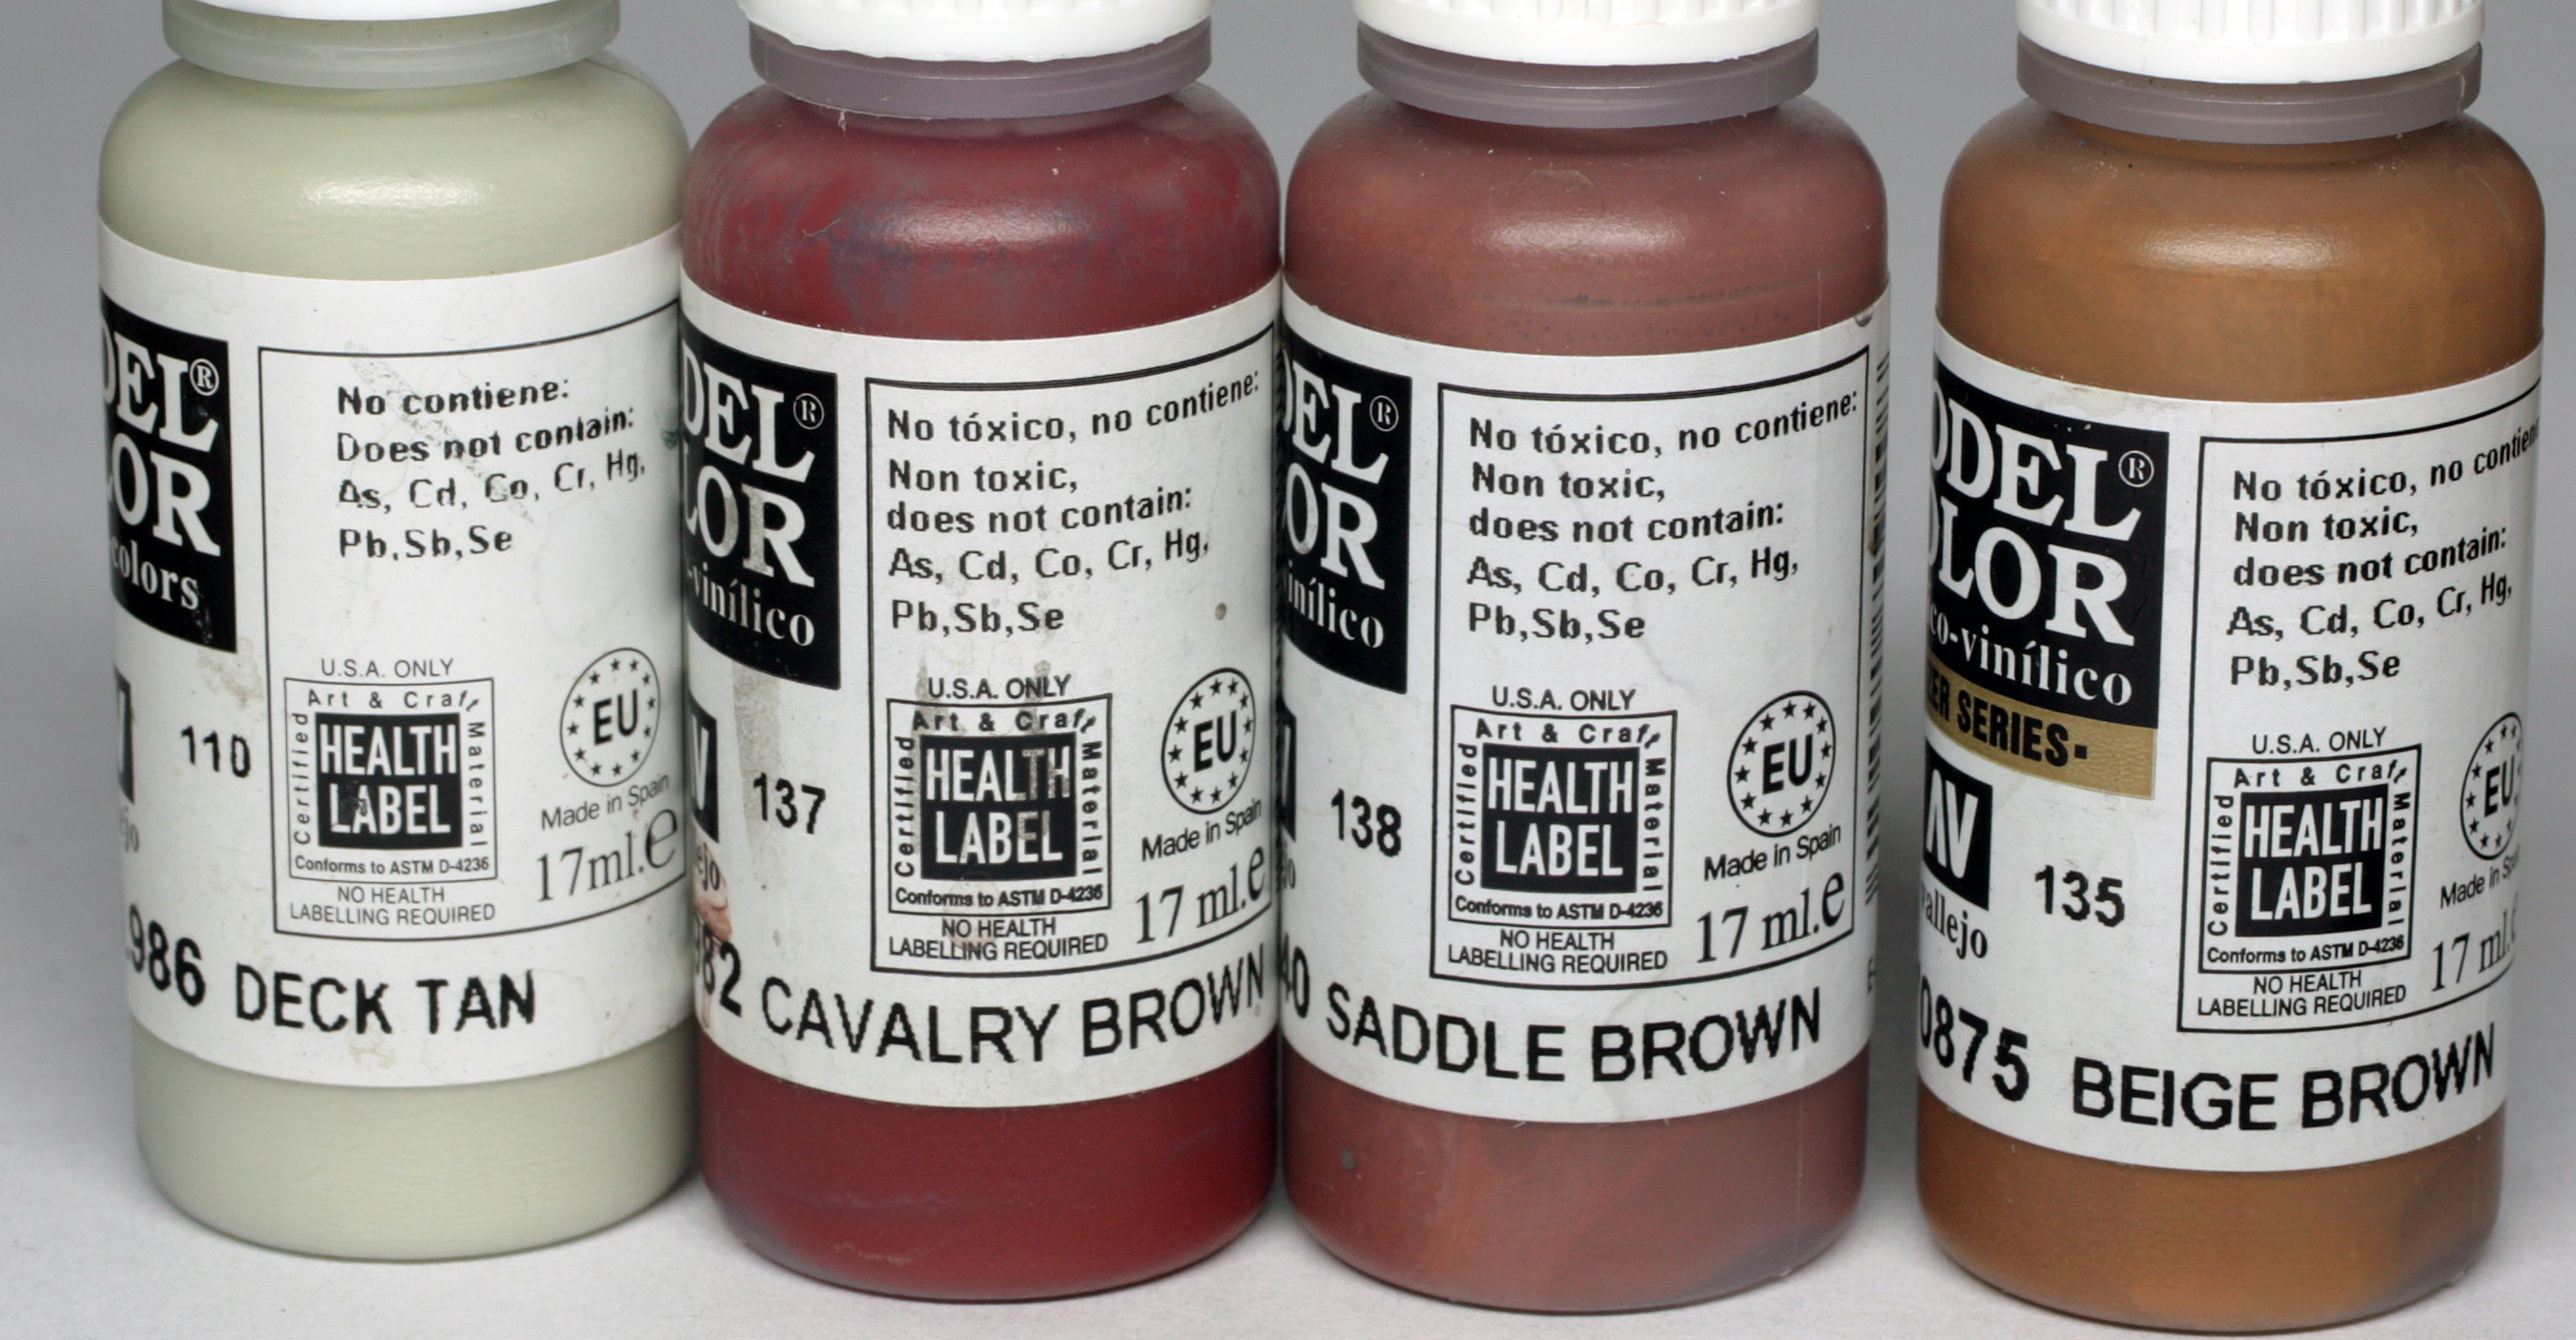
And then I universally shaded and toned the leathers with the following…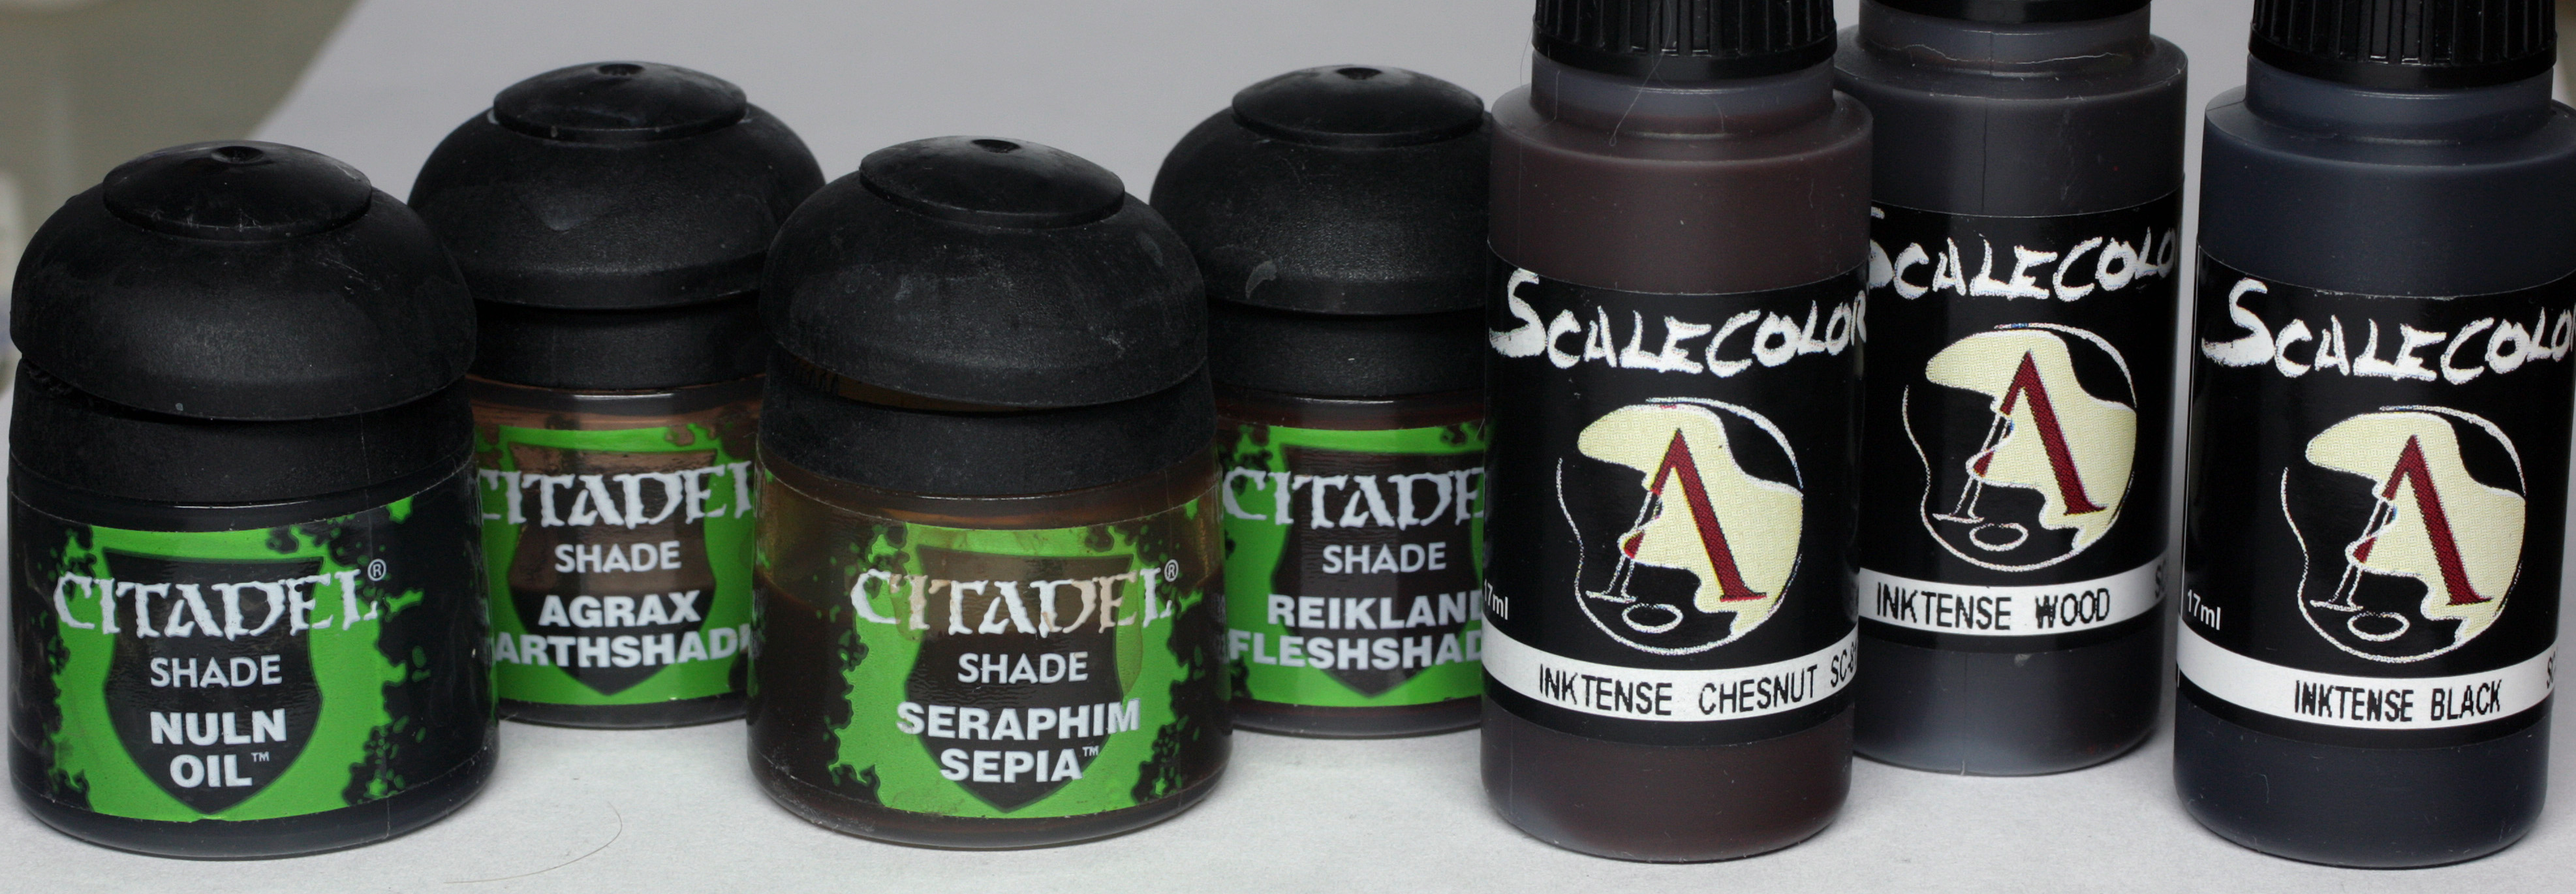
Looking a little more closely at the art for the survivor, you can see that her garments and accessories are made up from a patchwork of different leathers/cloths. So I decided to do about 5 different tones of brown and green.
The green leather – seen on her left boot and shoulder pads – was base coloured in a mix of Ordic Olive, Cryx Bane Base and a little leather brown. I highlighted the boot by adding first more olive to the mix, then some deck tan.
The shoulders were highlighted by adding a mix of cryx bane and deck tan to the original base colour.
The brown leather straps were base coloured in VMC Beige brown mixed with VMC Saddle brown. I highlighted this with pure beige brown. The same was done with the stitching to the knife scabbard.
The bikini, the thigh guard and forearm guard were base coloured in Umbral Umber mixed with VMC Panzer Aces Tank Crew Black. This was highlighted by adding leather brown and deck tan and then glazing in accordingly.
The pole of the weapon was also painted in leather brown mixed with some VMC tank crew black as a base colour, then highlighted with some fine lines of leather brown and then some leather brown mixed with beige brown.
The brown leather of the right boot and glove was a starting mix of leather brown with a little Umbral umber. Highlighting was done with leather brown and then a little deck tan.
With all of the base colours and highlights in place, I wanted to make the leather a little more interesting where possible. So, with this in mind, I set about getting some texture into the leather…
First thing that I did was some stippling. I used each of the stippling colours sparingly on each of the areas. I used an old small brush that had lost its fine point, and diluted the paint about 1/1 with water before blotting it. I didn’t sponge the areas because they were too small. Obviously the lighter browns were used more on the brown leathers, but the green leathers also got a little of the lighter browns along with slightly more of the redder browns.
At this point I also added little scratches and a moccasin-like effect to the boots which is on the art, but not the sculpt. This was done using a very fine brush and some diluted deck tan.
Once this was all done it looked much too light and colourful, but that was the intention, as the shading and toning would sort this out. So, I started the shading process.
The green leather was shaded with Agrax Earthshade, Nuln Oil, a little dilute wood ink and some very dilute black ink.
The straps were shaded with sepia wash, Reikland flesh shade, Agrax earthshade, thinned chestnut ink and a little thinned black ink.
The bikini and darker leather were shaded with Agrax, Nuln Oil and some thinned black ink.
The brown leather boot and glove were shaded with Reikland flesh shade, thinned chestnut ink, a little thinned wood ink and a little thinned black ink.
The pole arm was shaded with thin lines of Agrax and Reikland Flesh shade, then toned with thinned wood and chestnut ink together, followed by some Nuln oil.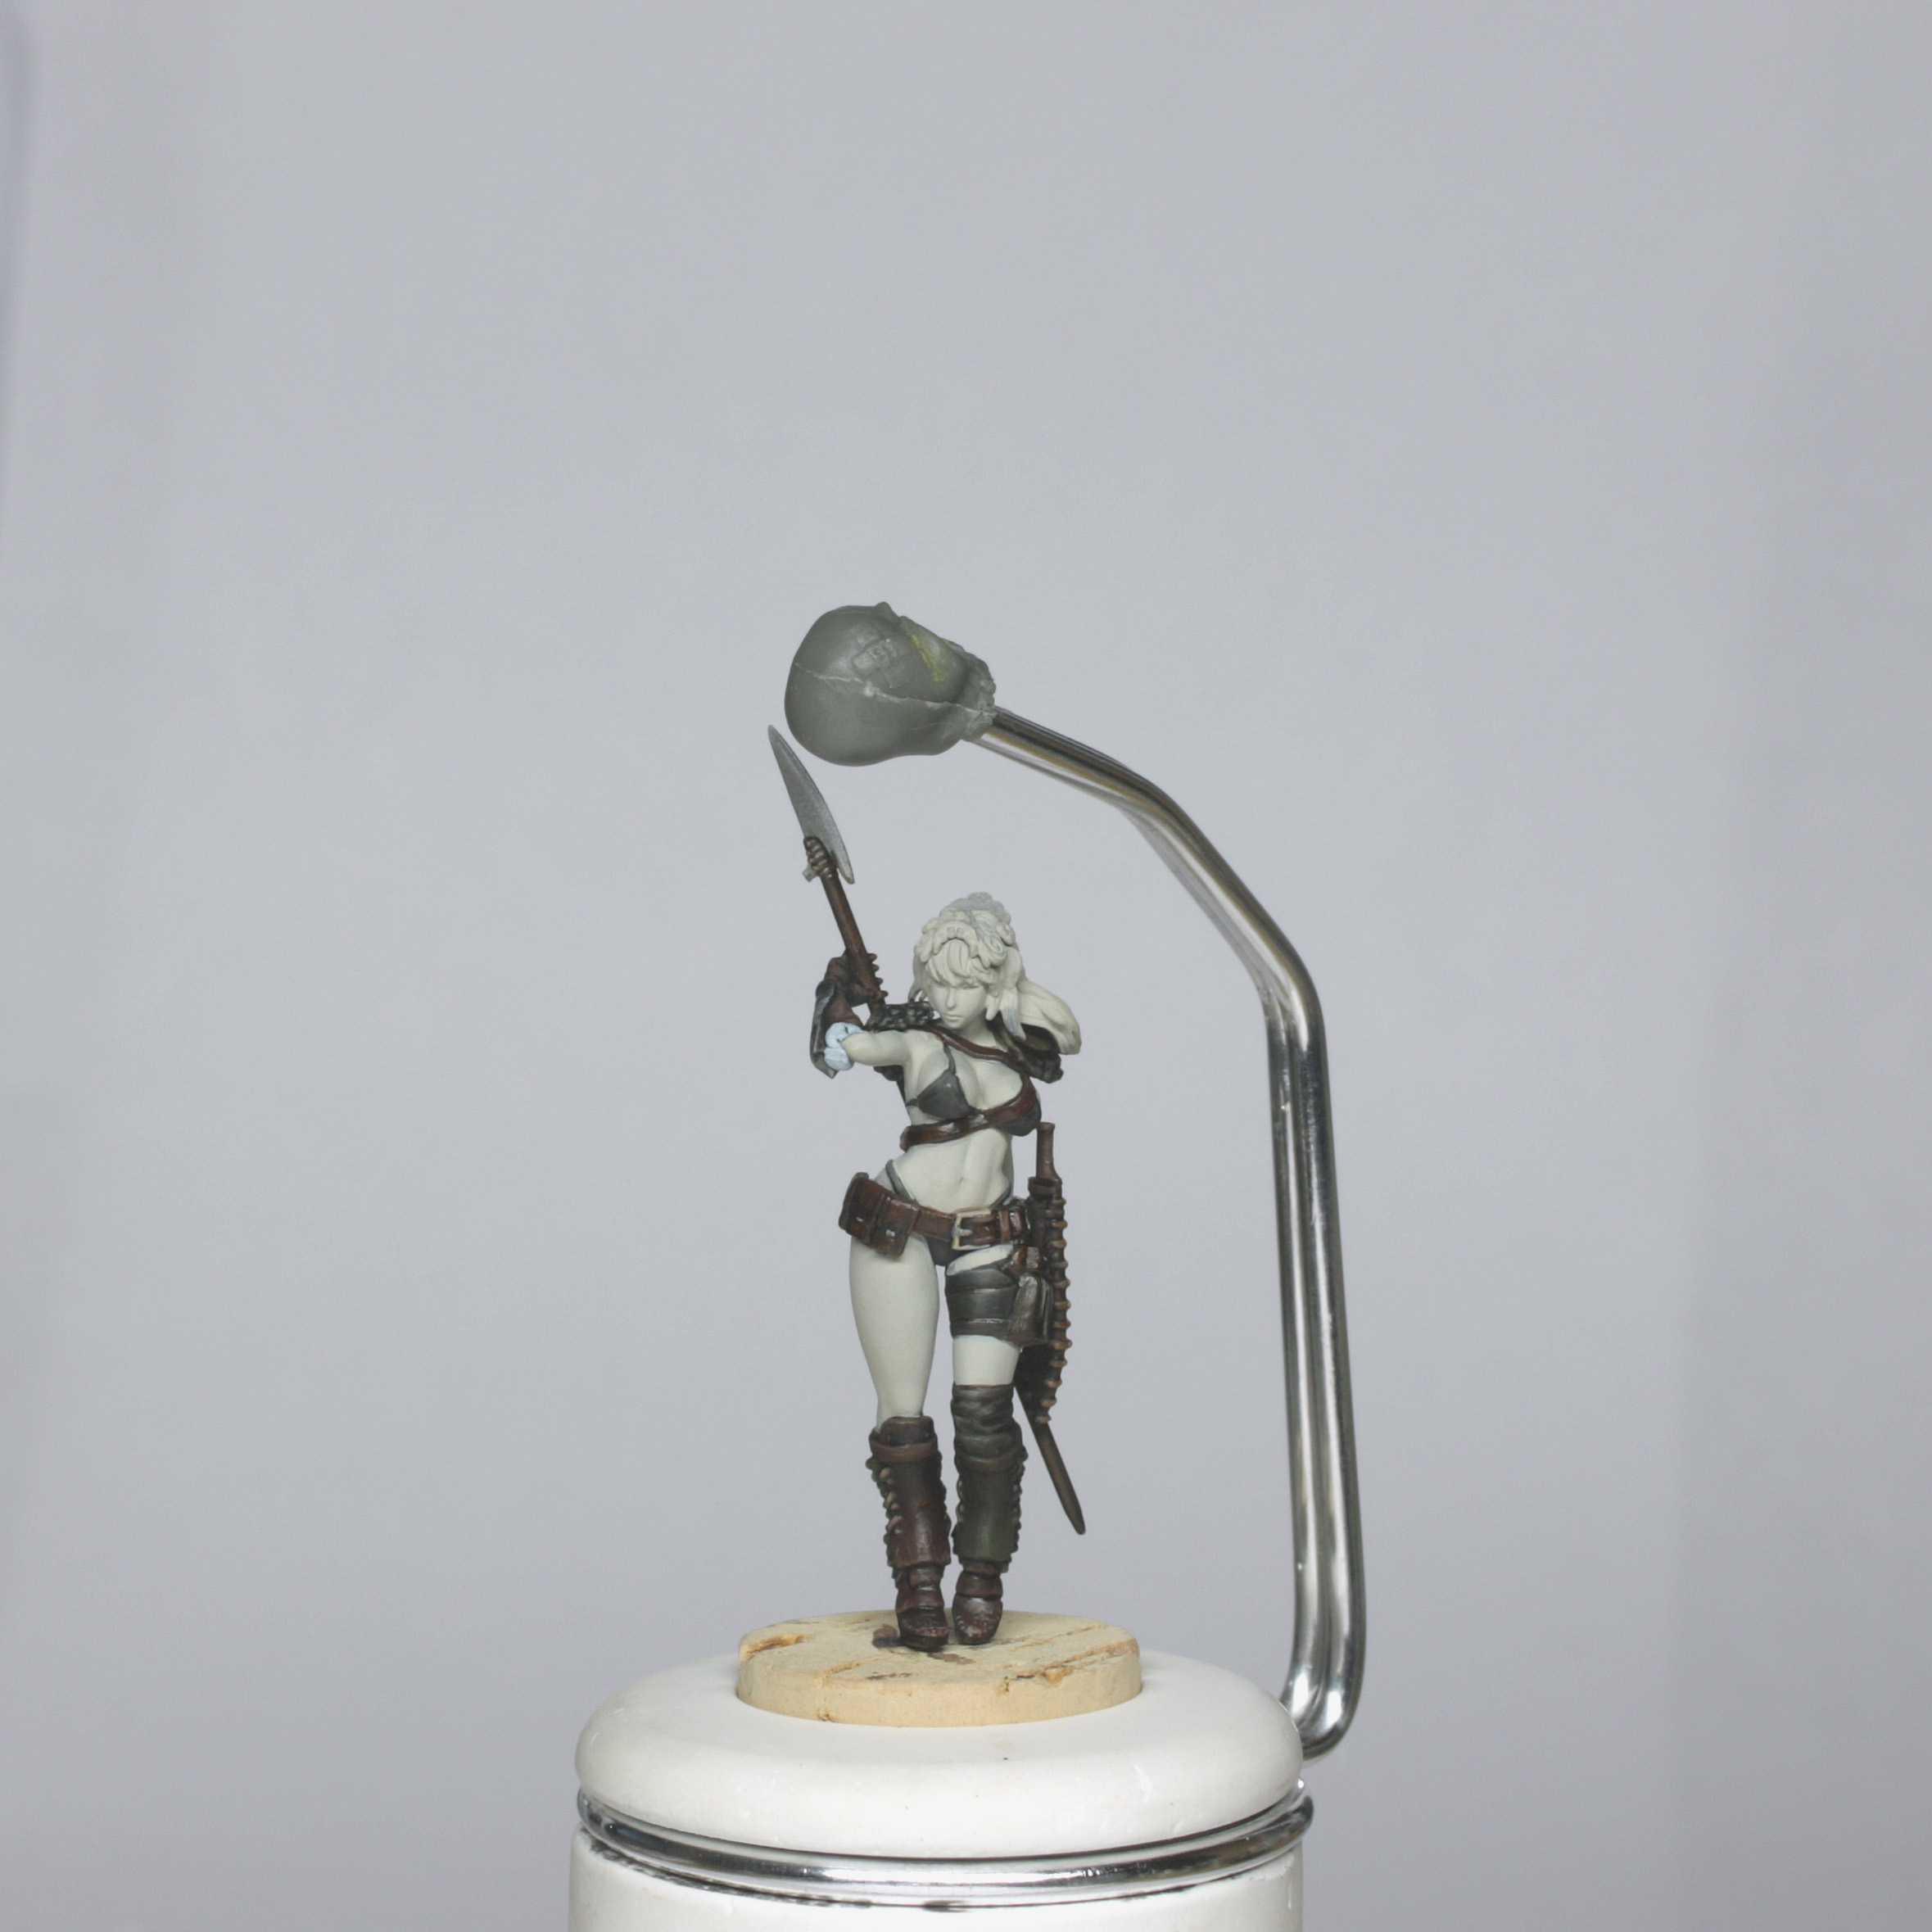
Painting the Skin
The colours used are as follows..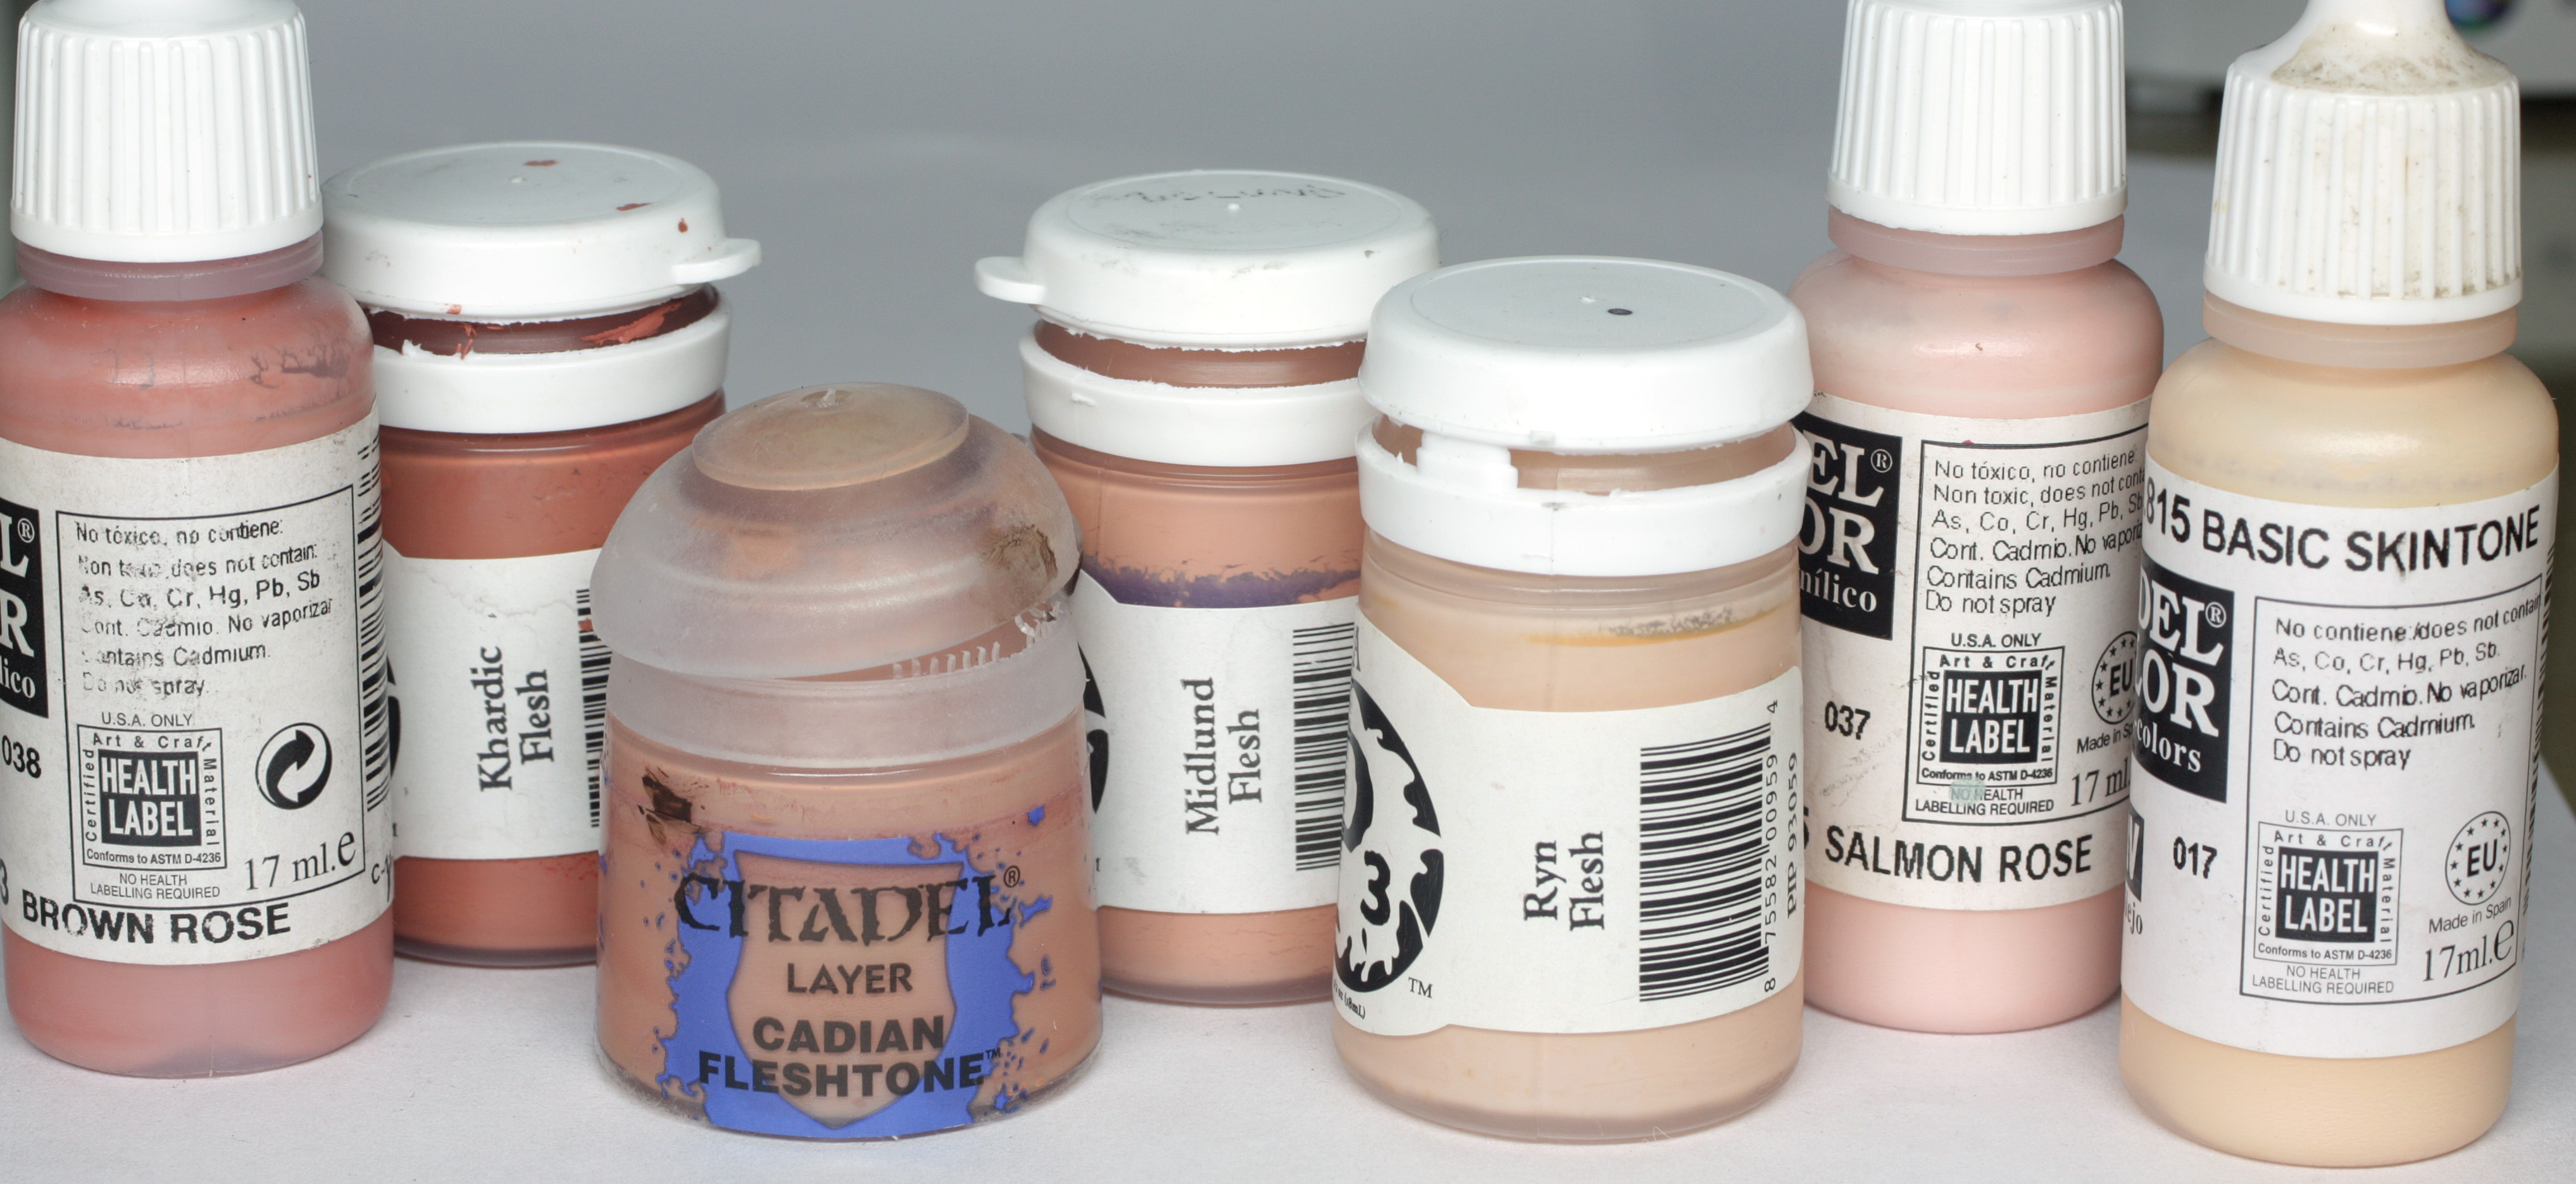
The skin here was done with lots of pink tones. I made up a well palette of each of the colours like I did in the Architect guide. Each well contained approx 1 drop matt medium, 1 drop glaze medium, 2 drops paint and 4 or 5 drops water. The matt medium and glaze medium additives help me when I am painting in this method as they get a little more “grip” to the model and help me make sure that I get fewer tide marks when I’m layering, glazing and blending.
The initial base colour was a mix of the Cadian Flesh, Midlund Flesh and Ryn flesh. I painted the legs first, and established the base colour in 2 or 3 thin coats. Once established I shaded with glazes of Midlund, Cadian and Khardic Flesh, building the shading under the buttocks, inner thighs and around the knees. A little VMC Brown Rose was also shaded in as a kind of “in between” tone where I felt that the Khardic had gone a little too dark.
Highlighting was done with glazes of Ryn flesh, then some Salmon Rose and Basic Skintone. The last two were used very sparingly on the legs, concentrating just on the front of her right thigh and top of her knee.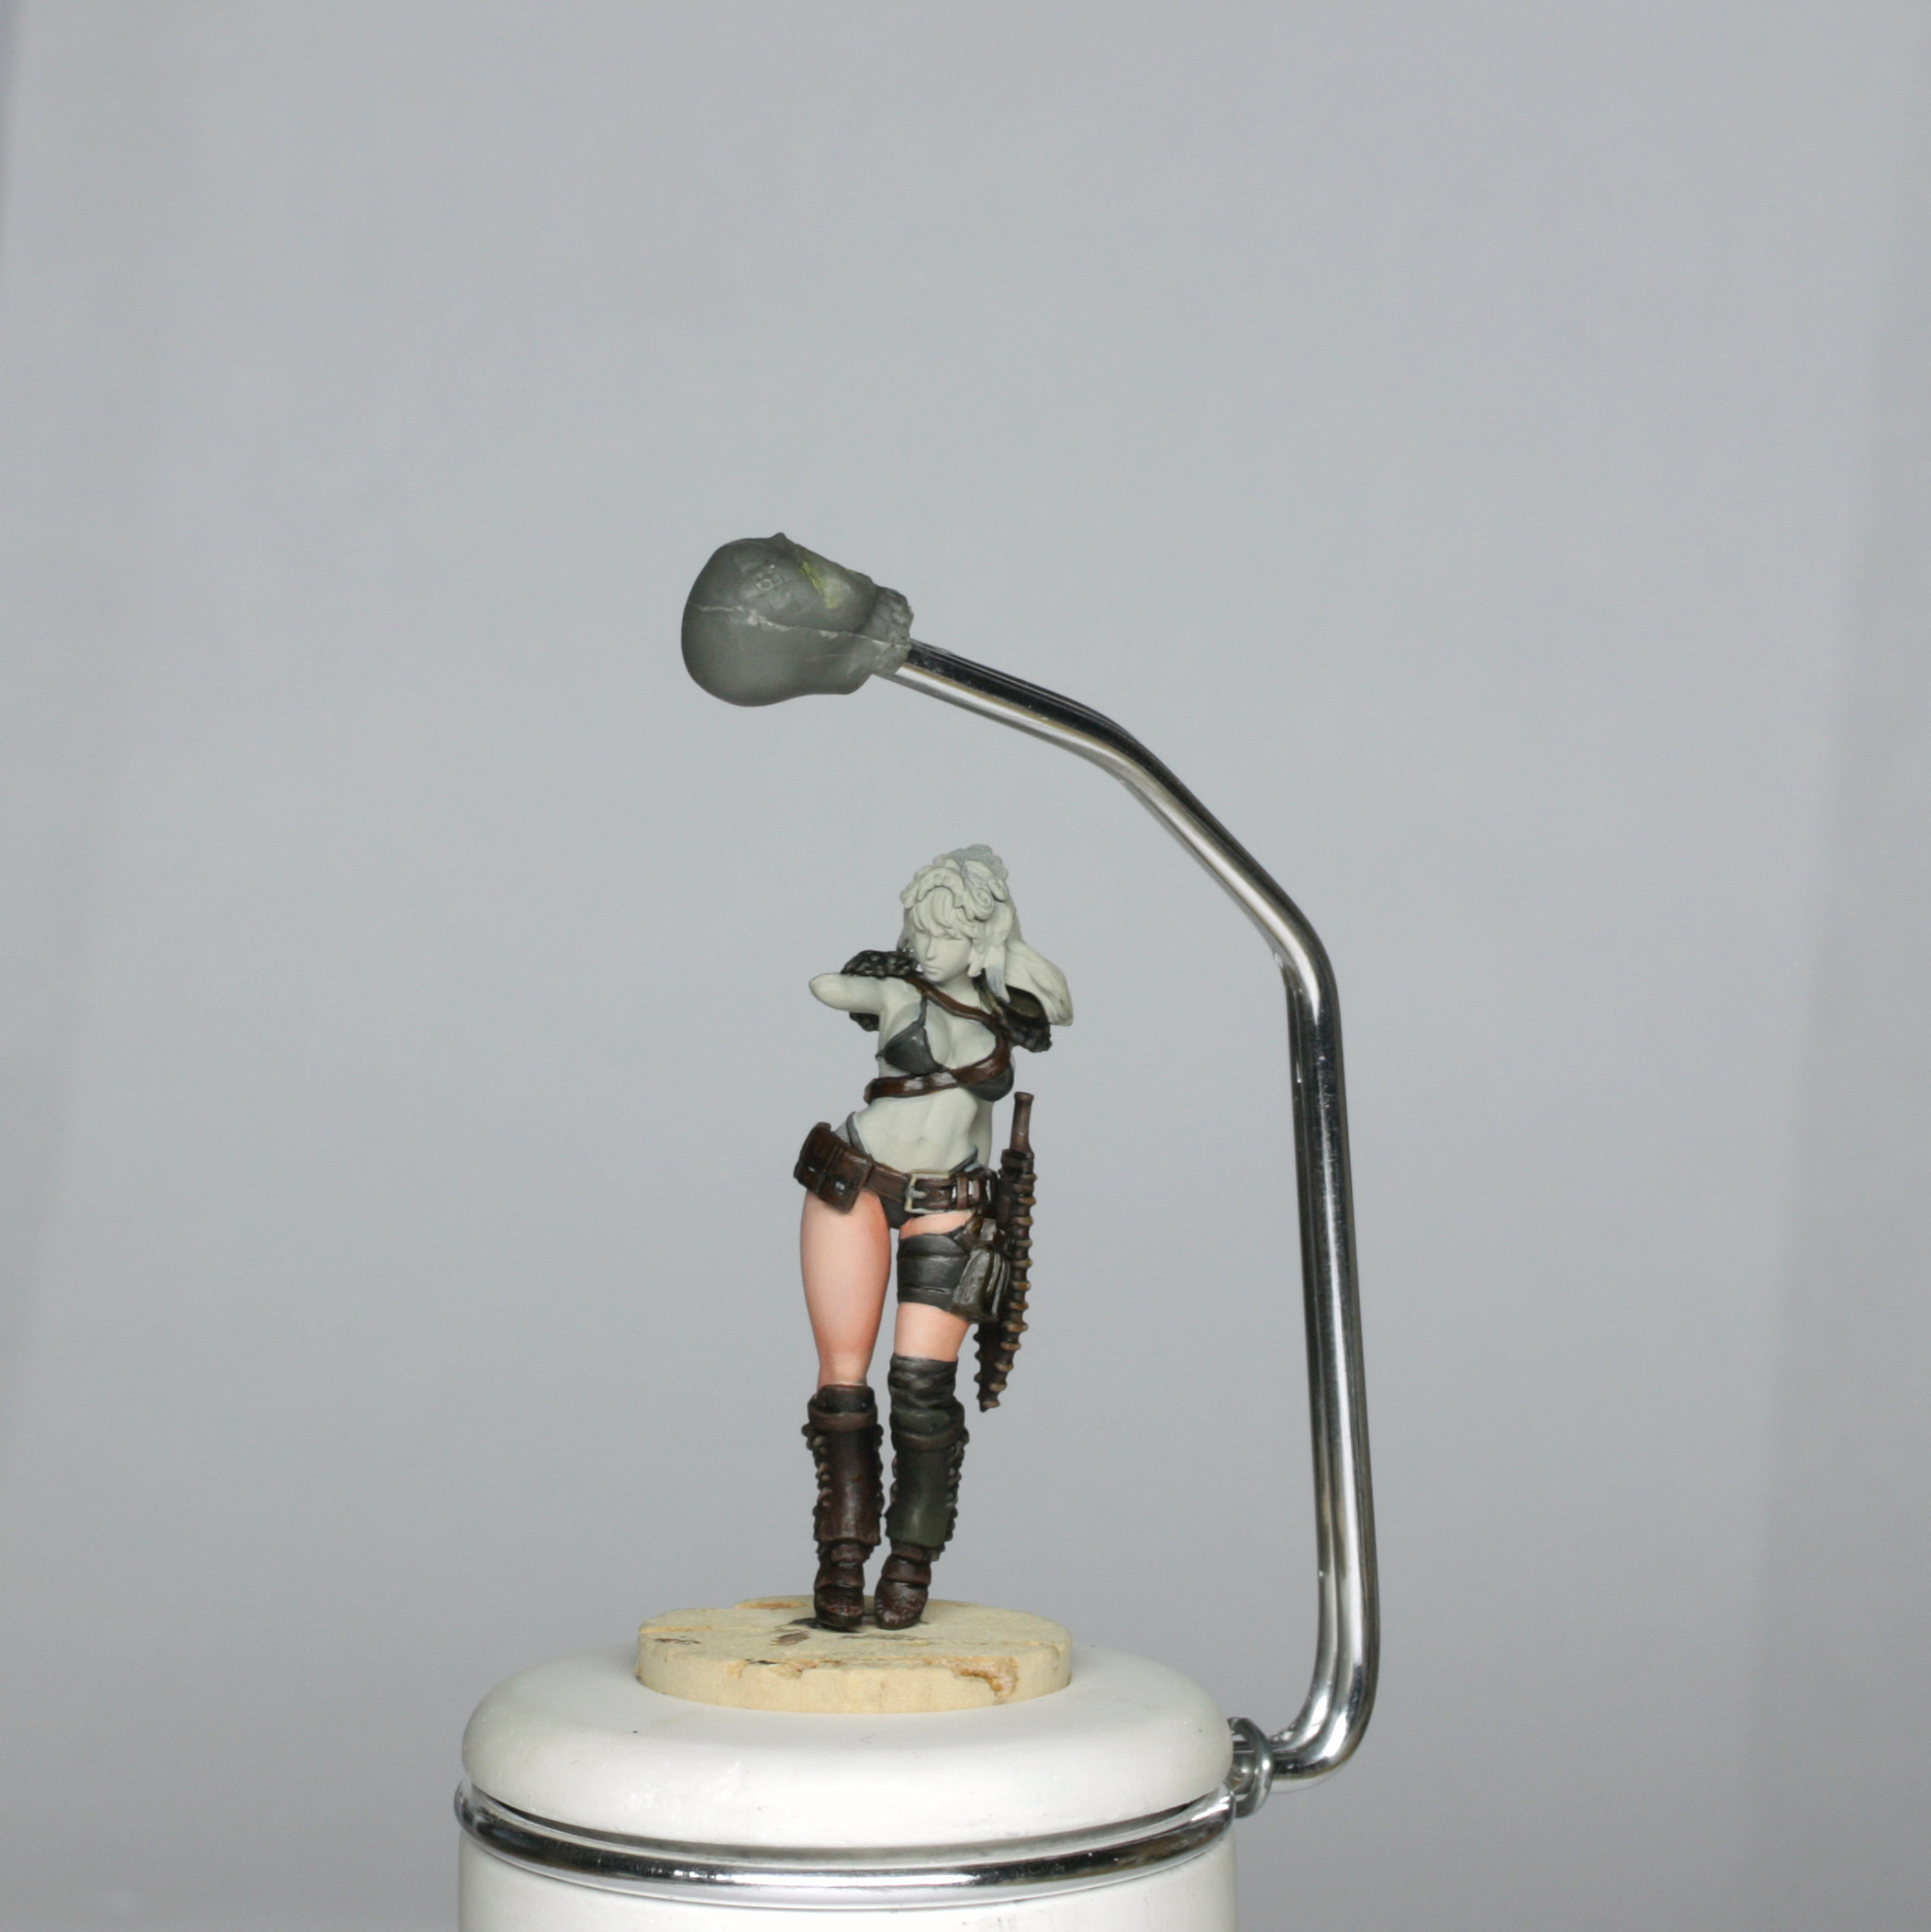
Once I had tweaked the blends around a little, I was happy with the colour in general, so I worked on the top half.
I applied the same principles as the legs, but aside from the cleavage and mid-back the shading was less emphasised and the highlighting more emphasised, with concentration on the stomach and boobs.
I really like the face on this model, as the sculpt is particularly “open”, so I could access the eyes and rest of the face easily. I painted the eyes in first using the following colours…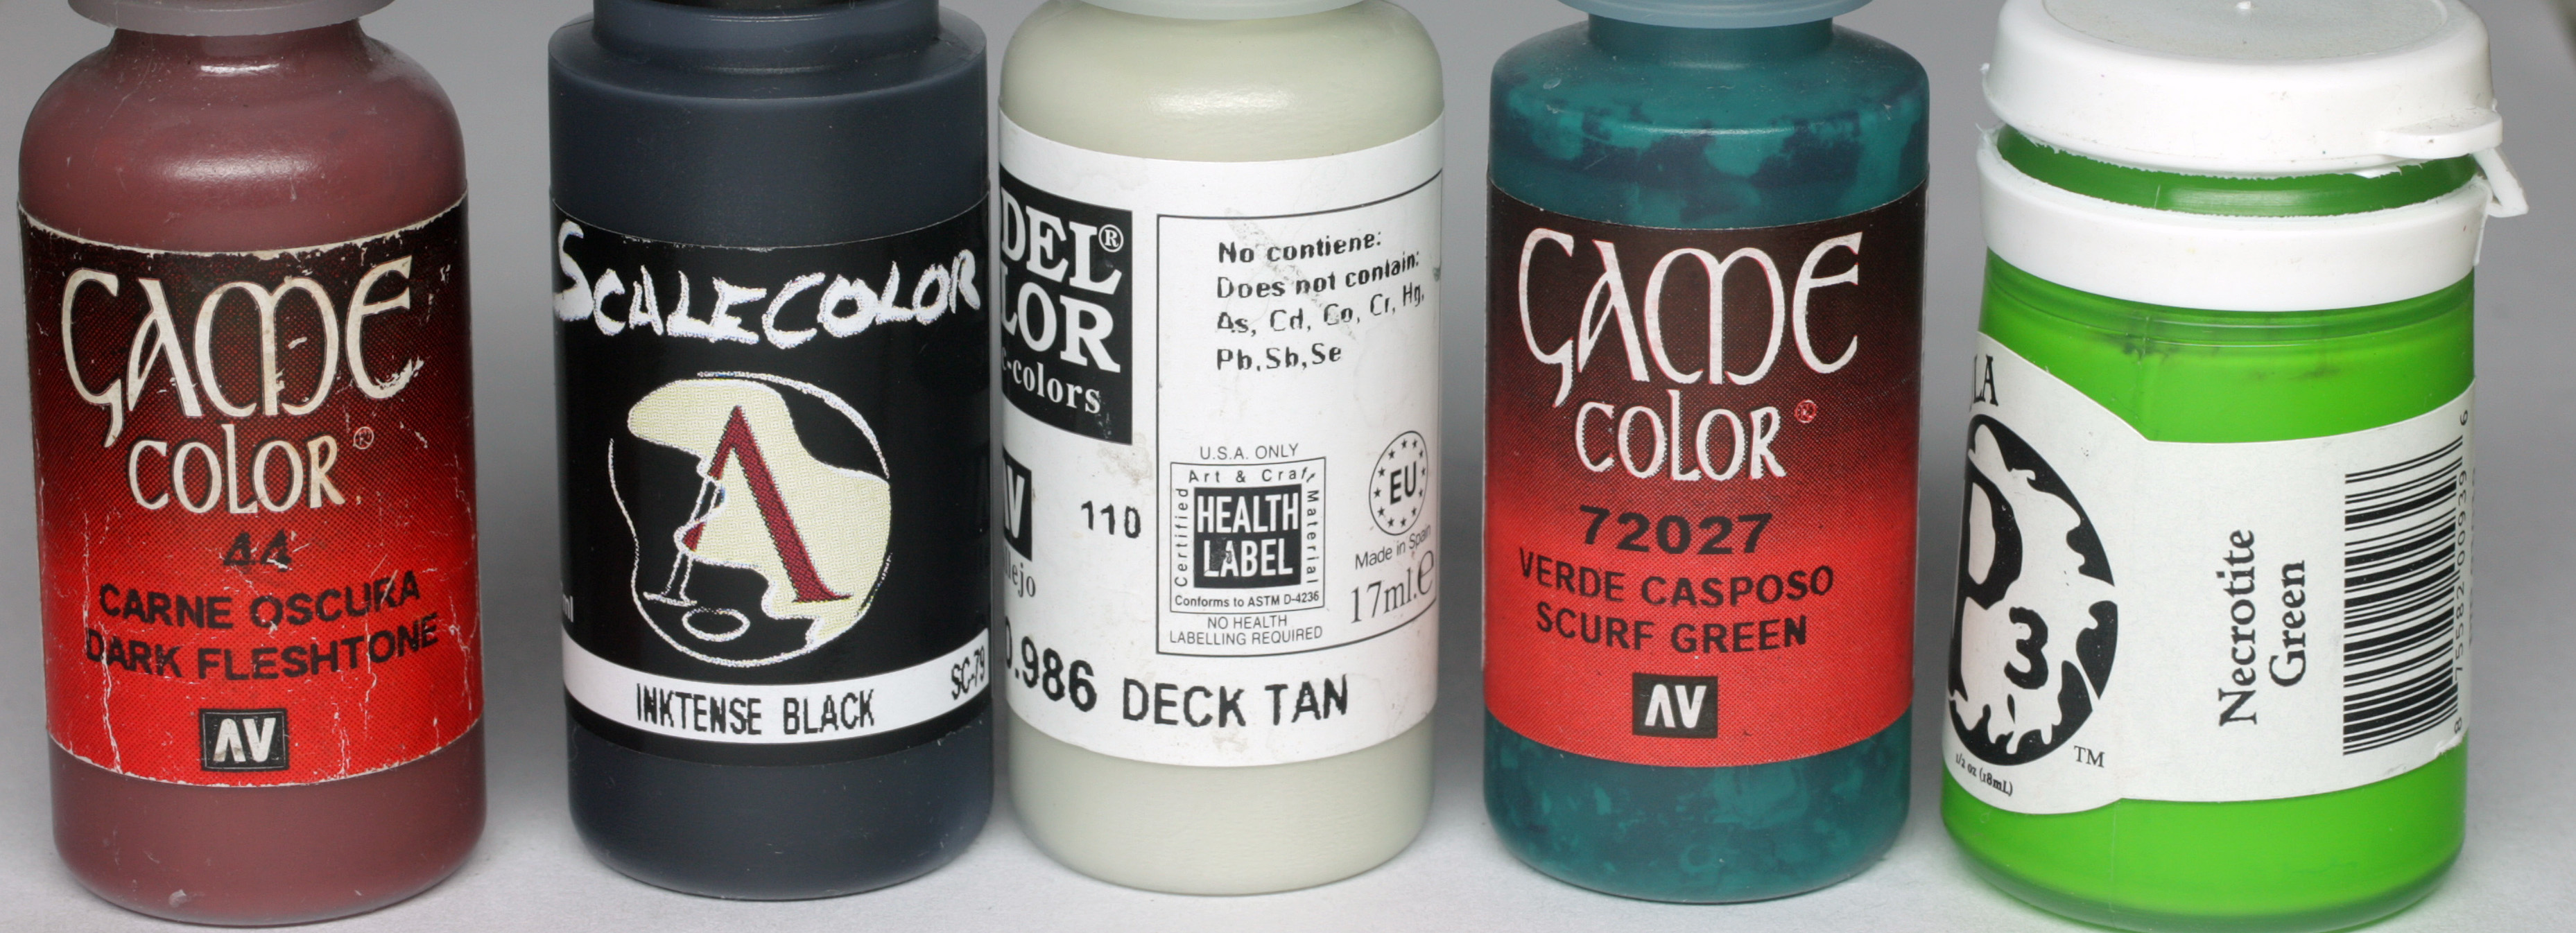
The whites of the eyes were painted in with deck tan and then I picked out the bottom lid with some thinned VGC dark fleshtone. The top lid/eye liner were painted in carefully with some thinned black ink mixed with a little dark fleshtone.
The green of the eyes was dotted in first with some VGC Scurf green mixed with a little black ink, then a smaller dot of pure scurf green, a bottom highlight of thinned Necrotite green and a dot of light using deck tan with a touch of Necrotite green. The iris was then dotted in with black ink.
The face was then painted with the skin colours and a couple of freckles were added to the cheeks using thinned Khardic flesh dotted on.
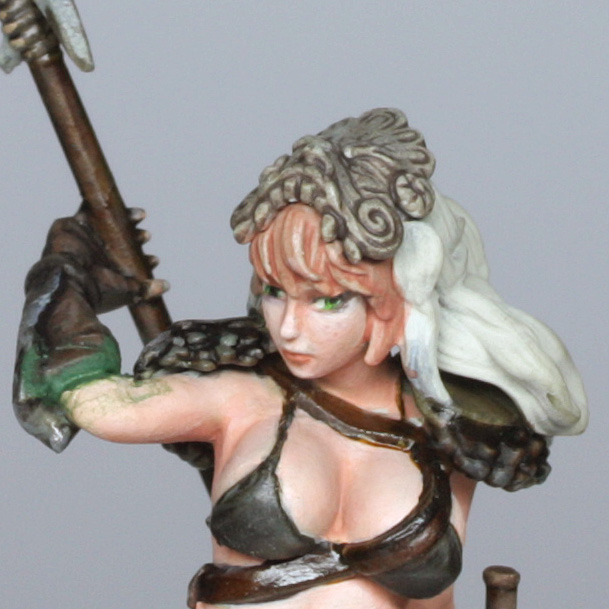
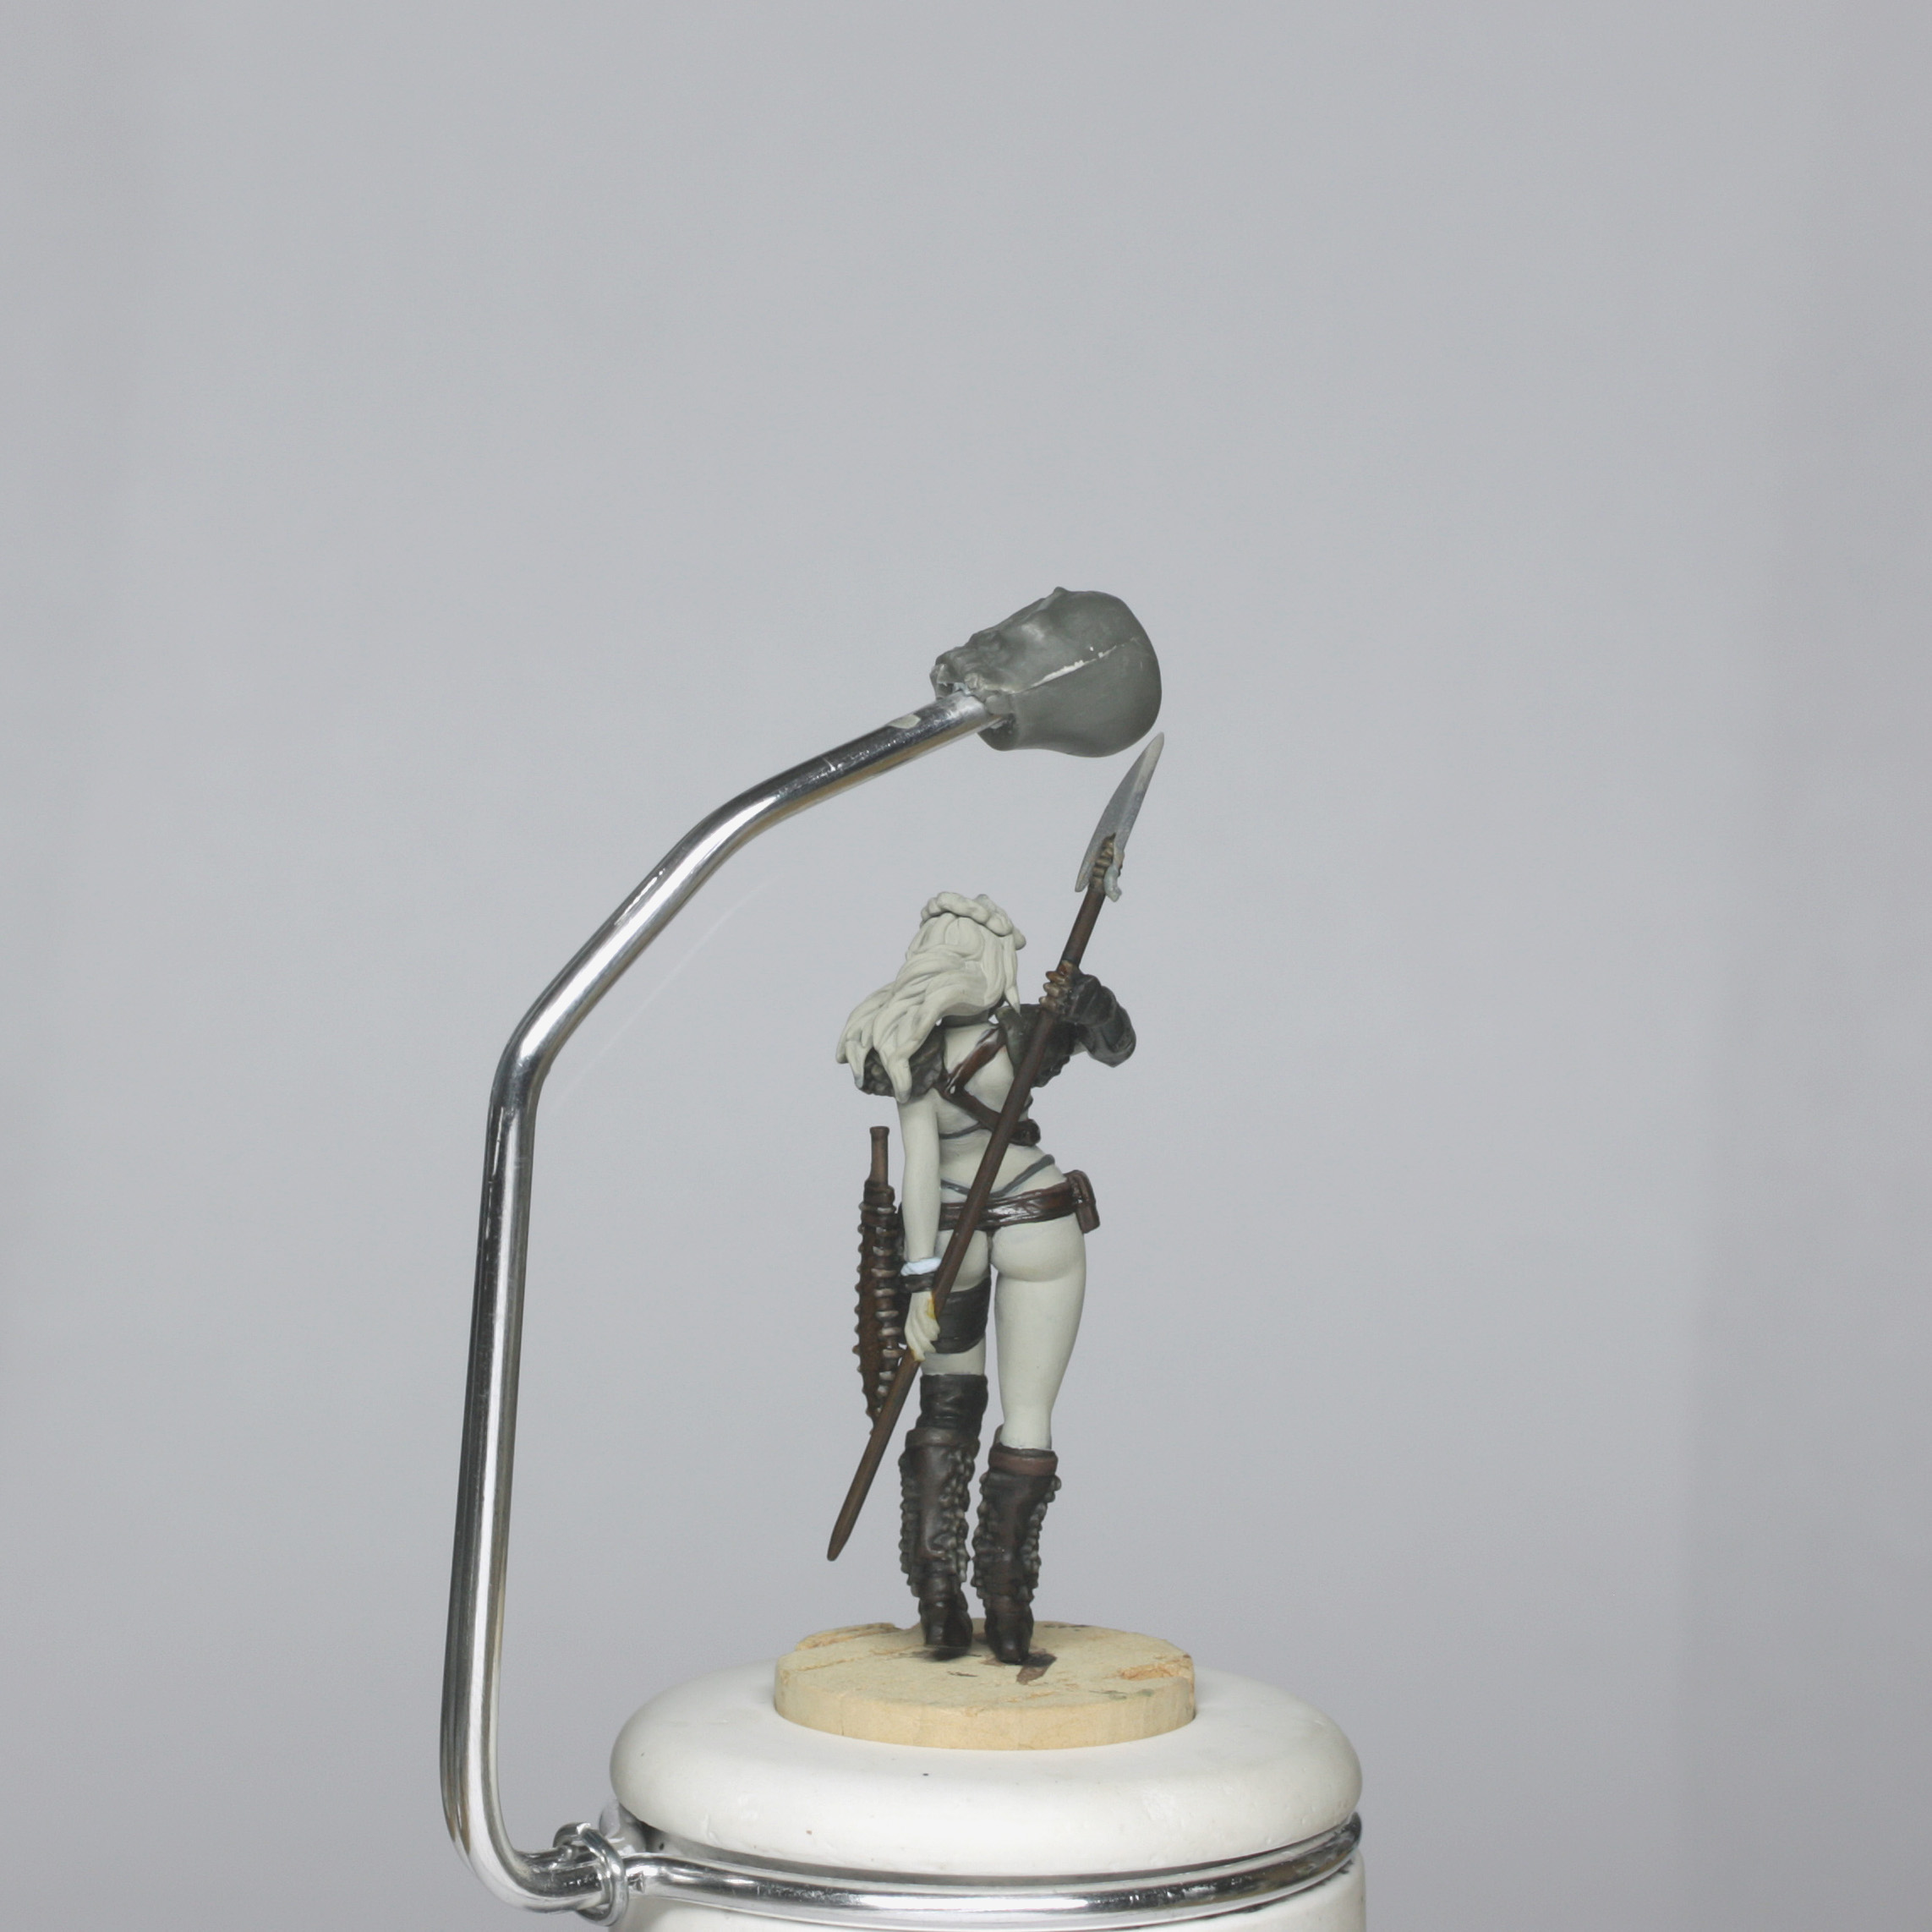
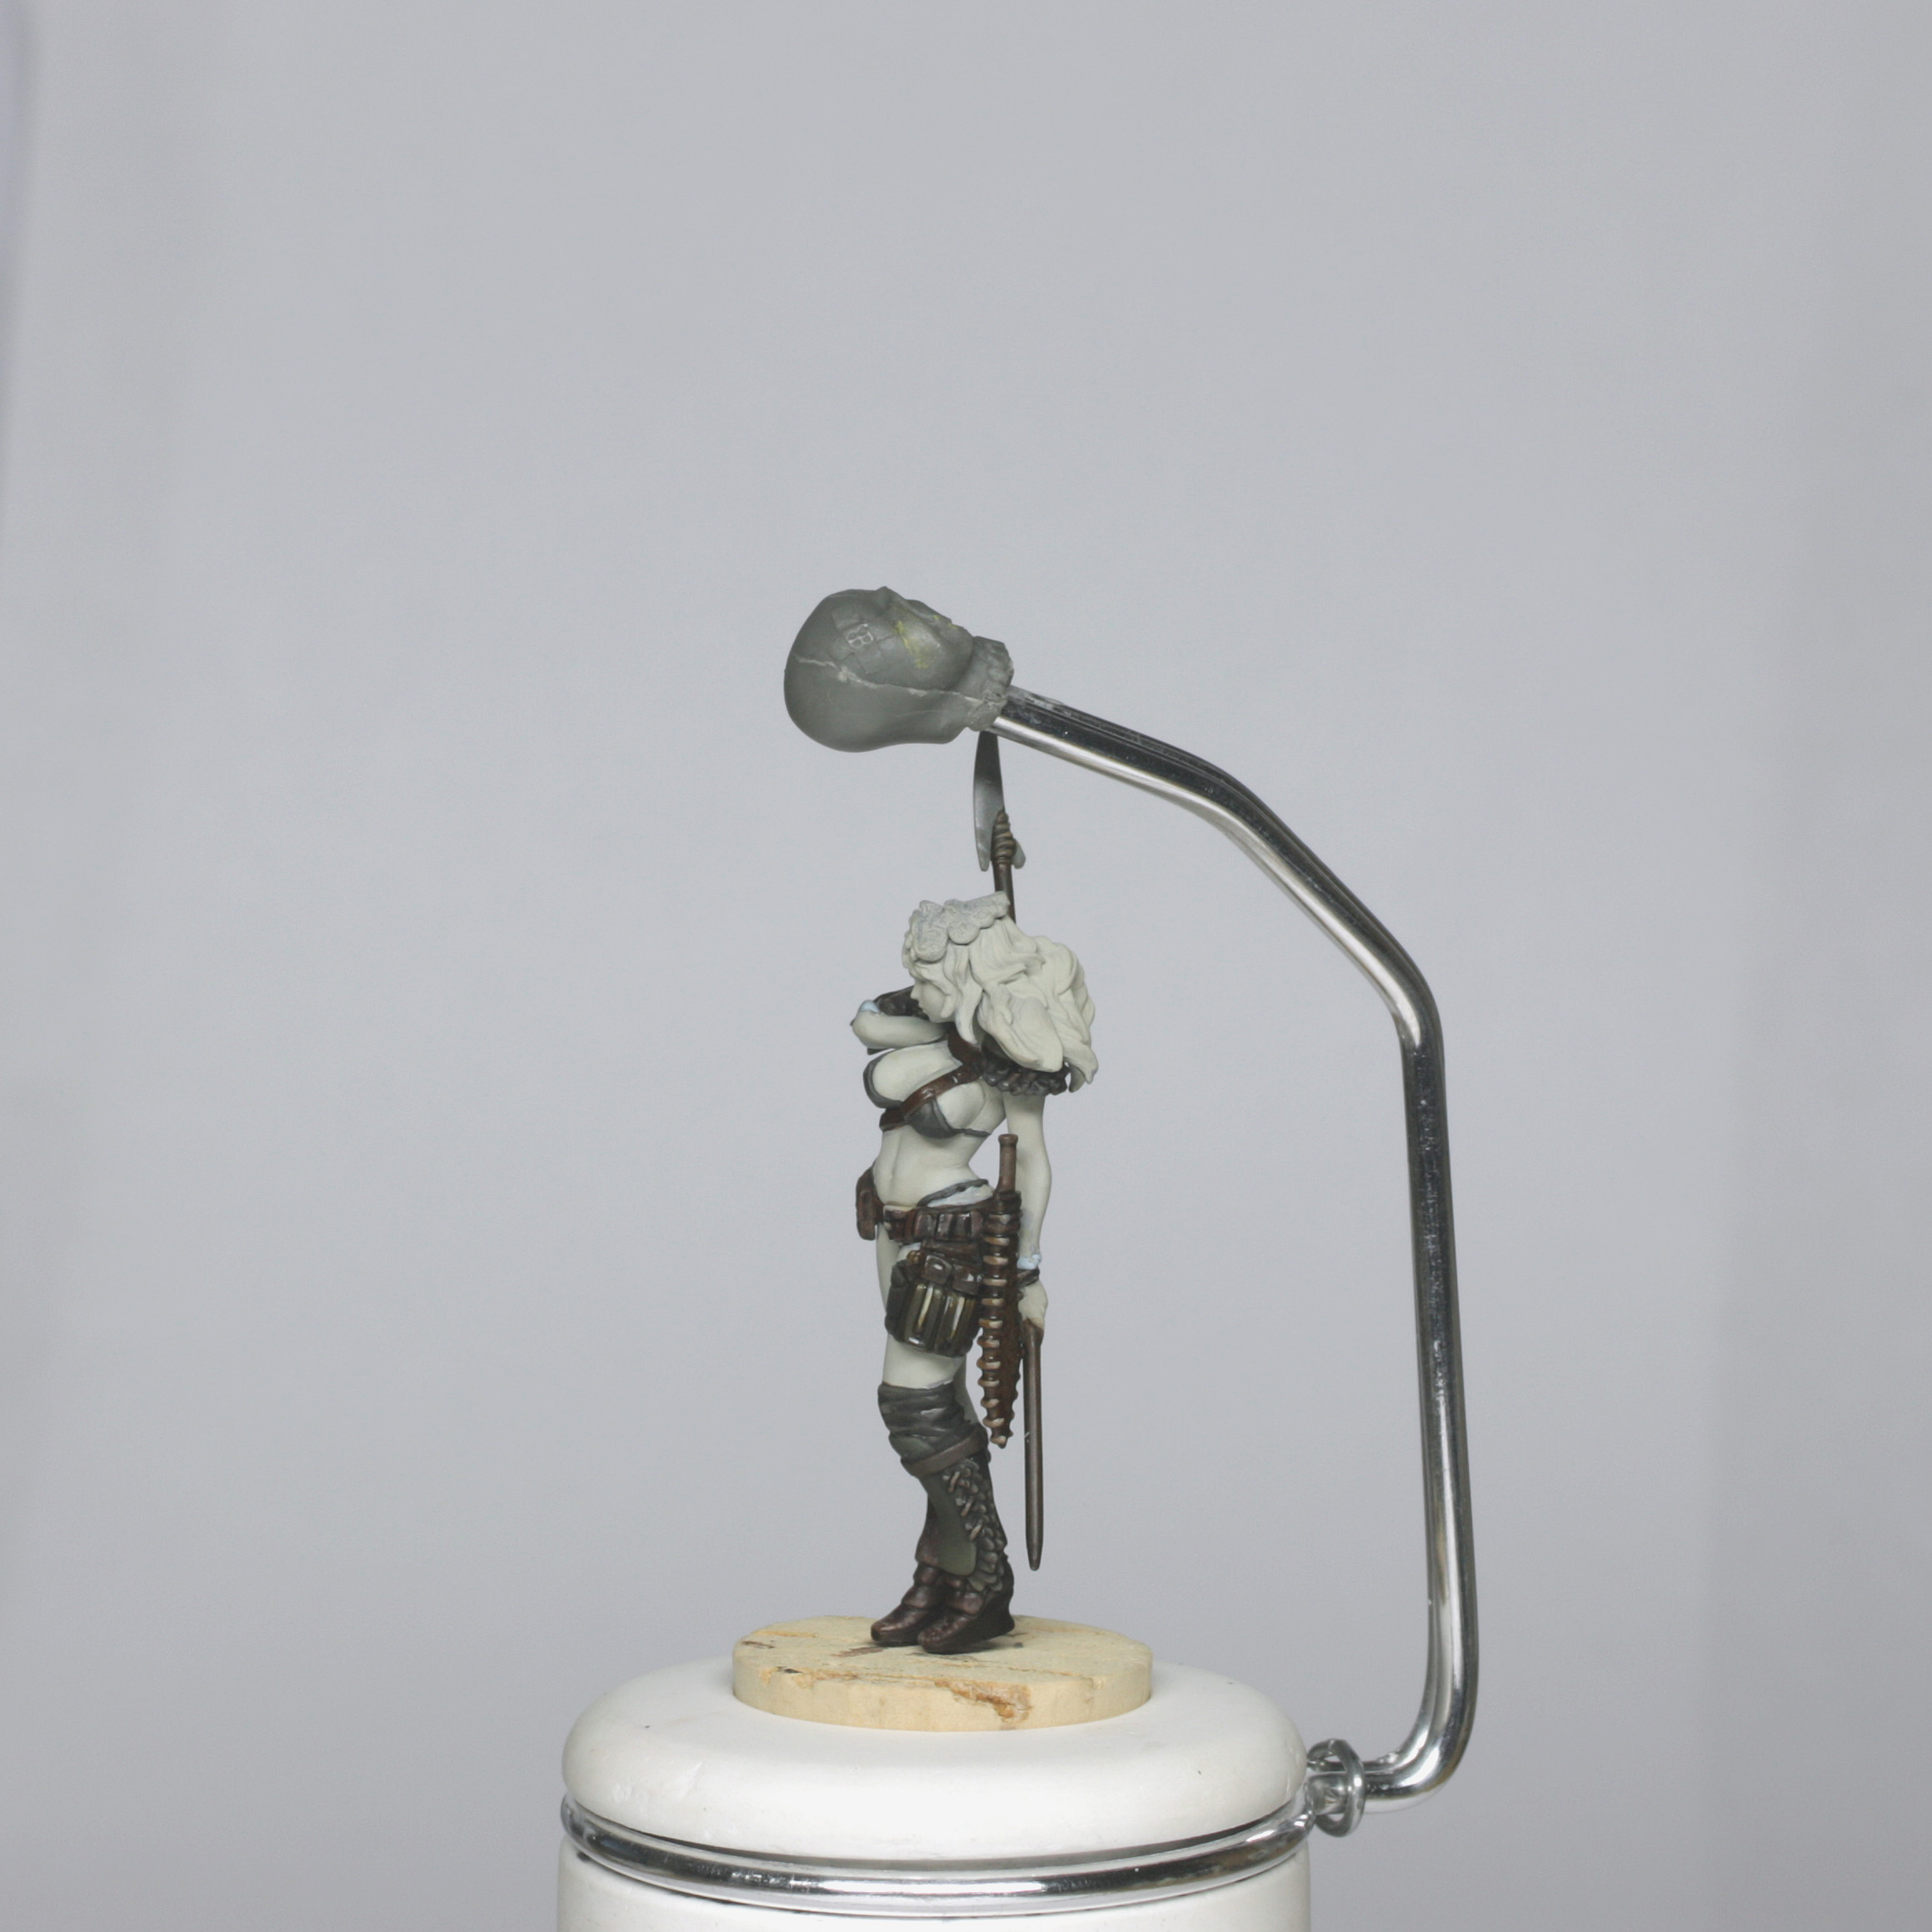
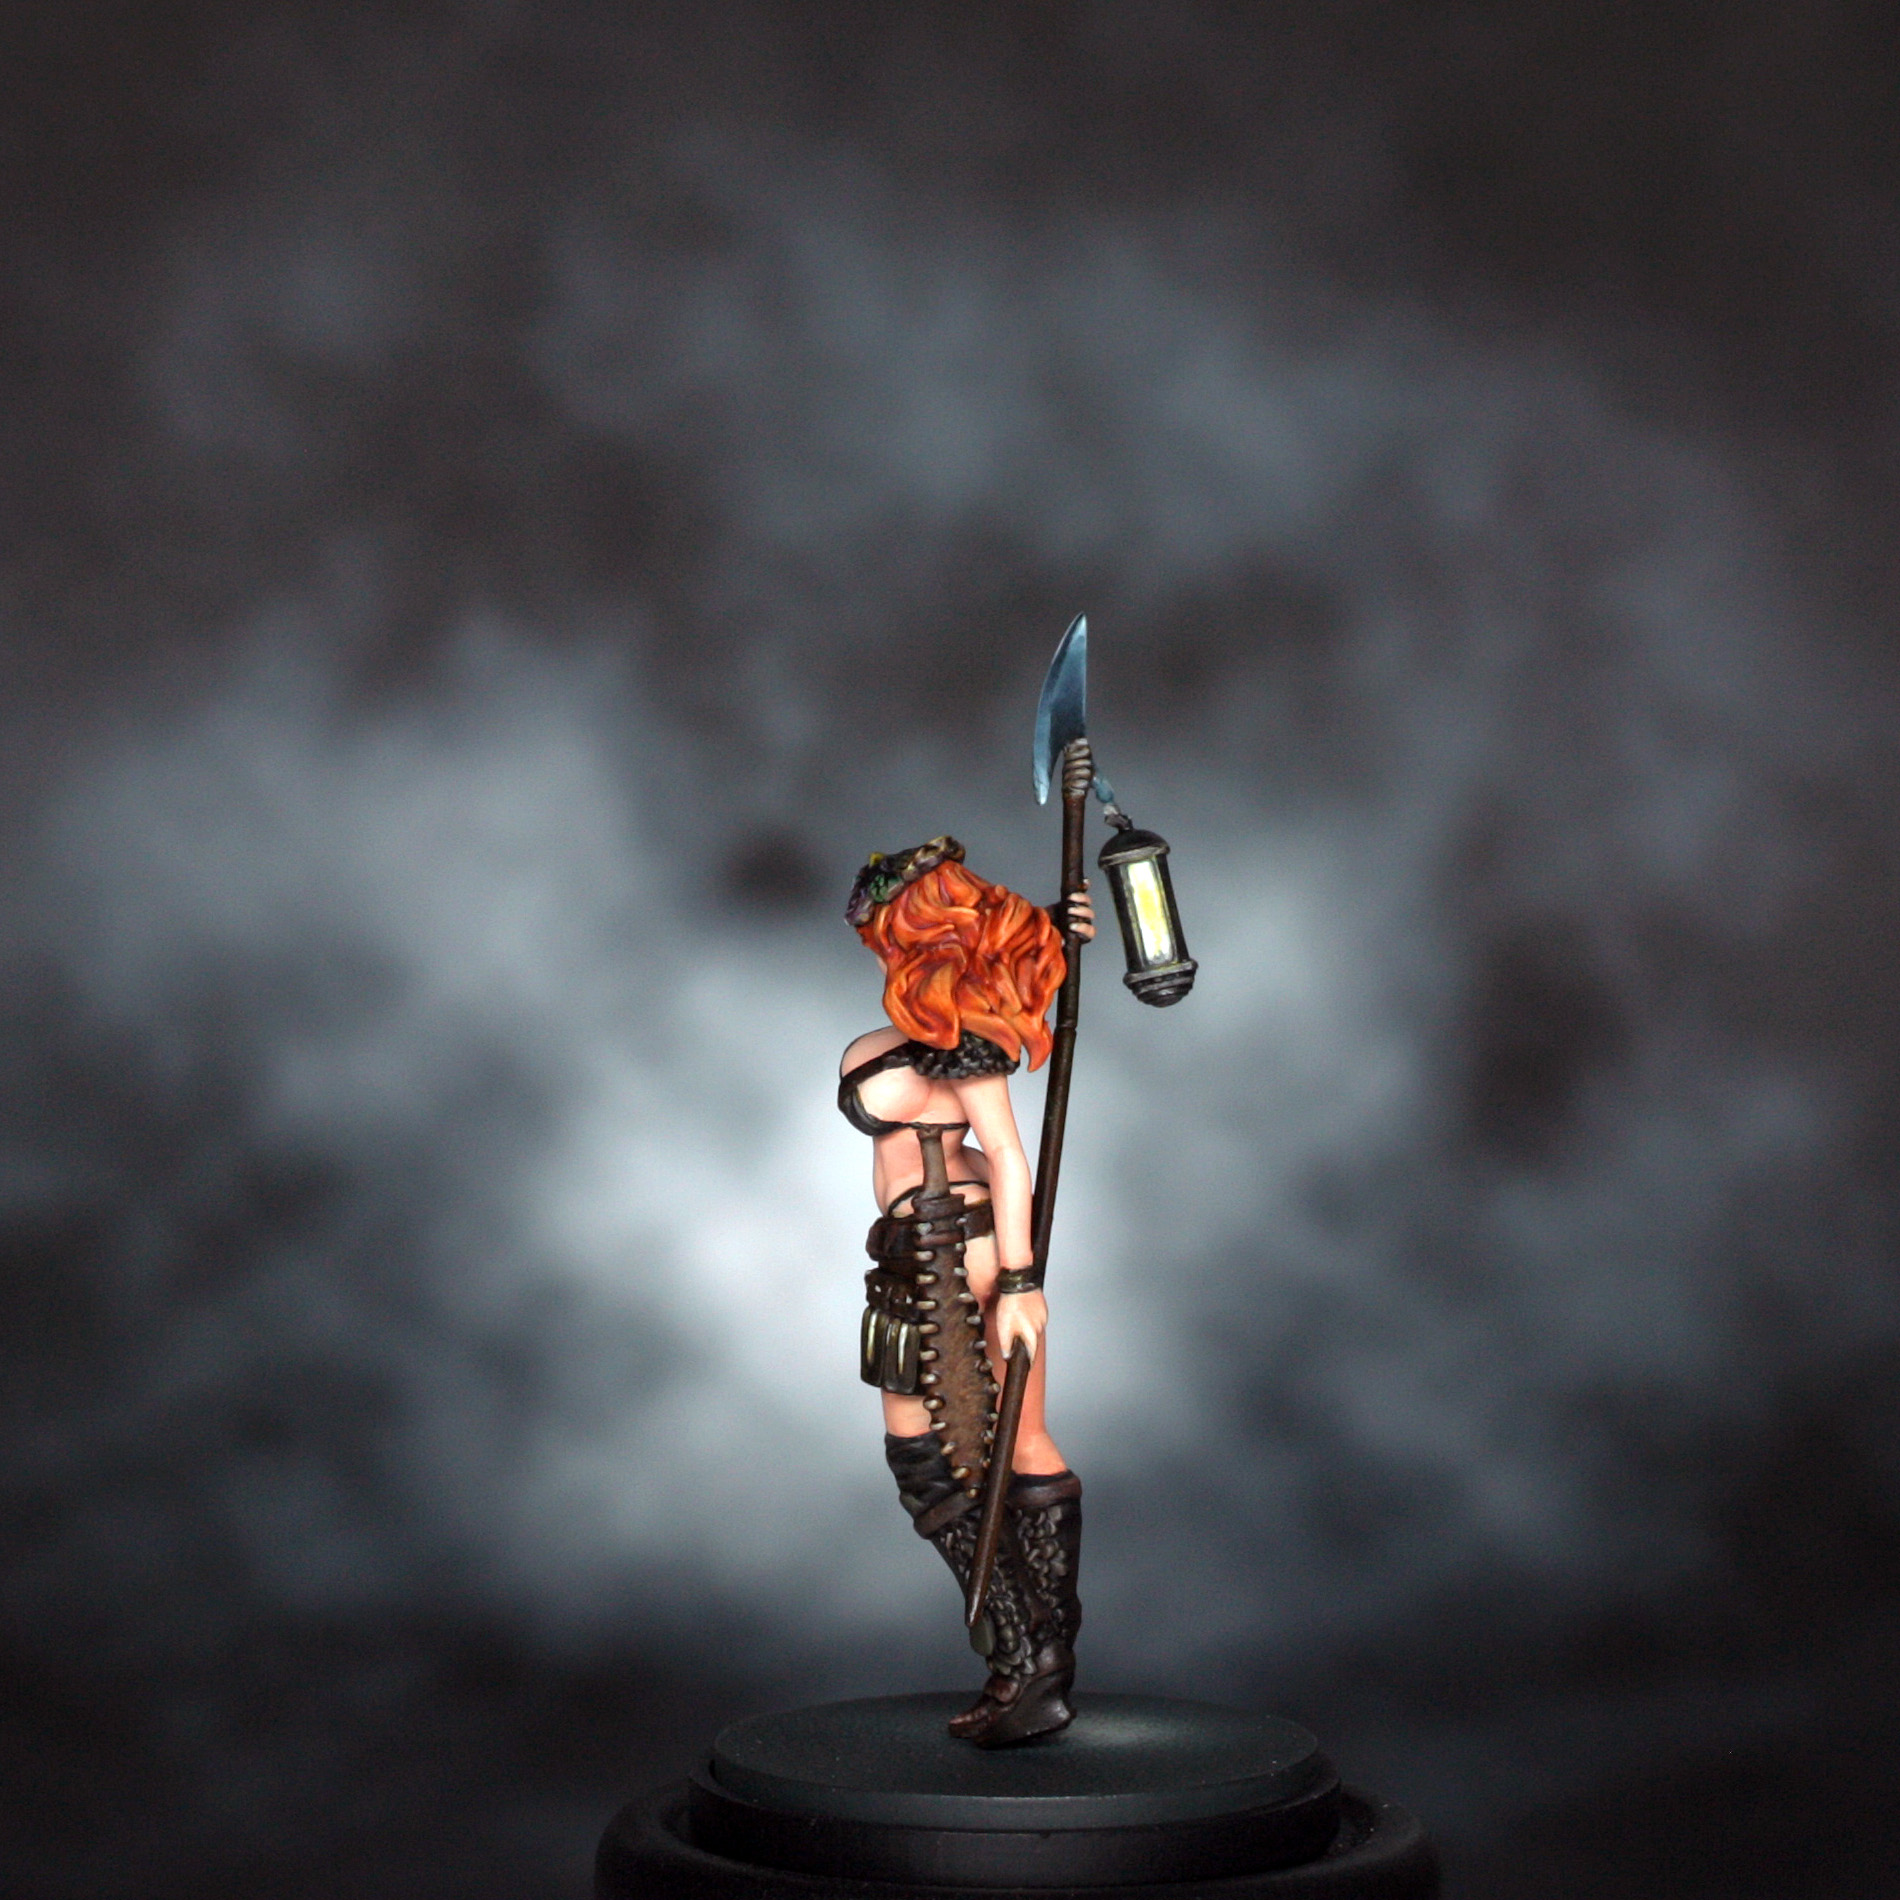
The bottom of her right eye still needed a little clean up at this stage, but it highlighted a mistake in the photo that isn’t always obvious with the naked eye. You can also see the liquid green stuff on the arm. I used this when I glued the arm and pole in place. It was a simple enough fix after this to quickly sand the residue off and touch up the paint around the join. After this I moved quite quickly to the end of the model, so there aren’t any progress shots. However I’ll go through the painting as it happened. Painting the Hair The hair is a new part of the sculpt (compared to the original resin version), with lots of curls, and is a rich ginger colour, so I used the following colours… The base mix was made up of 50/50 Fiery orange and VMC dark flesh, which I painted over all of the hair. I then highlighted by adding more dark flesh and then deck tan, but not up to pure deck tan in this case – more like 75/25 deck tan to dark flesh. The shading was started with a mix of Reikland Flesh shade and Fiery orange, then a few successive glazes of Reikland to build the depth of the shading. Final touch was a thin glaze over all of the hair with Seraphim sepia to tone all of the hair with a little yellow-orange. Painting the Spear Blade These were the colour used for the spear blade…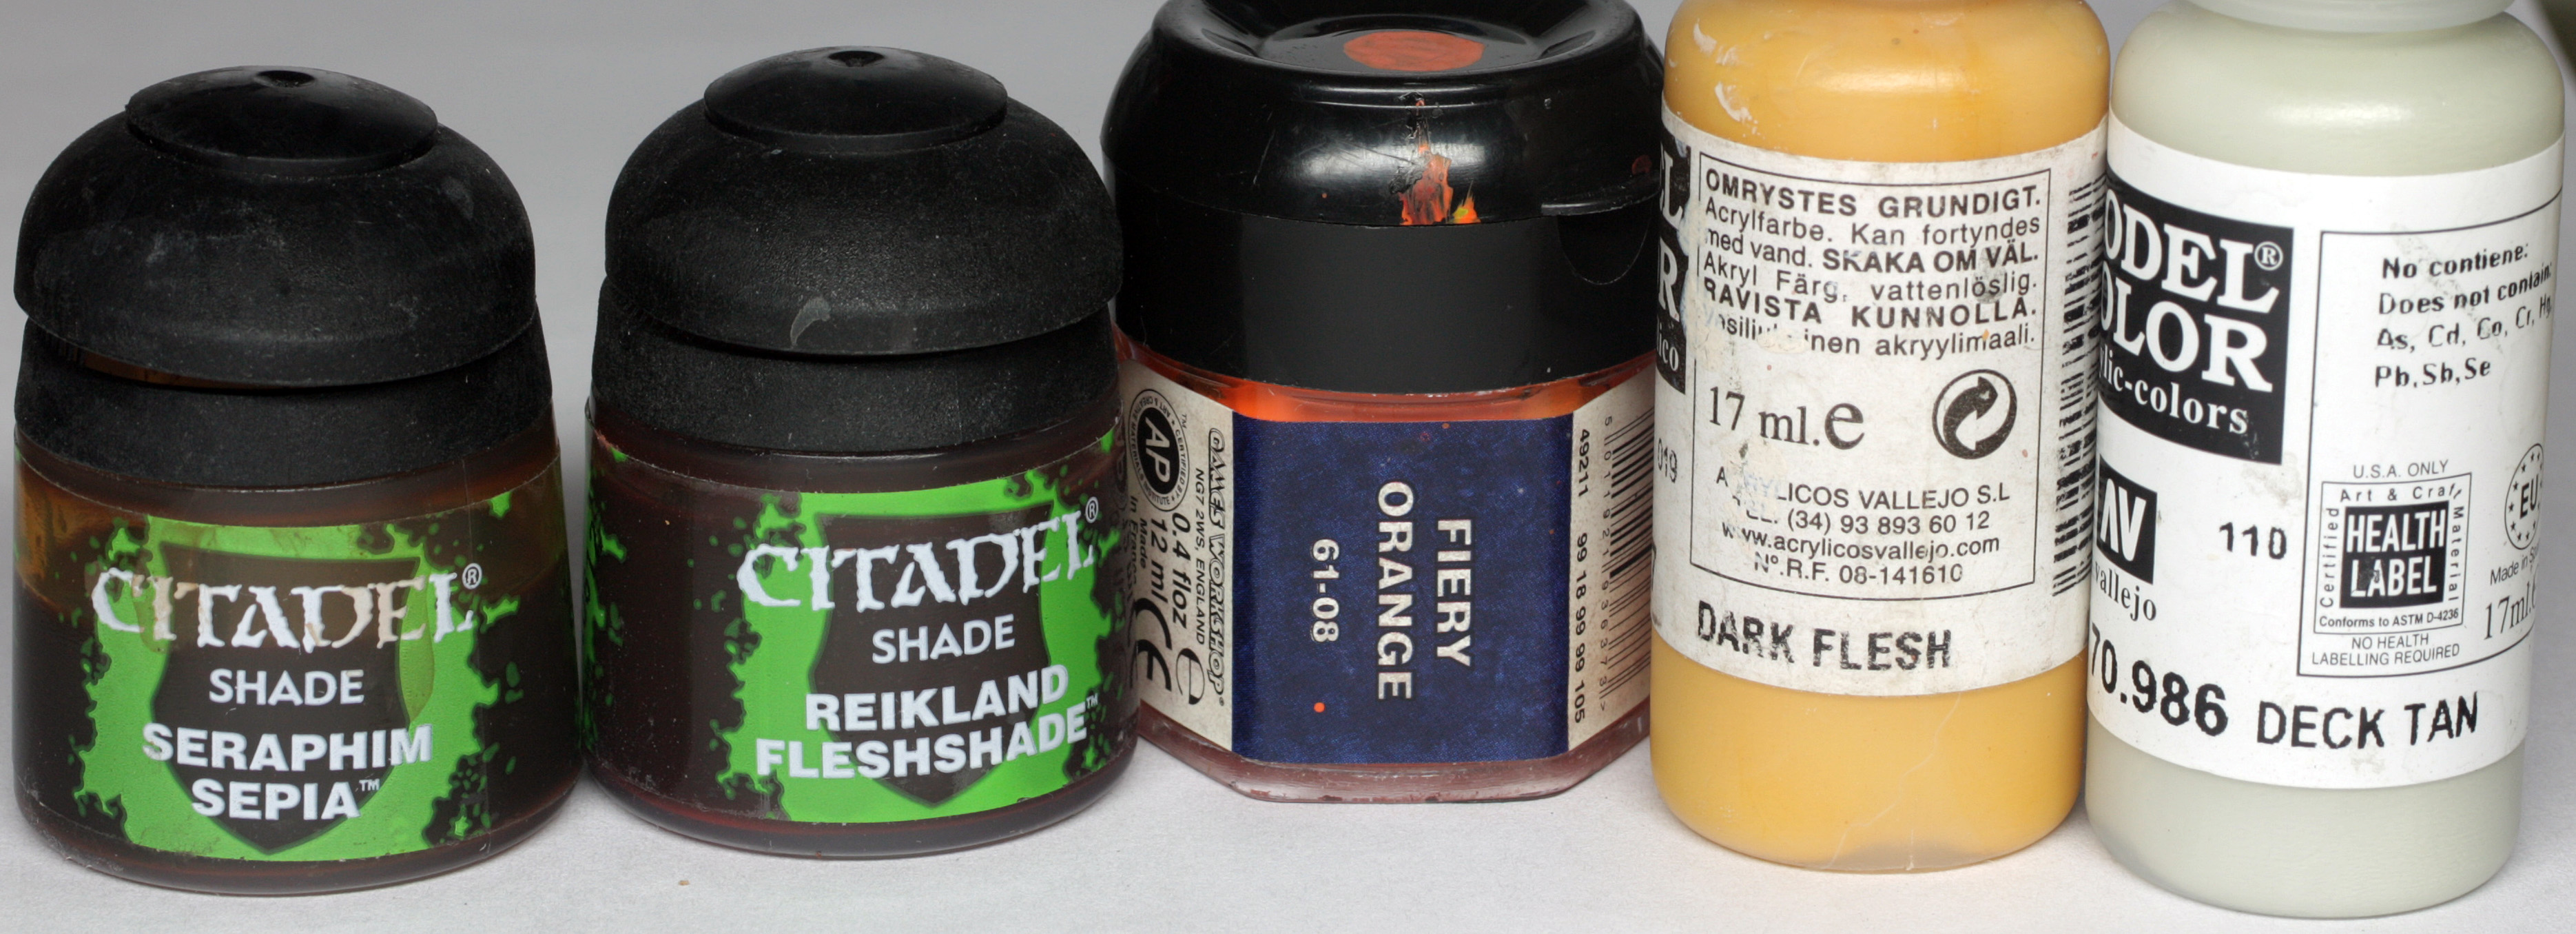
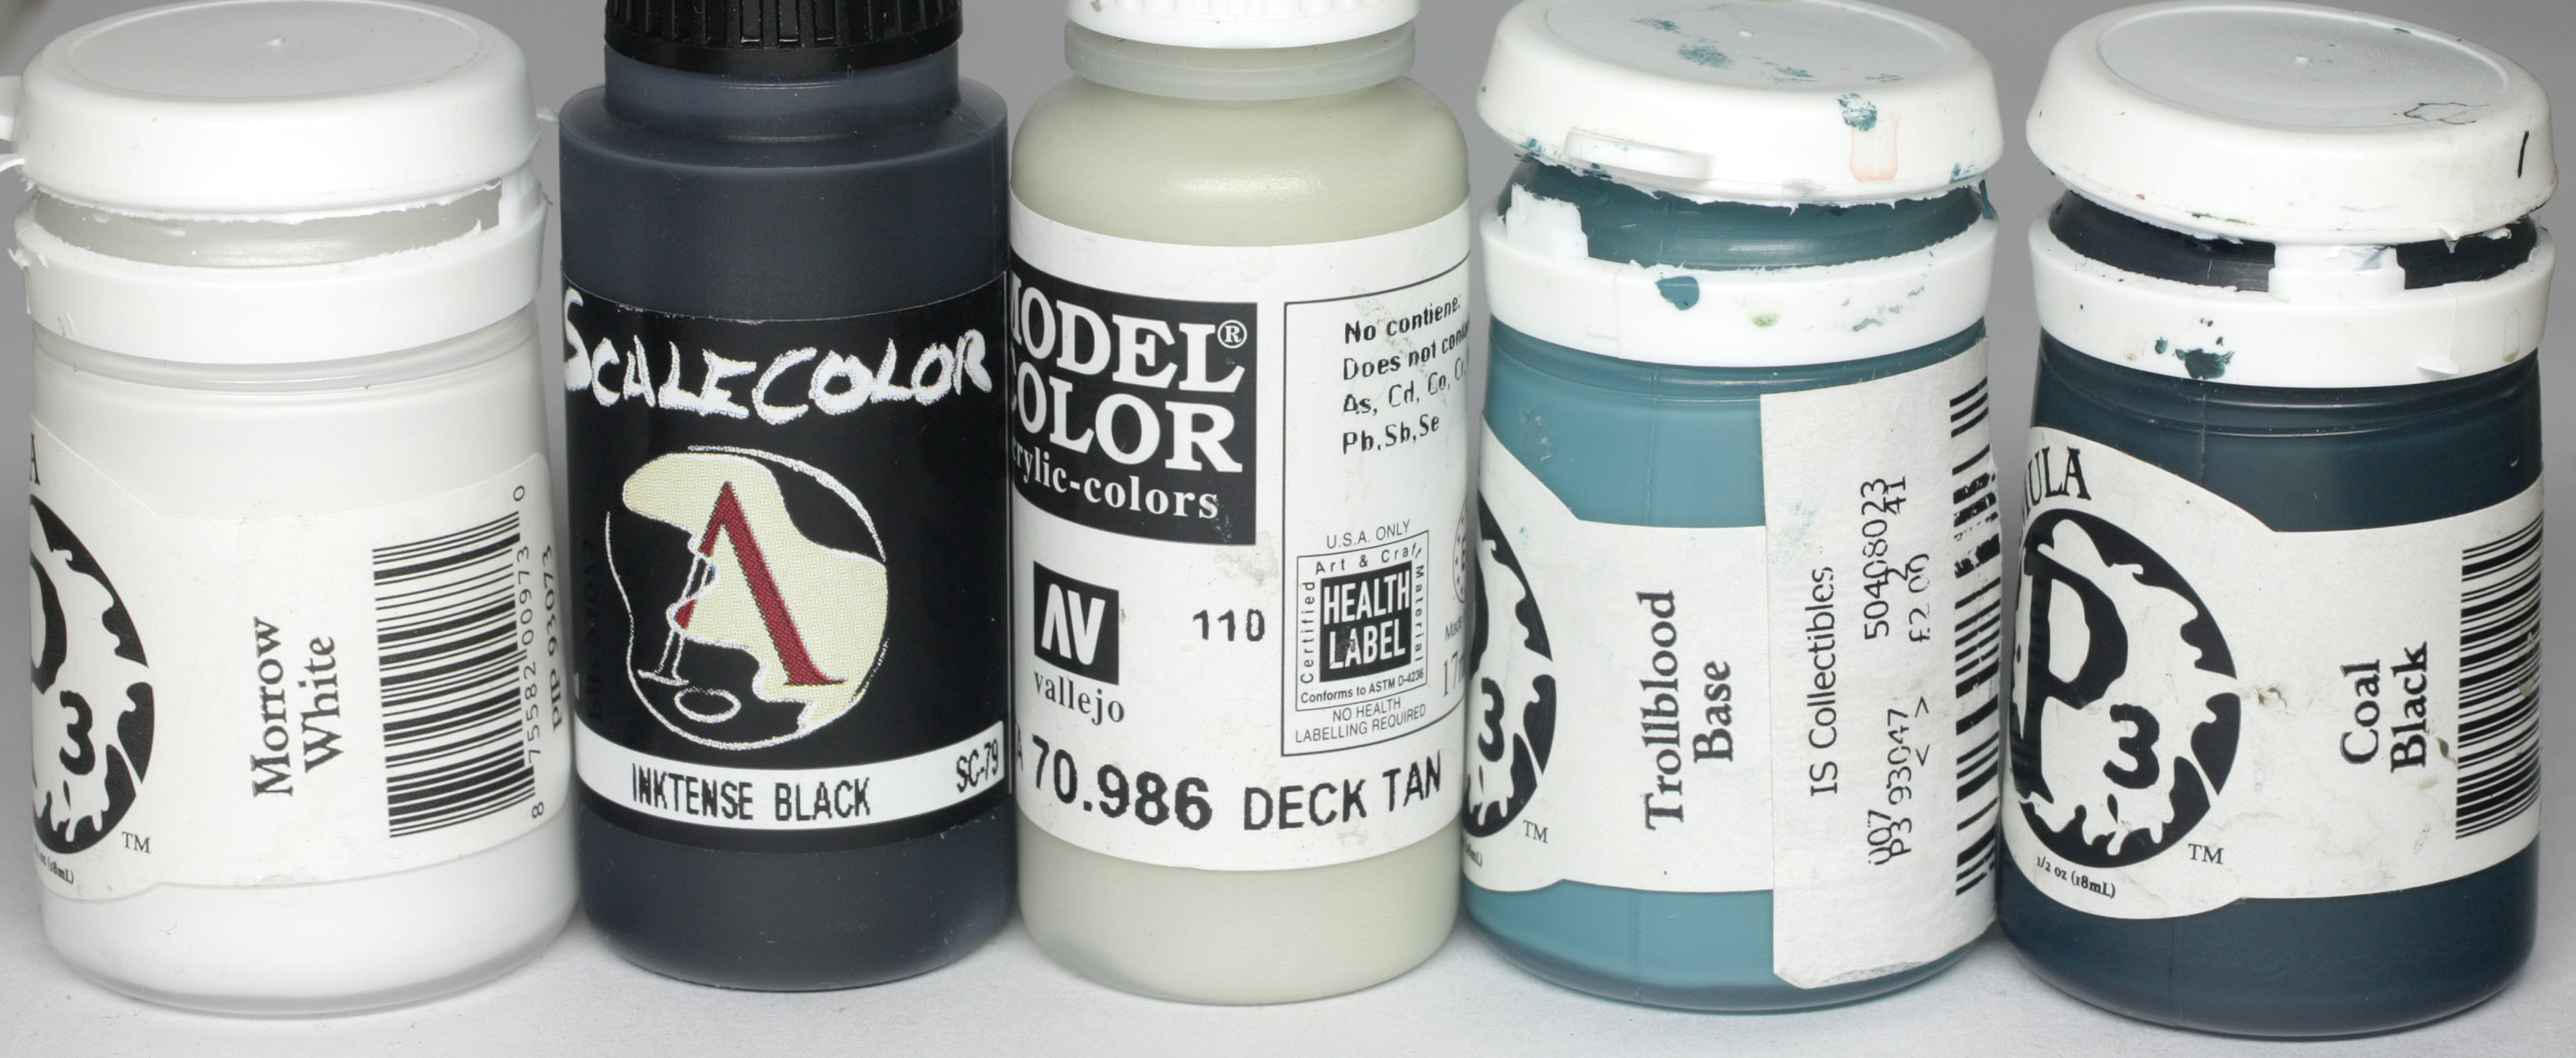
The painting of the blade was a reasonably quick process using my usual NMM method of placing the lightest and darkest parts in immediate contact with each other and blending away from there. So, I made a base mix of equal Trollblood base and Coal Black and painted that on nice and smooth, then started adding deck tan to the mix and glazing towards the decided highlight points in decreasing strokes, so building up the lightness while keeping as smooth a transition as possible, once I reached pure deck tan I added some white paint and carried on highlighting in smaller strokes right into the final highlight points. At this point it was a little too “white” and I had lost too much midtone, so I thinned out the original base mix and glazed back towards the middle of the blade.
Shading was done by increasing the base mix with more coal black – heavily thinned and glazed in a very controlled way, because it can be notorious for staining the lighter colours. Once I reached pure coal black I added some black ink and continued, bringing a nice sharp line up next to the highlight points.
Final edge highlighting was done with pure, thinned, white paint.
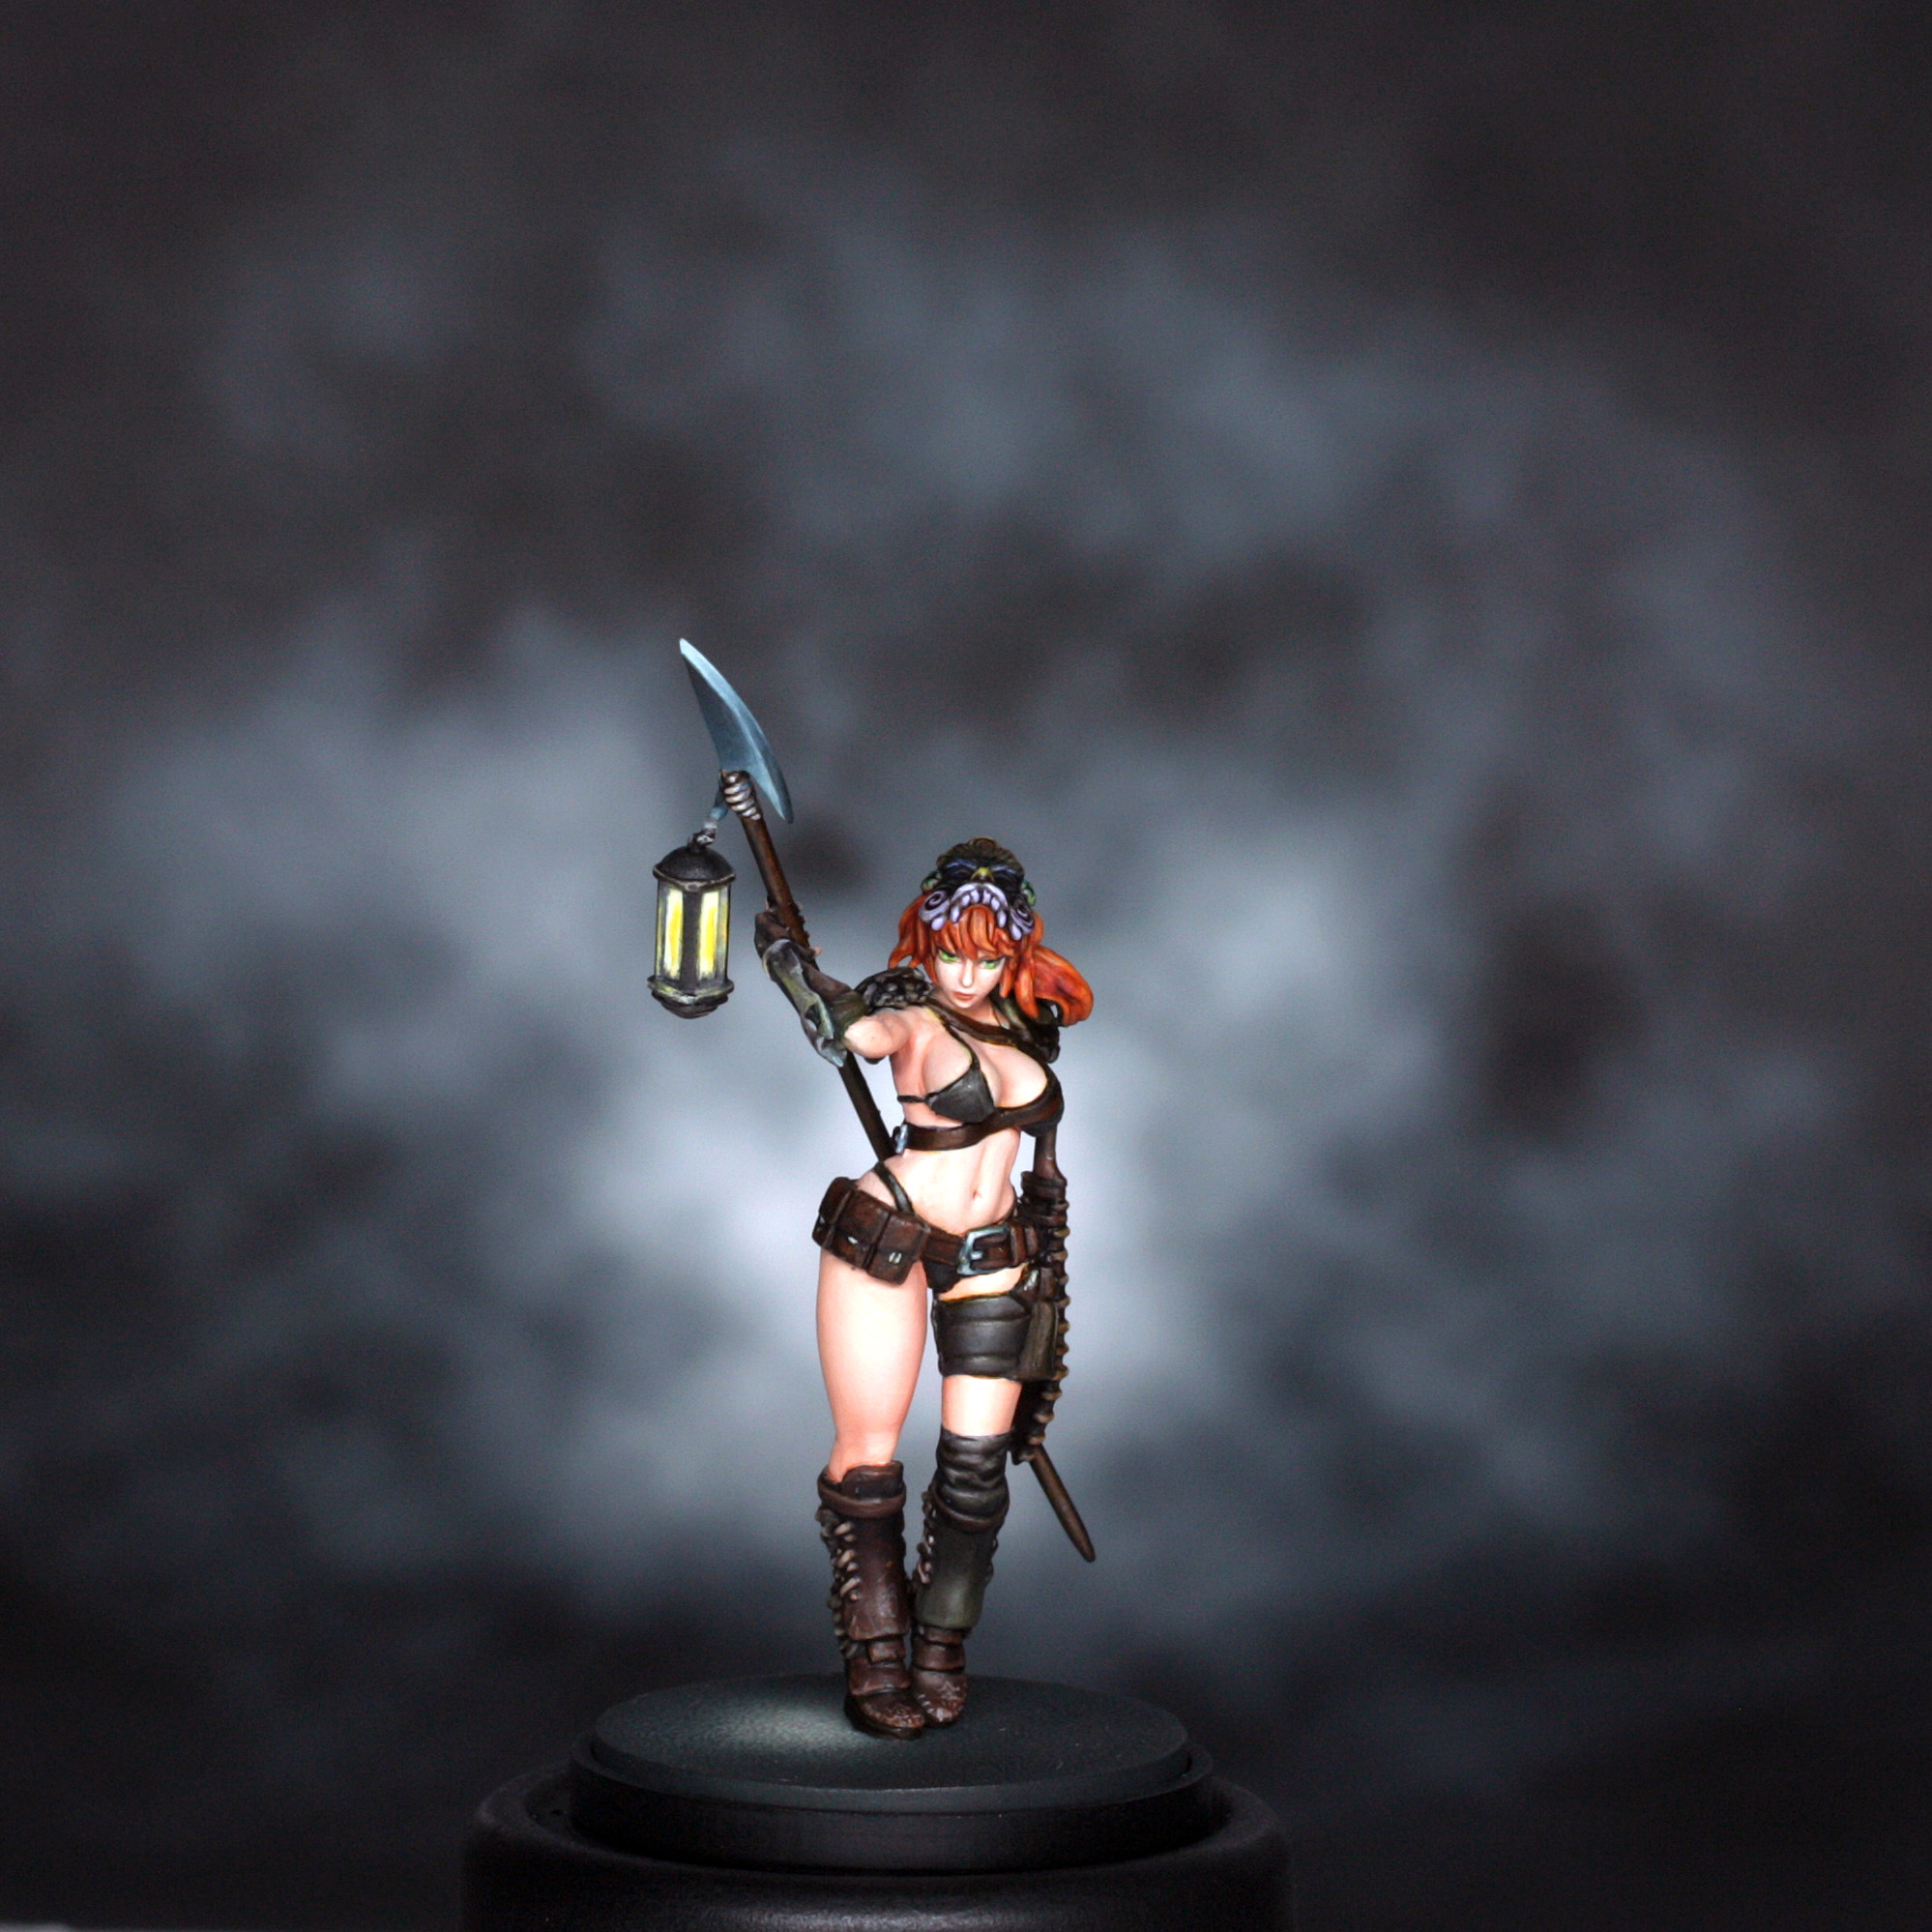
Painting the Lantern and the Glow
The lantern was painted using the following colours…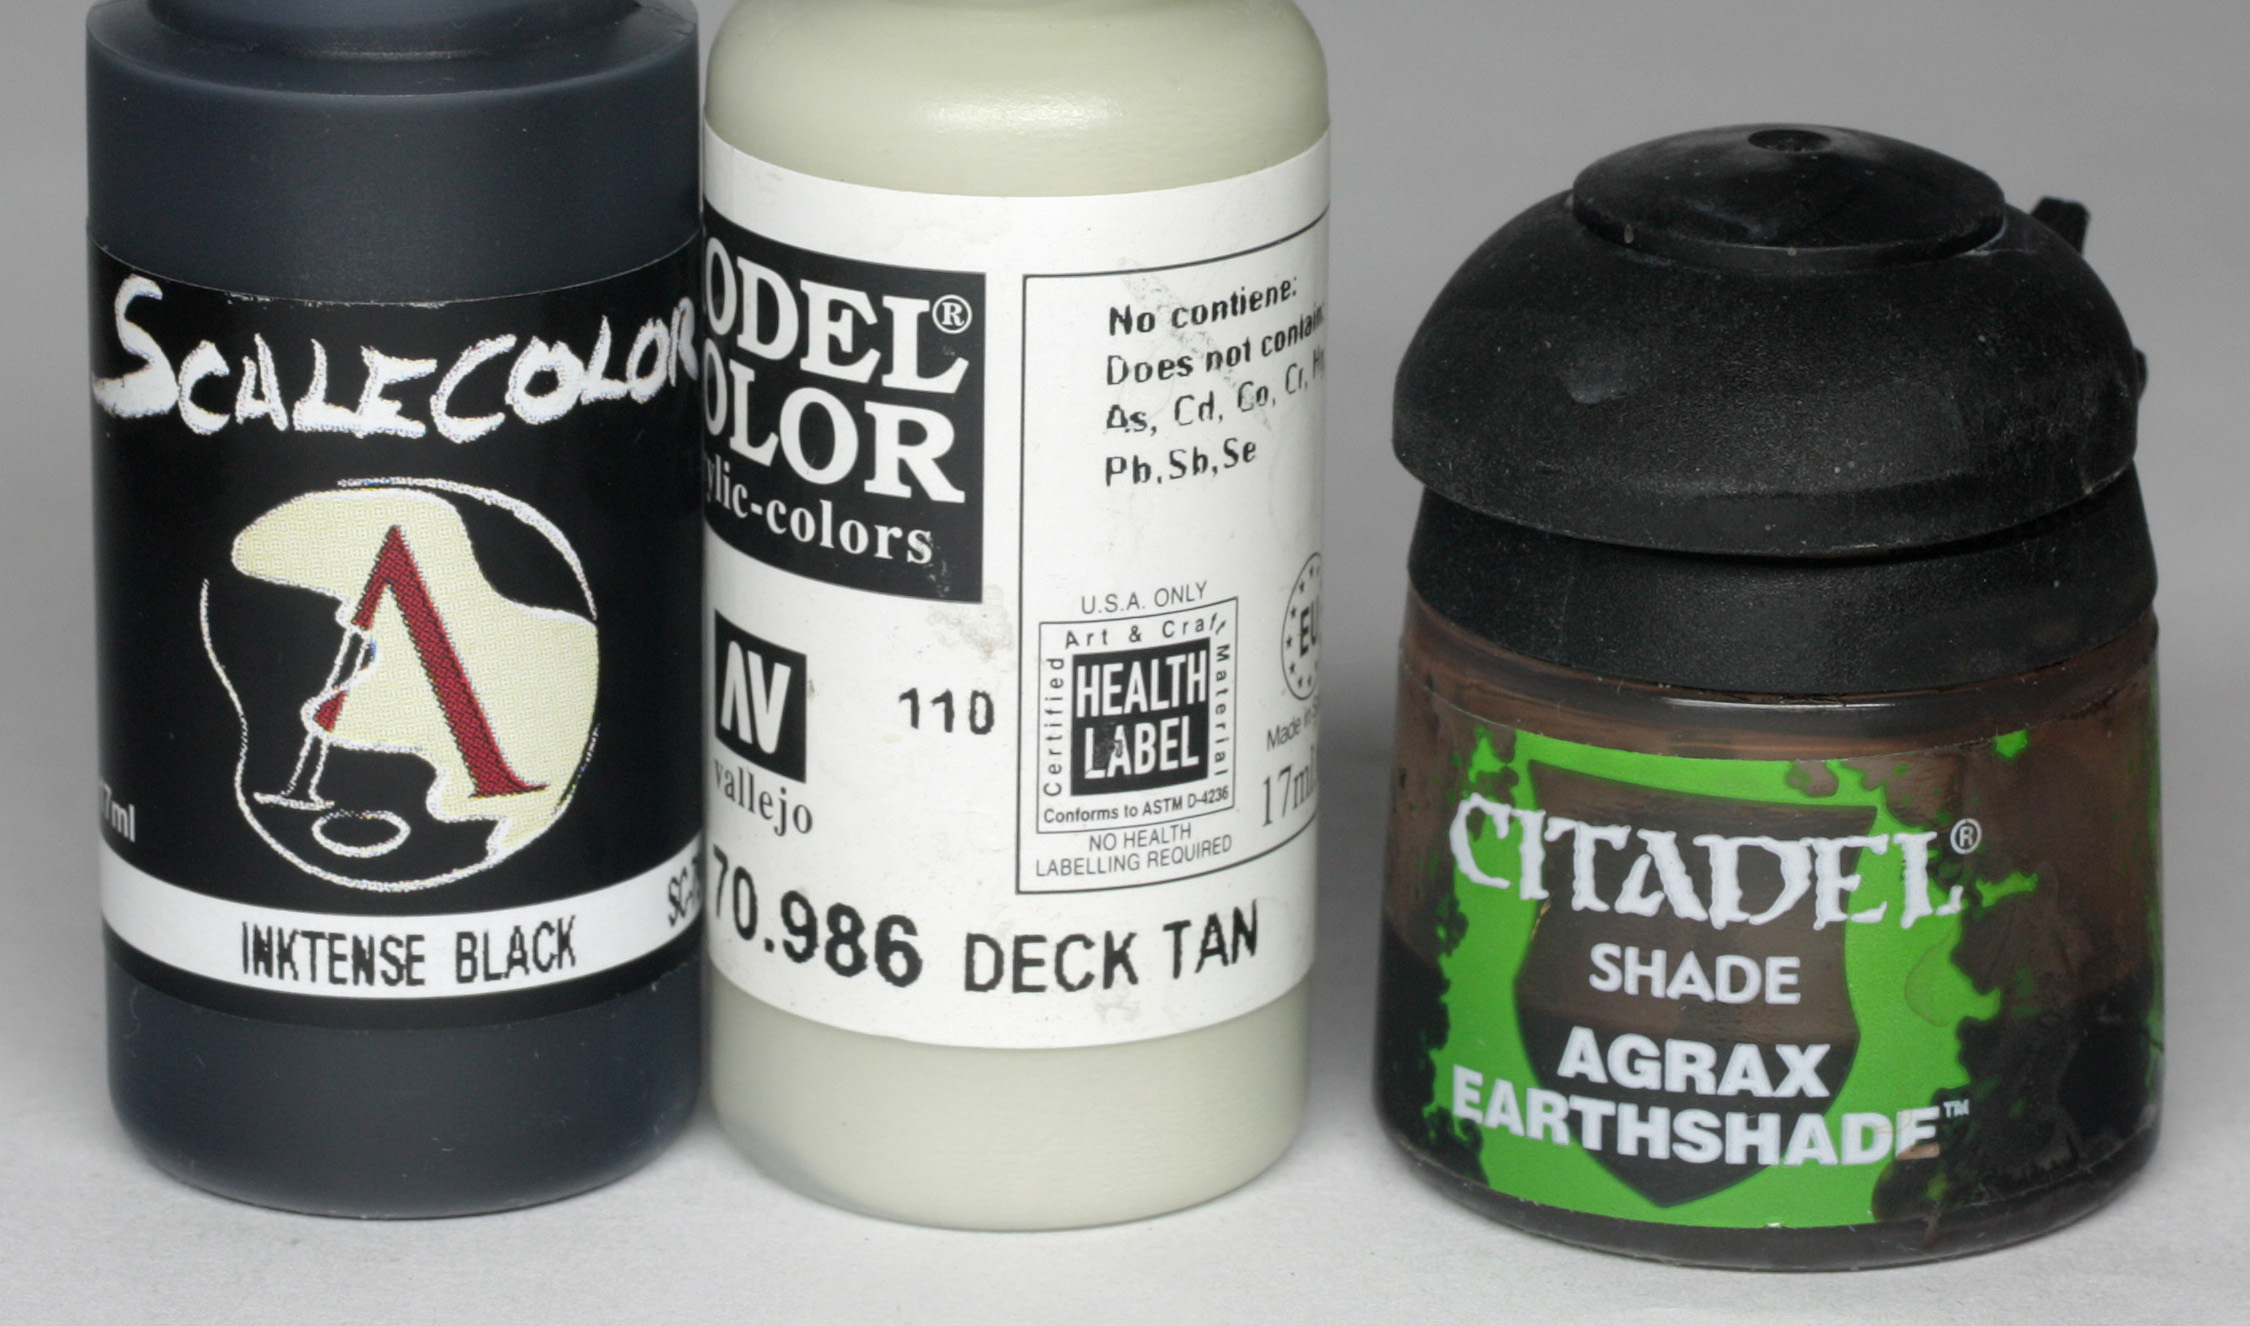
This is a really small part of the model, so also did not take long. First I painted the whole thing with deck tan.
Next I washed the whole thing with several coats of Agrax Earthshade – allowing it to dry thoroughly between coats.
The recesses were then inked in with thin black ink before I highlighted the “lighter” parts of the lantern with a mix of deck tan and Agrax. The glass panels of the lantern were then blocked in with pure deck tan.
The glow was also quite quick with this model, and I decided not to have any OSL glow on the model itself.
The colours used were…
The glow was established using Heartfire with a little white. I painted it in a kind of irregular teardrop shape and then used the side of my brush to apply a little to the sides of the frame of the lantern. I then added a little more white and highlighted the top of the shape of the glow. Final bit was to carefully apply a little line of pure heartfire near the base of the flame, to appear like a candle wick. Done.
Painting the Mask
The colours used for the mask are shown below…
On the concept art there are several pale colours all around the mask, so I decided that some thinned inks over a grey colour would give me a good way of tinting the mask without painting into the details too much.
First I gave the mask a couple of washes of Reikland Flesh shade and Agrax Earthshade to build up the shadows in the recesses. I thinned the washes and removed the worst of the wash from the raised areas with a clean slightly moist brush as I went along. The effect can be seen in the earlier picture of the face.
Once this was done I diluted each of the inks quite heavily and applied them very carefully with a well blotted brush, slowly building up the effect over 3 or 4 passes.
After this, a final tidy up was needed to a few areas, especially the edges of the bikini, then a spray of matt varnish after gluing the model to the base before final photos…
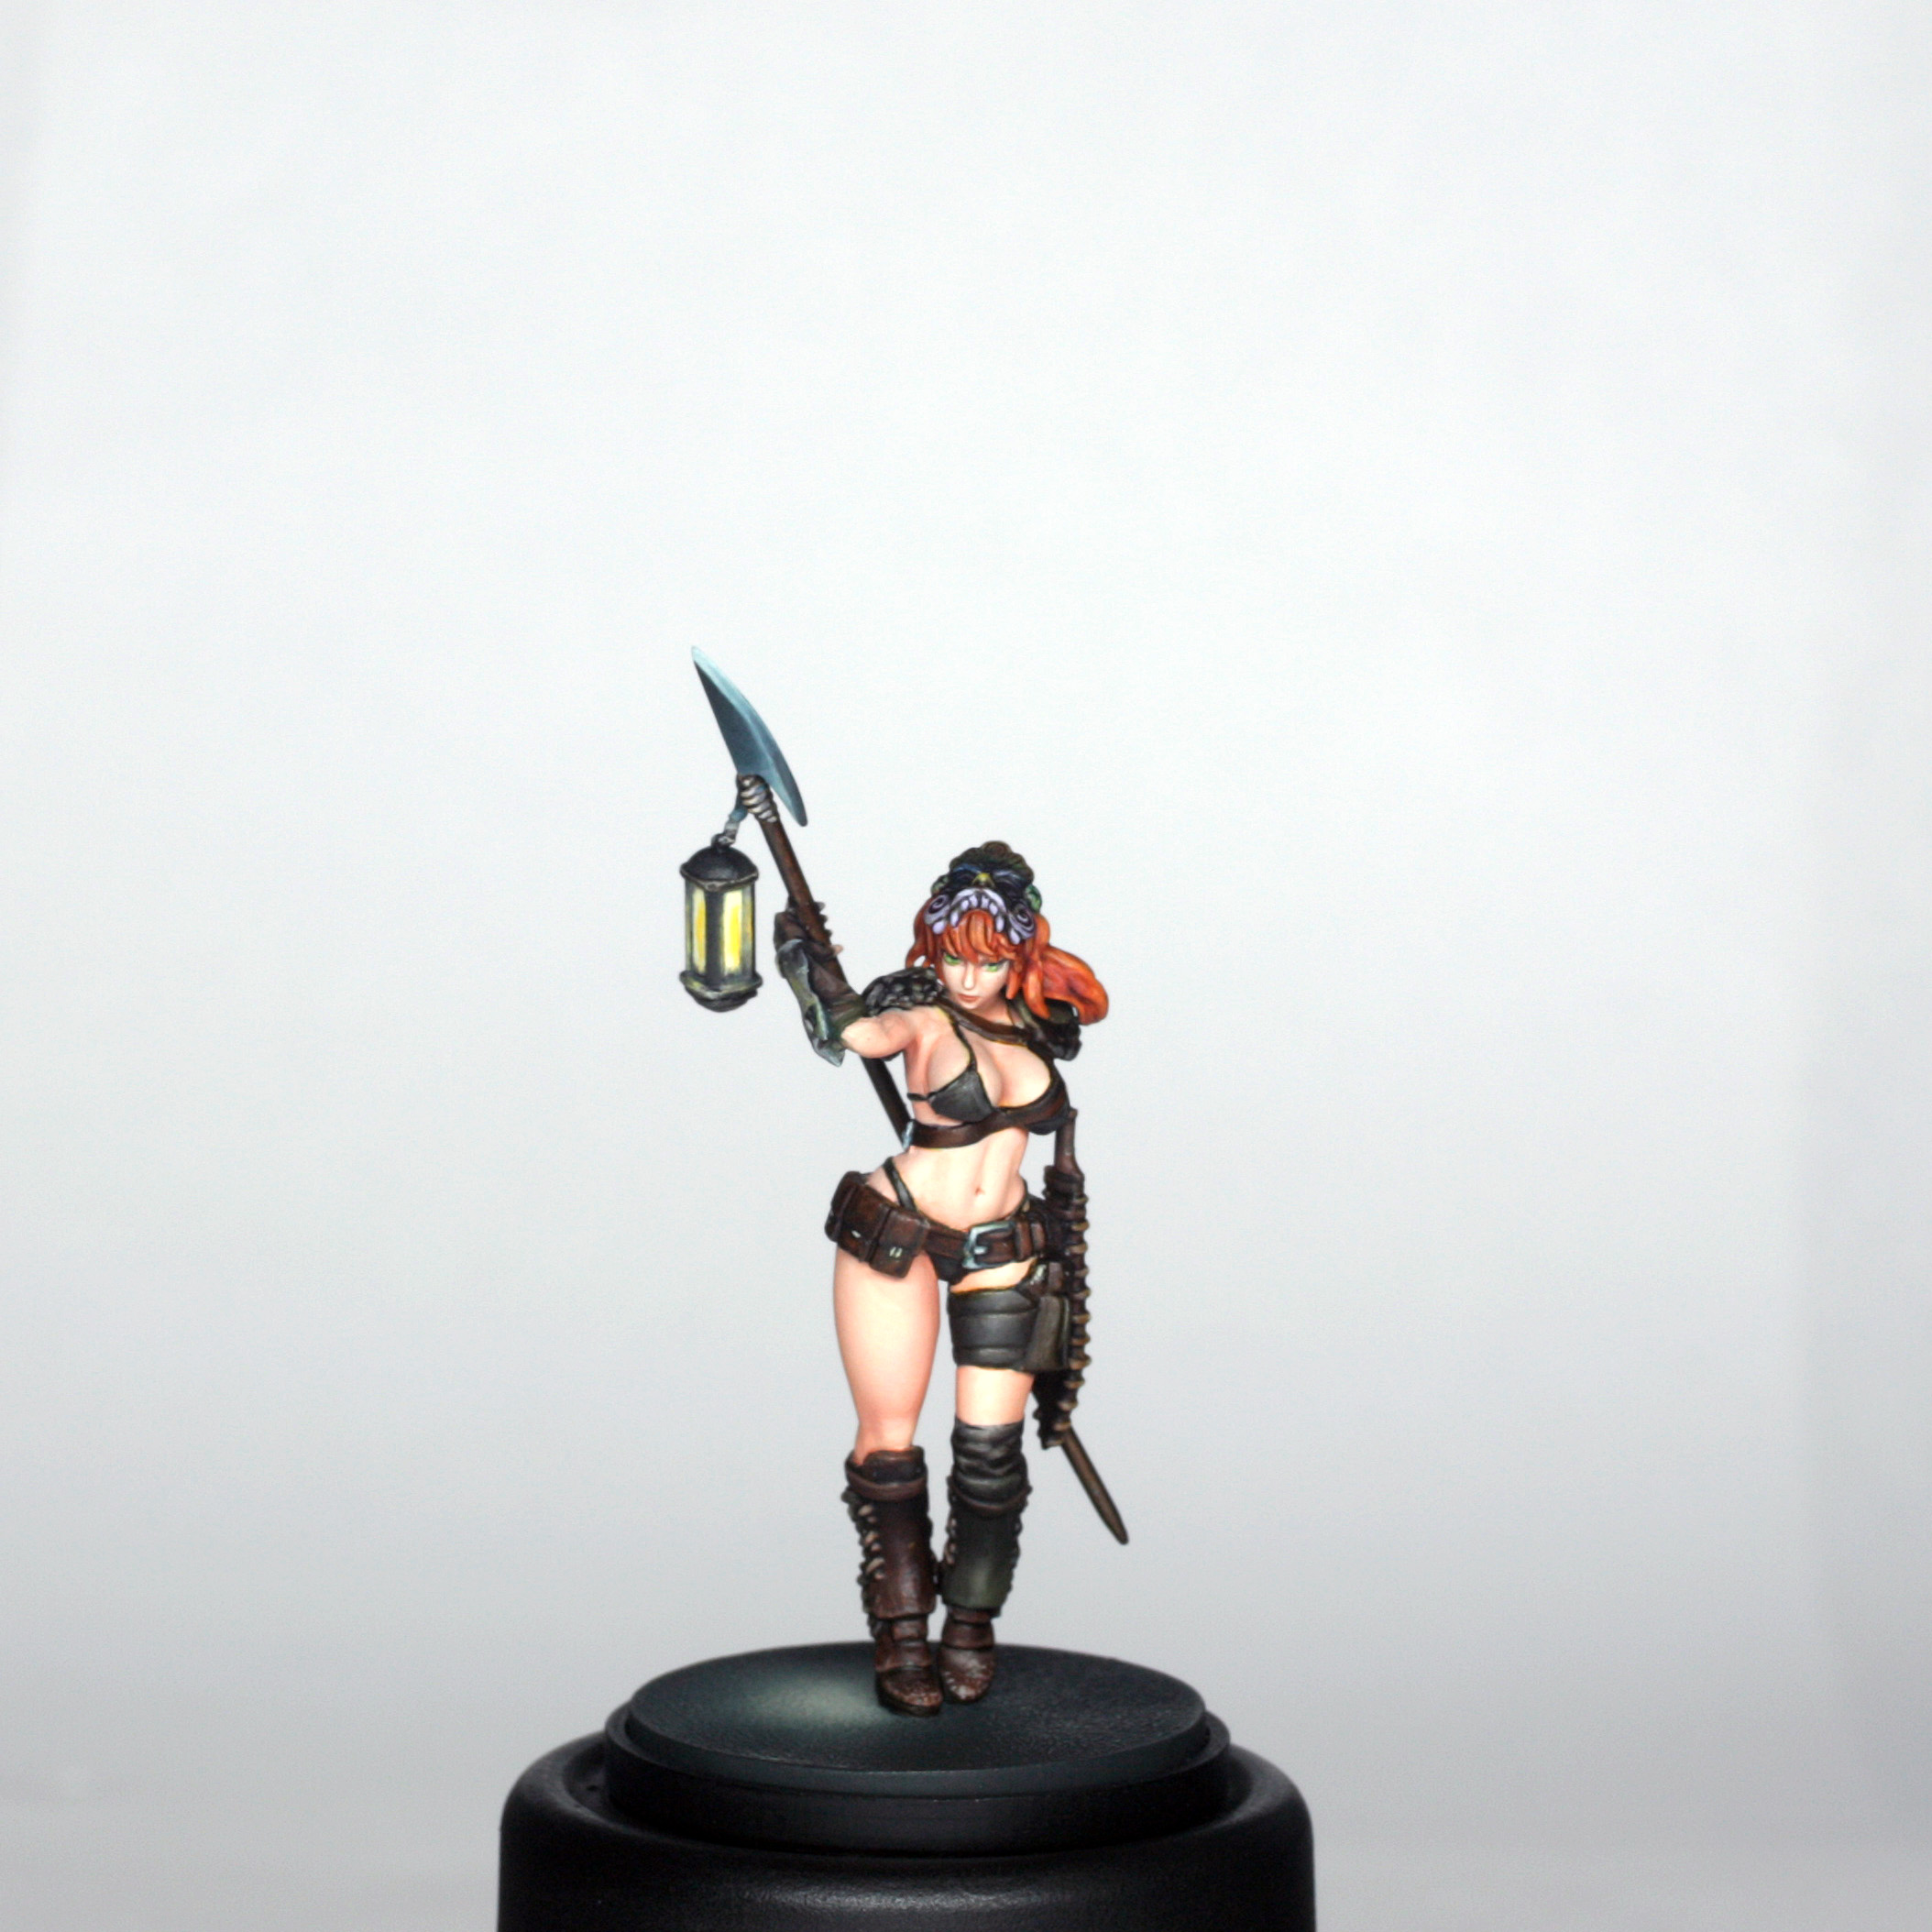
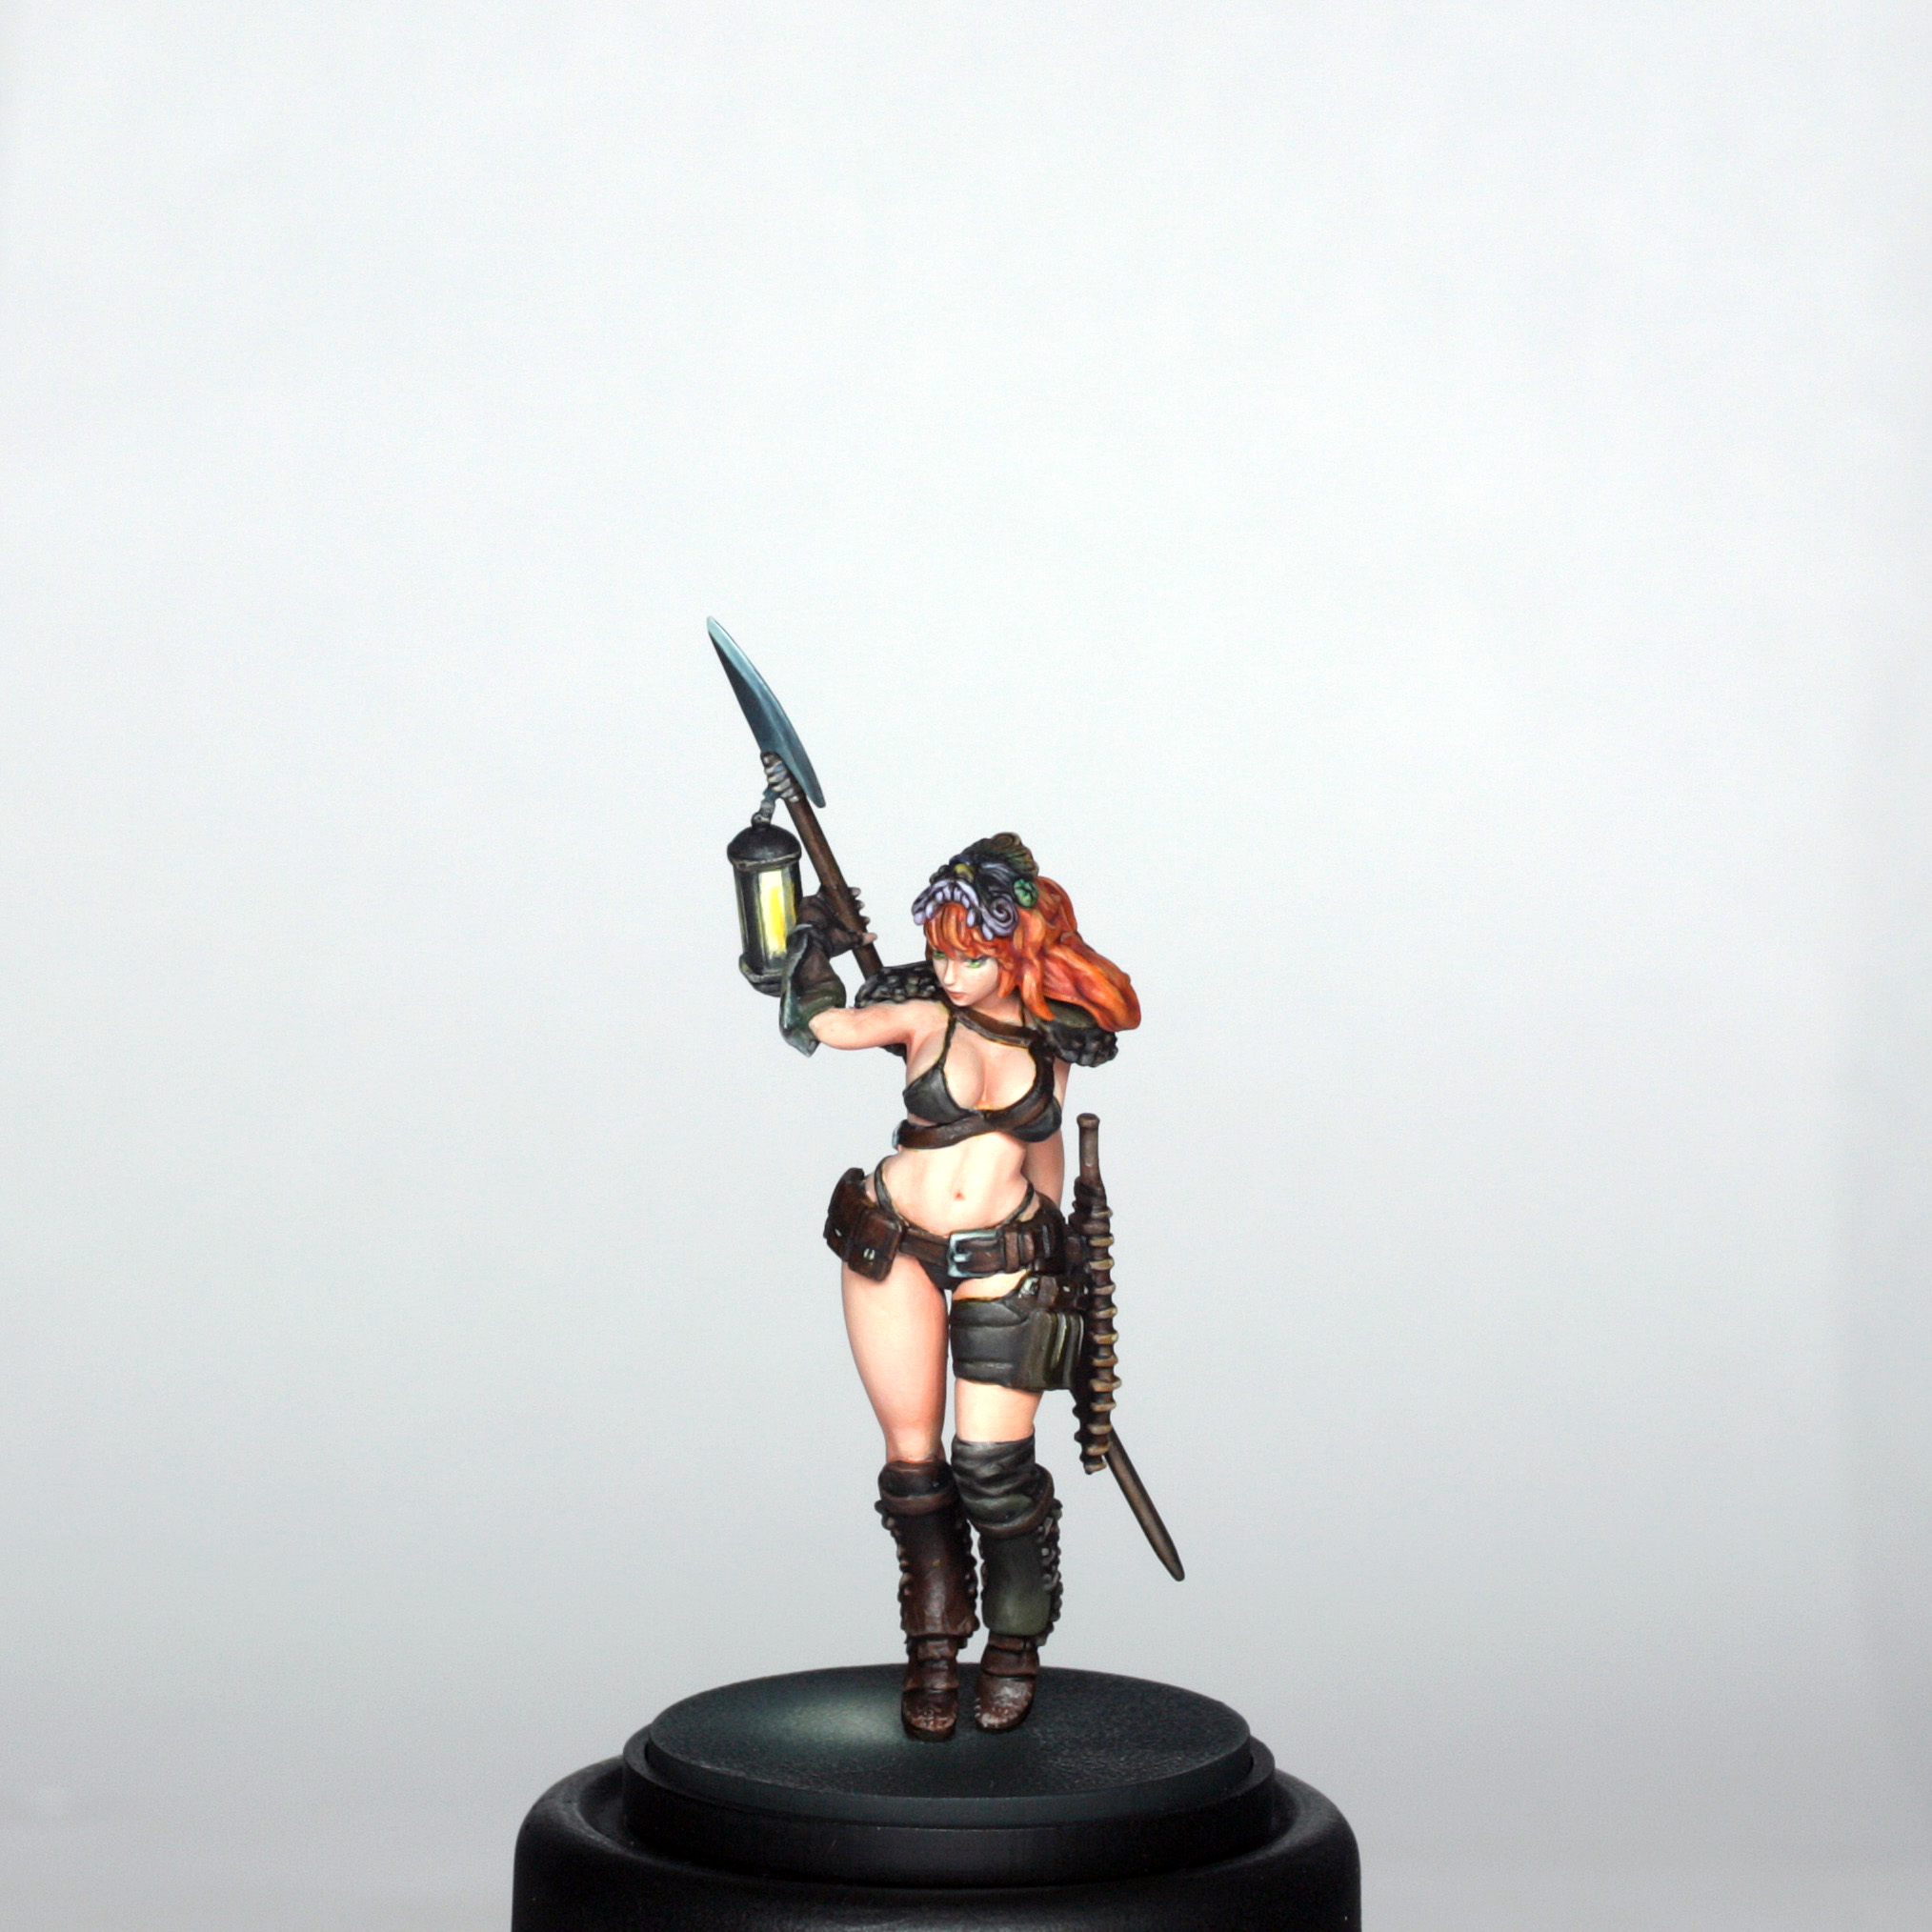
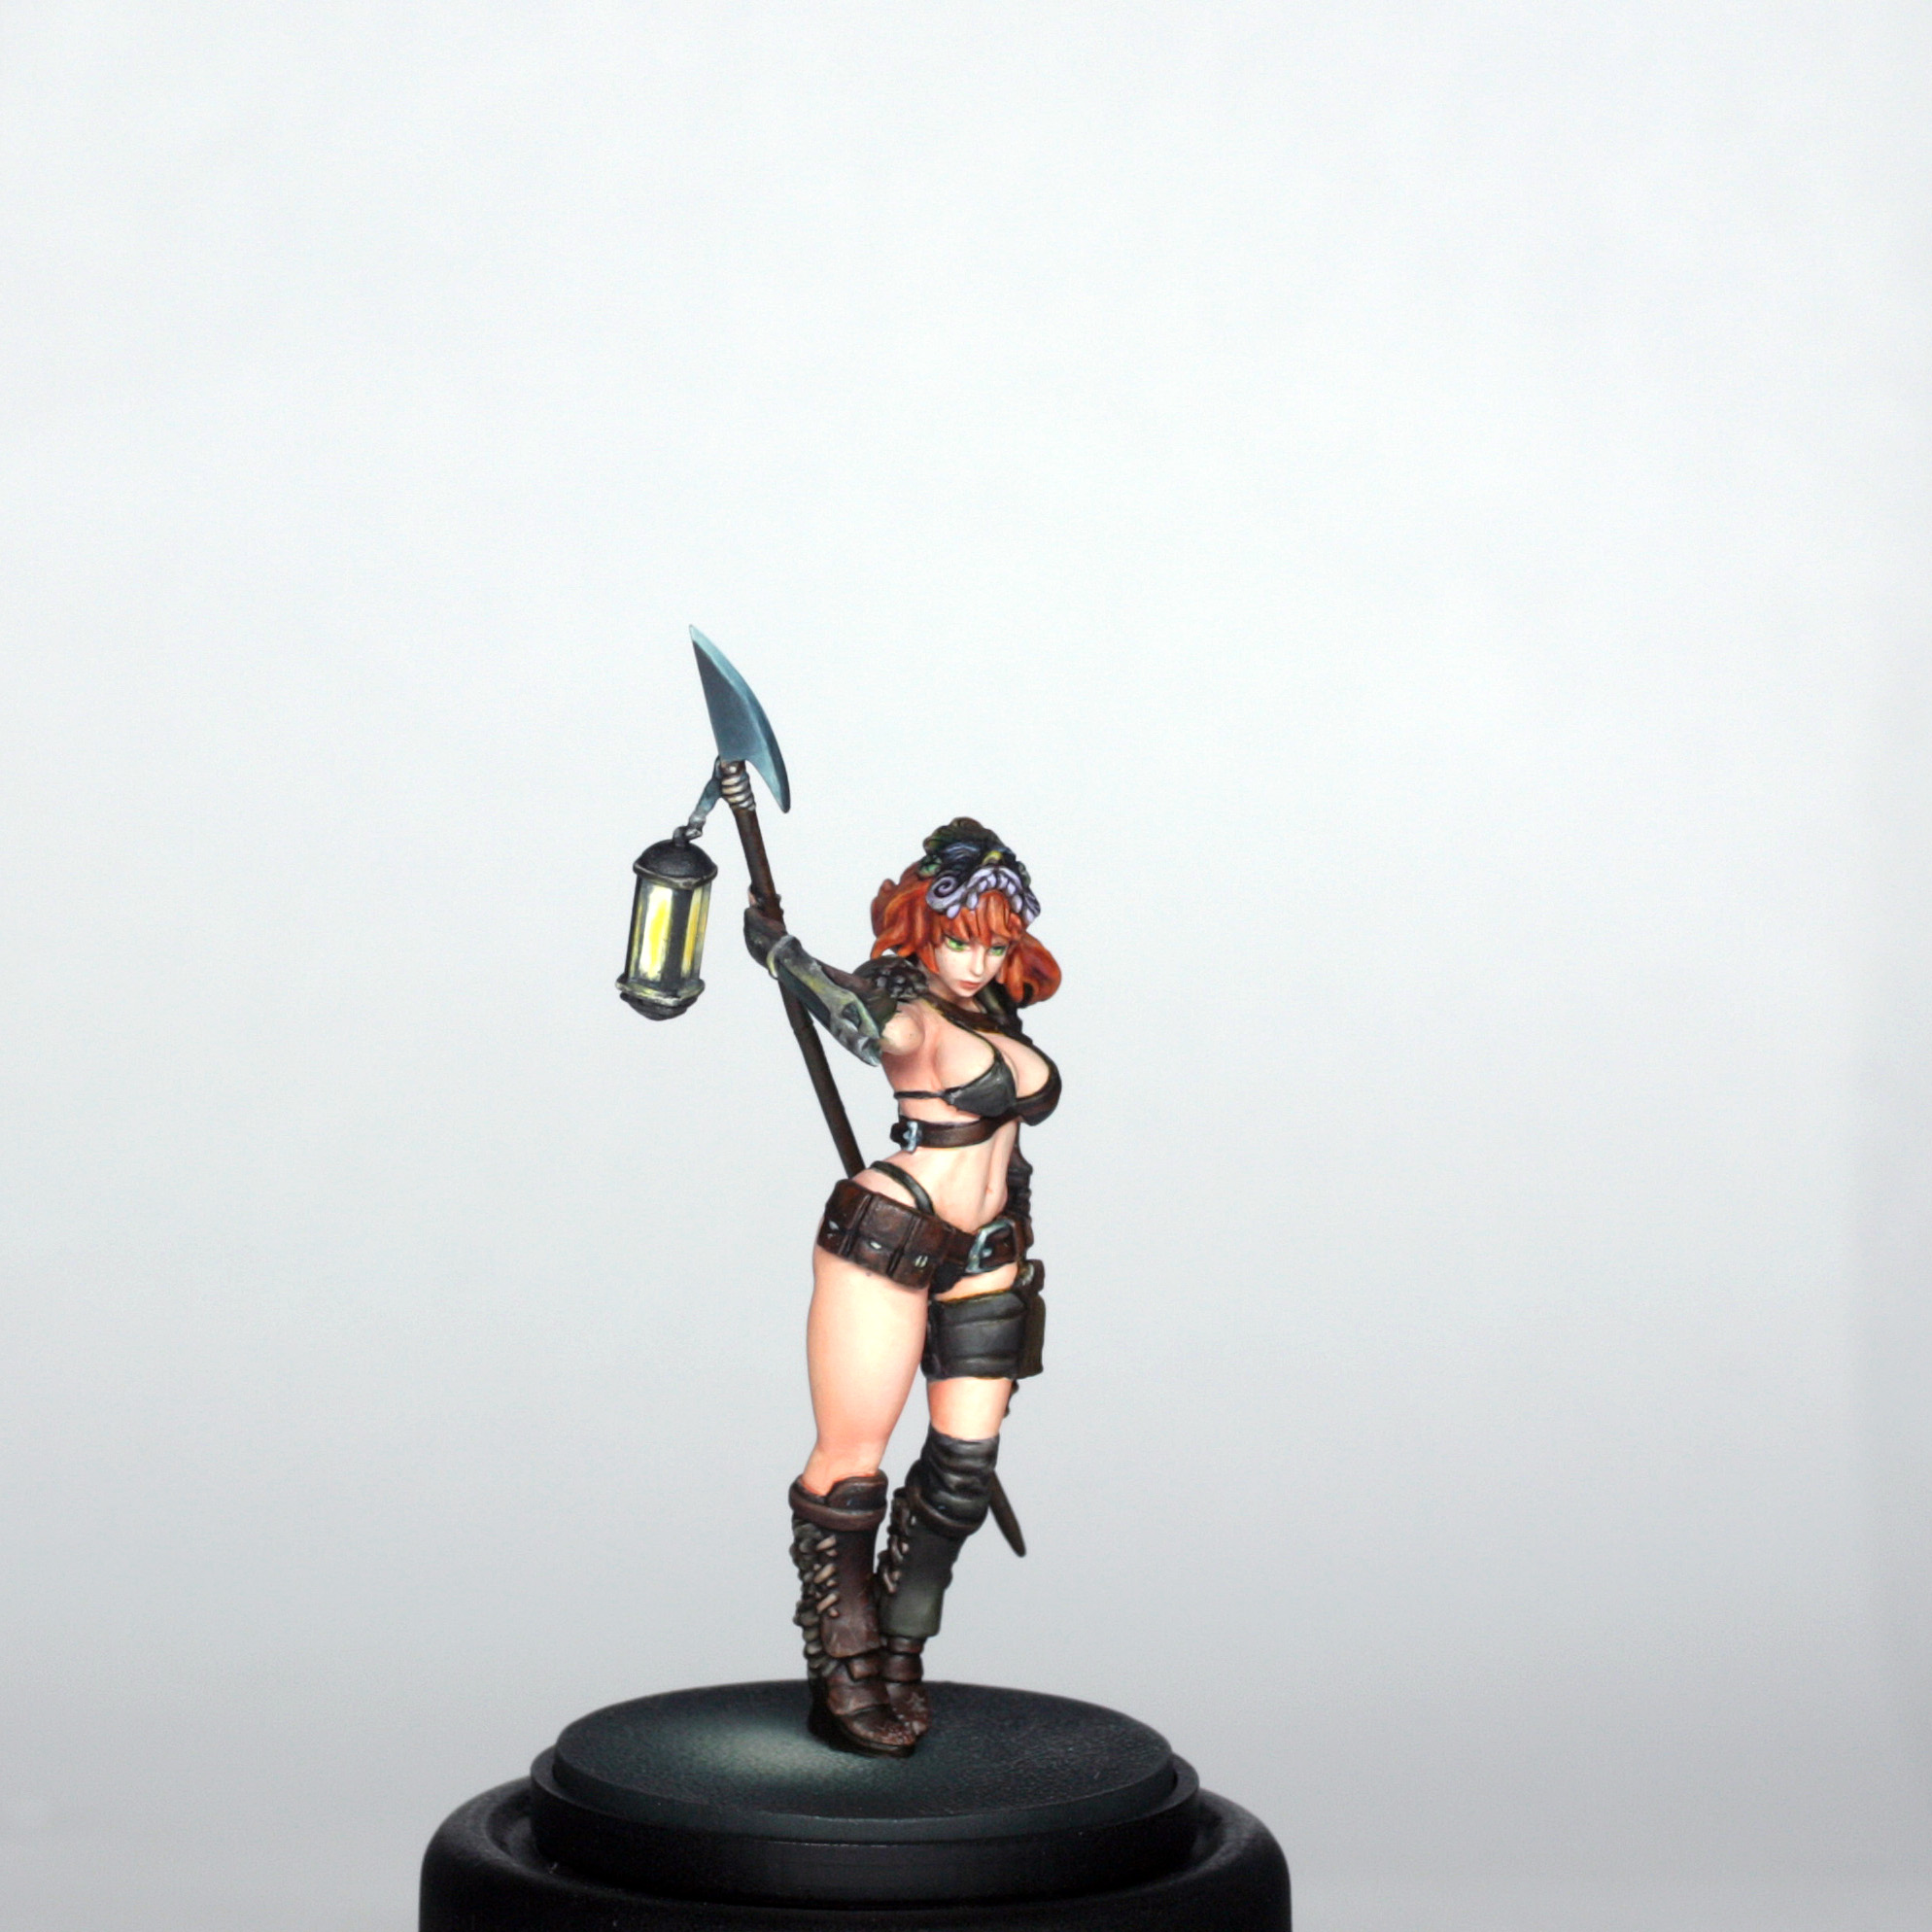
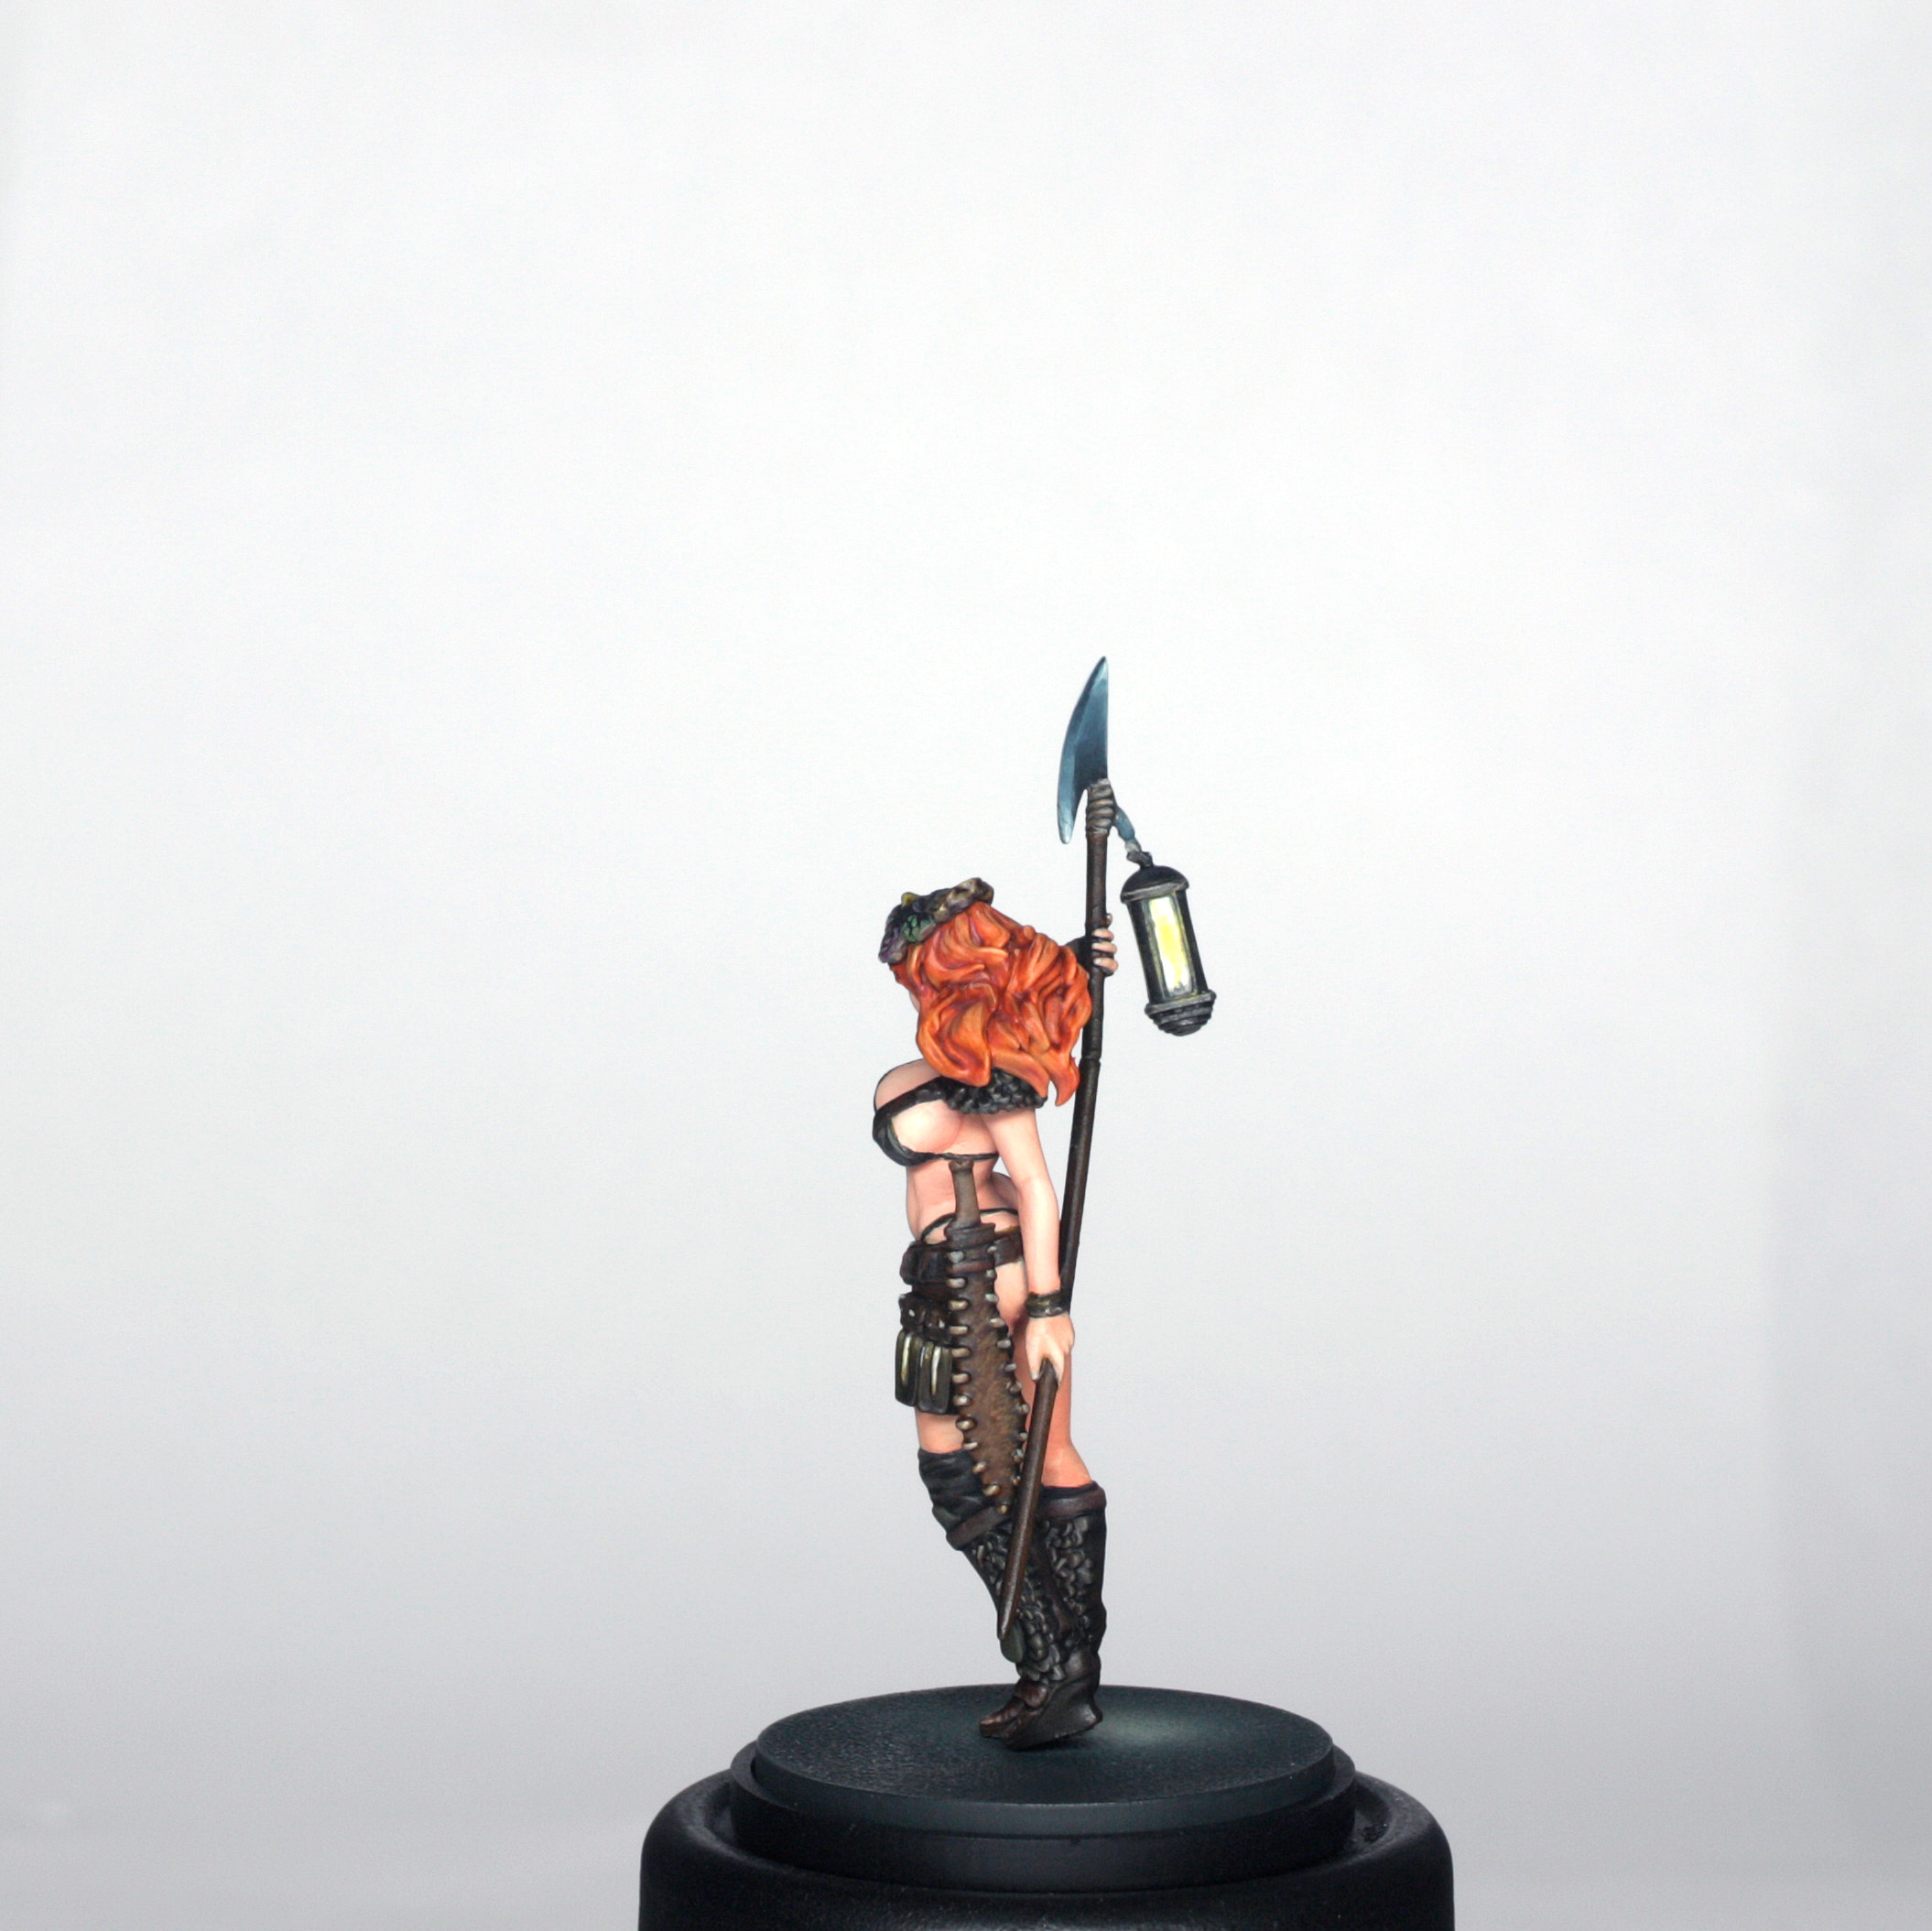
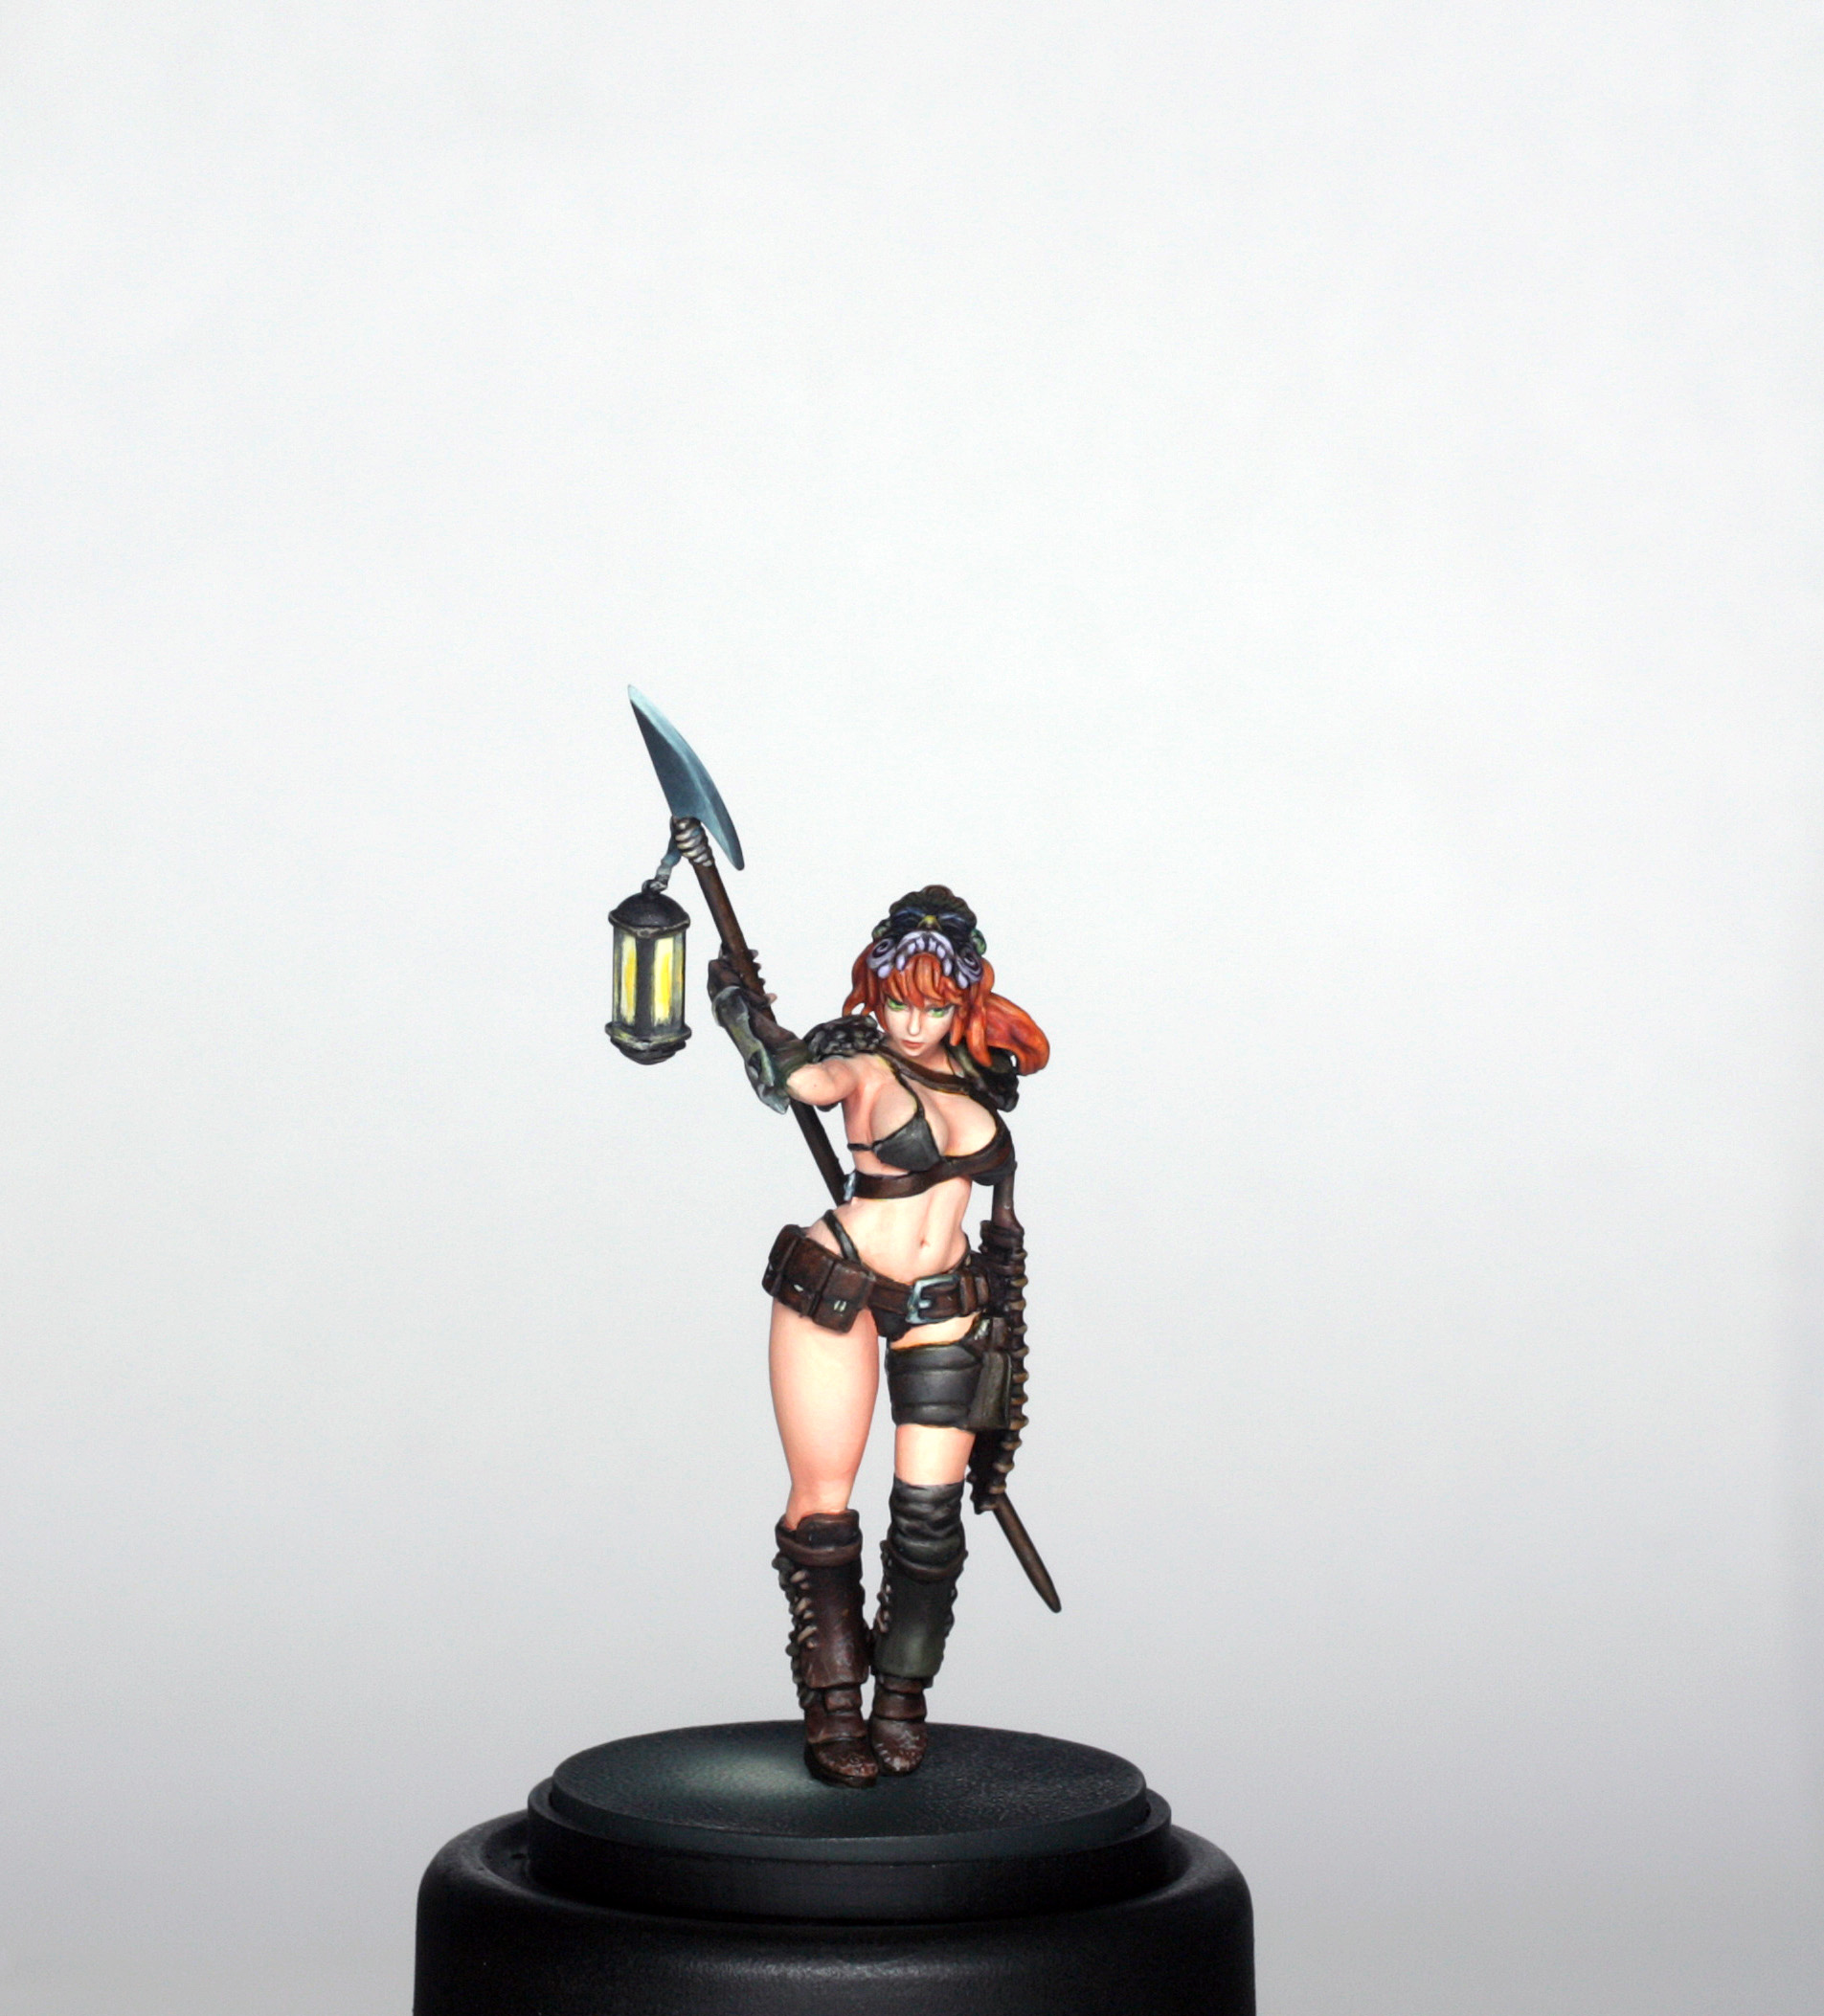
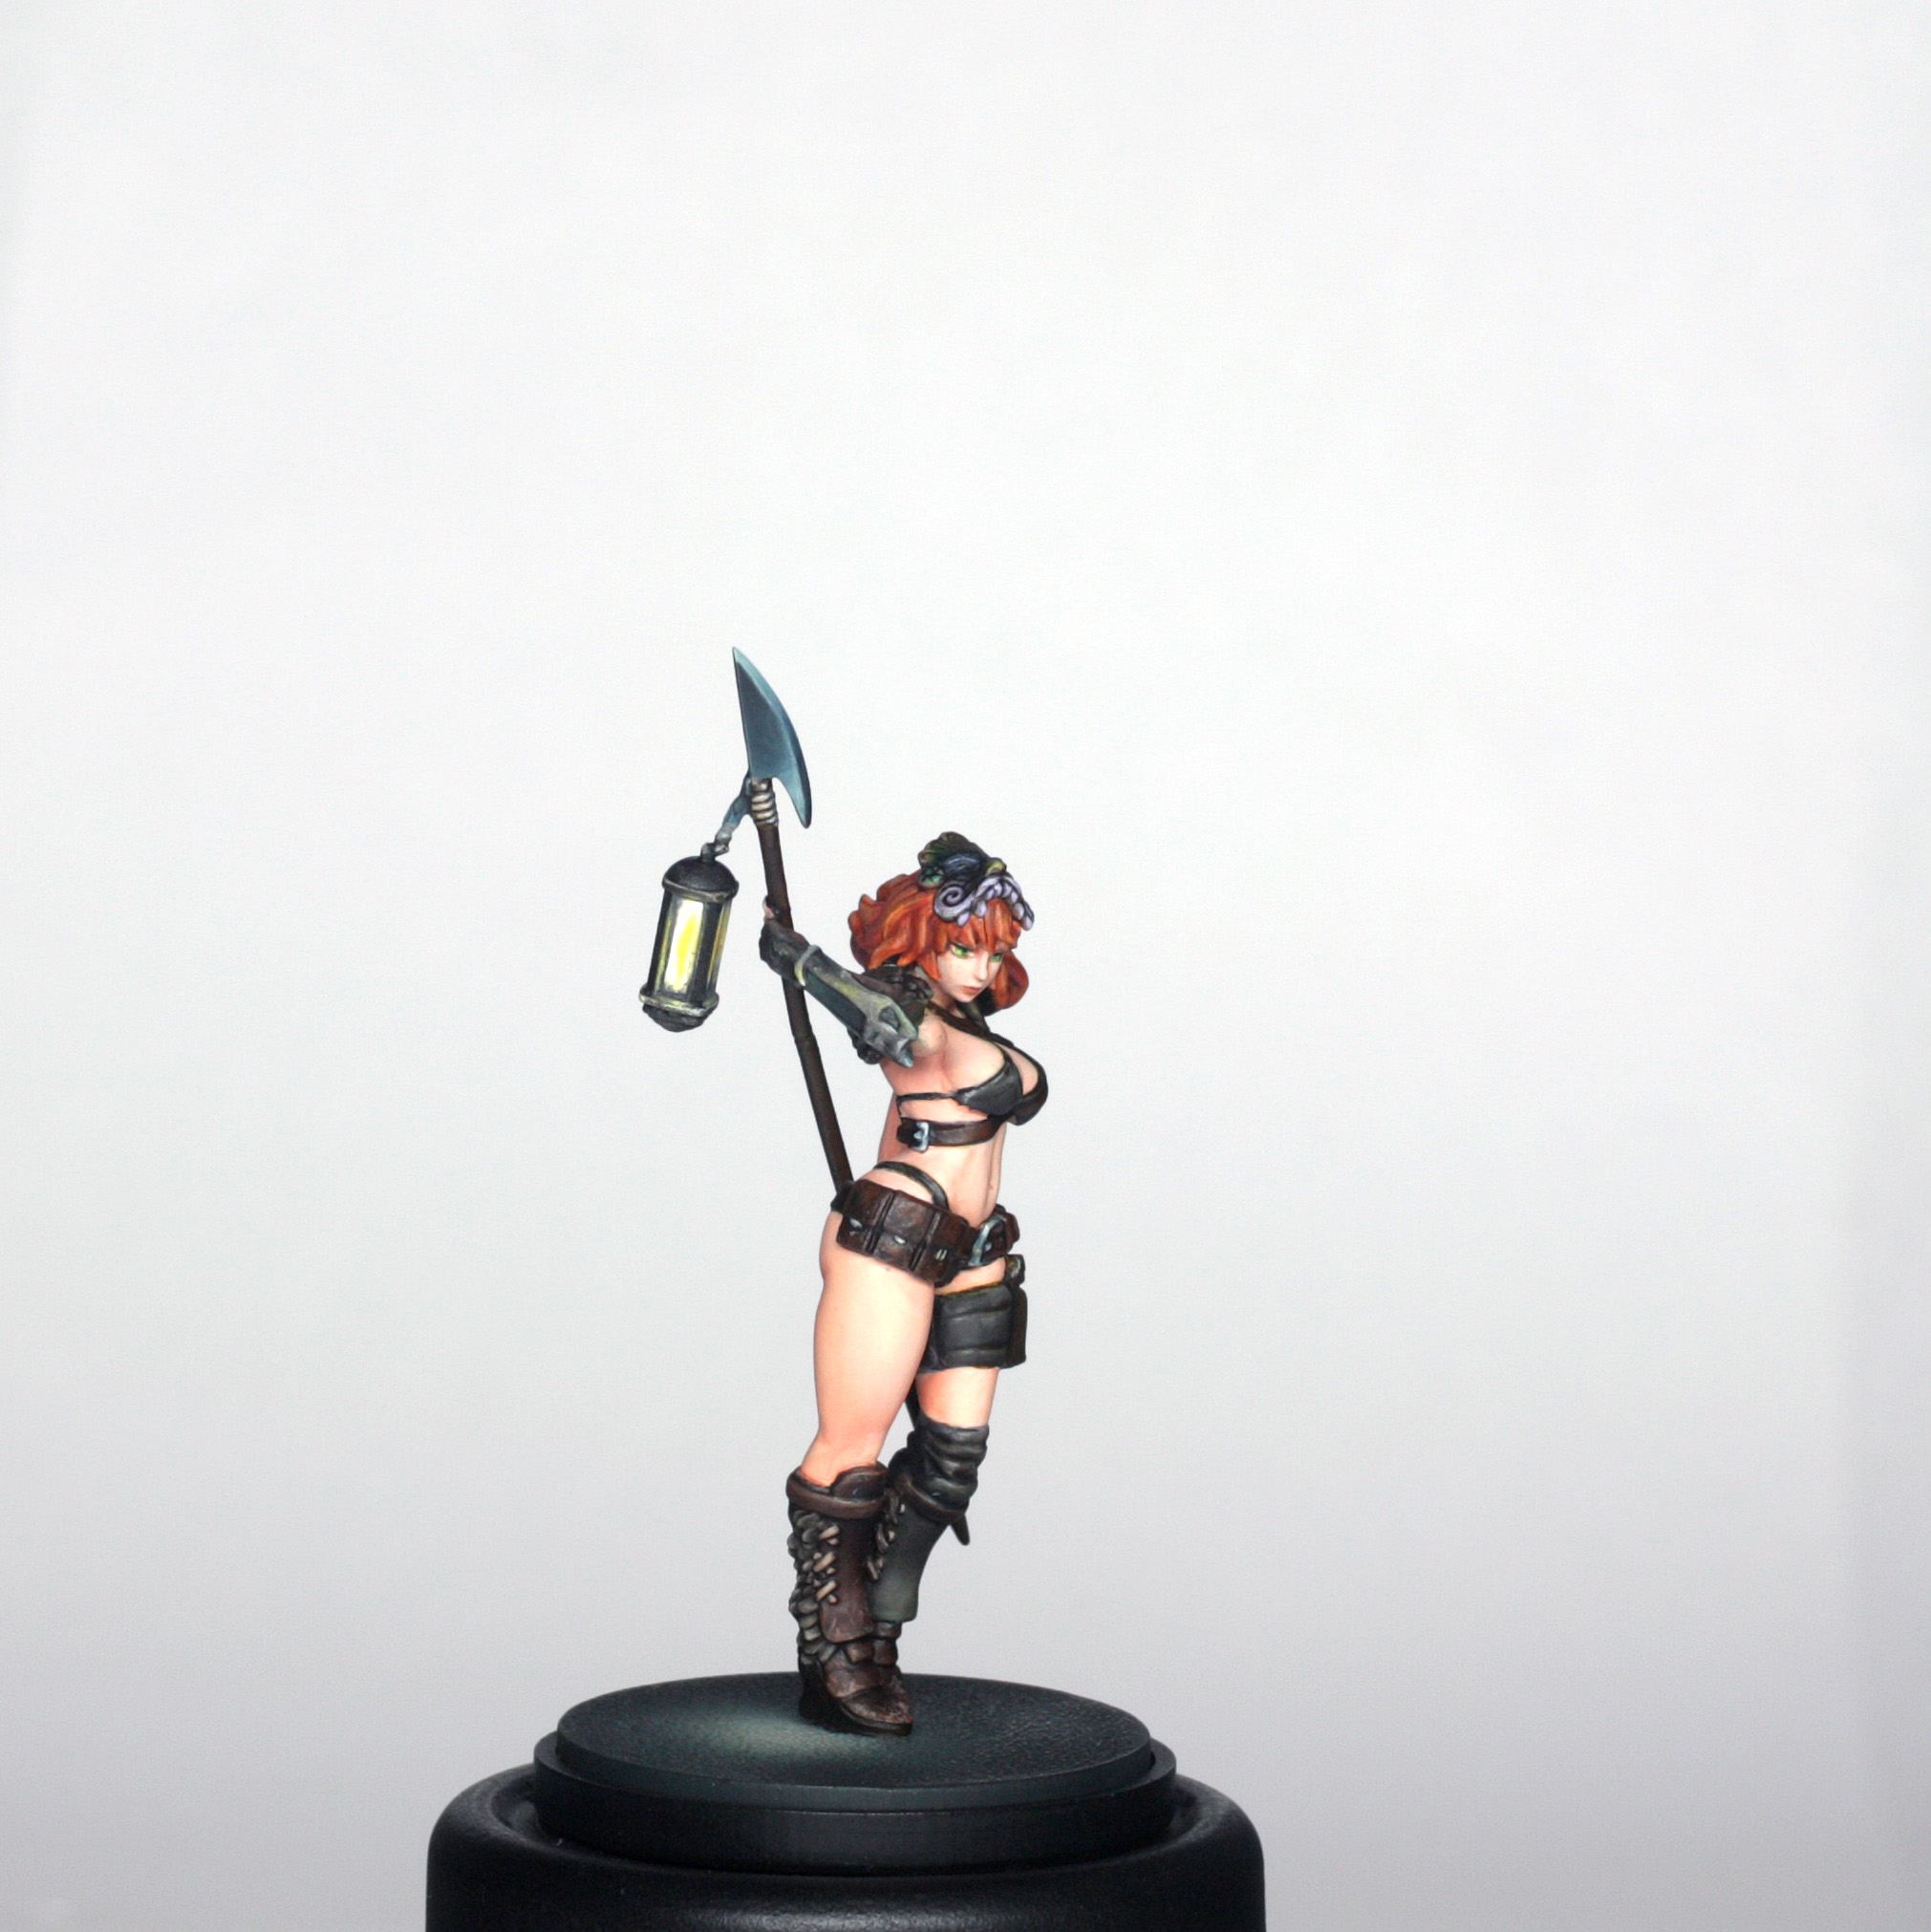
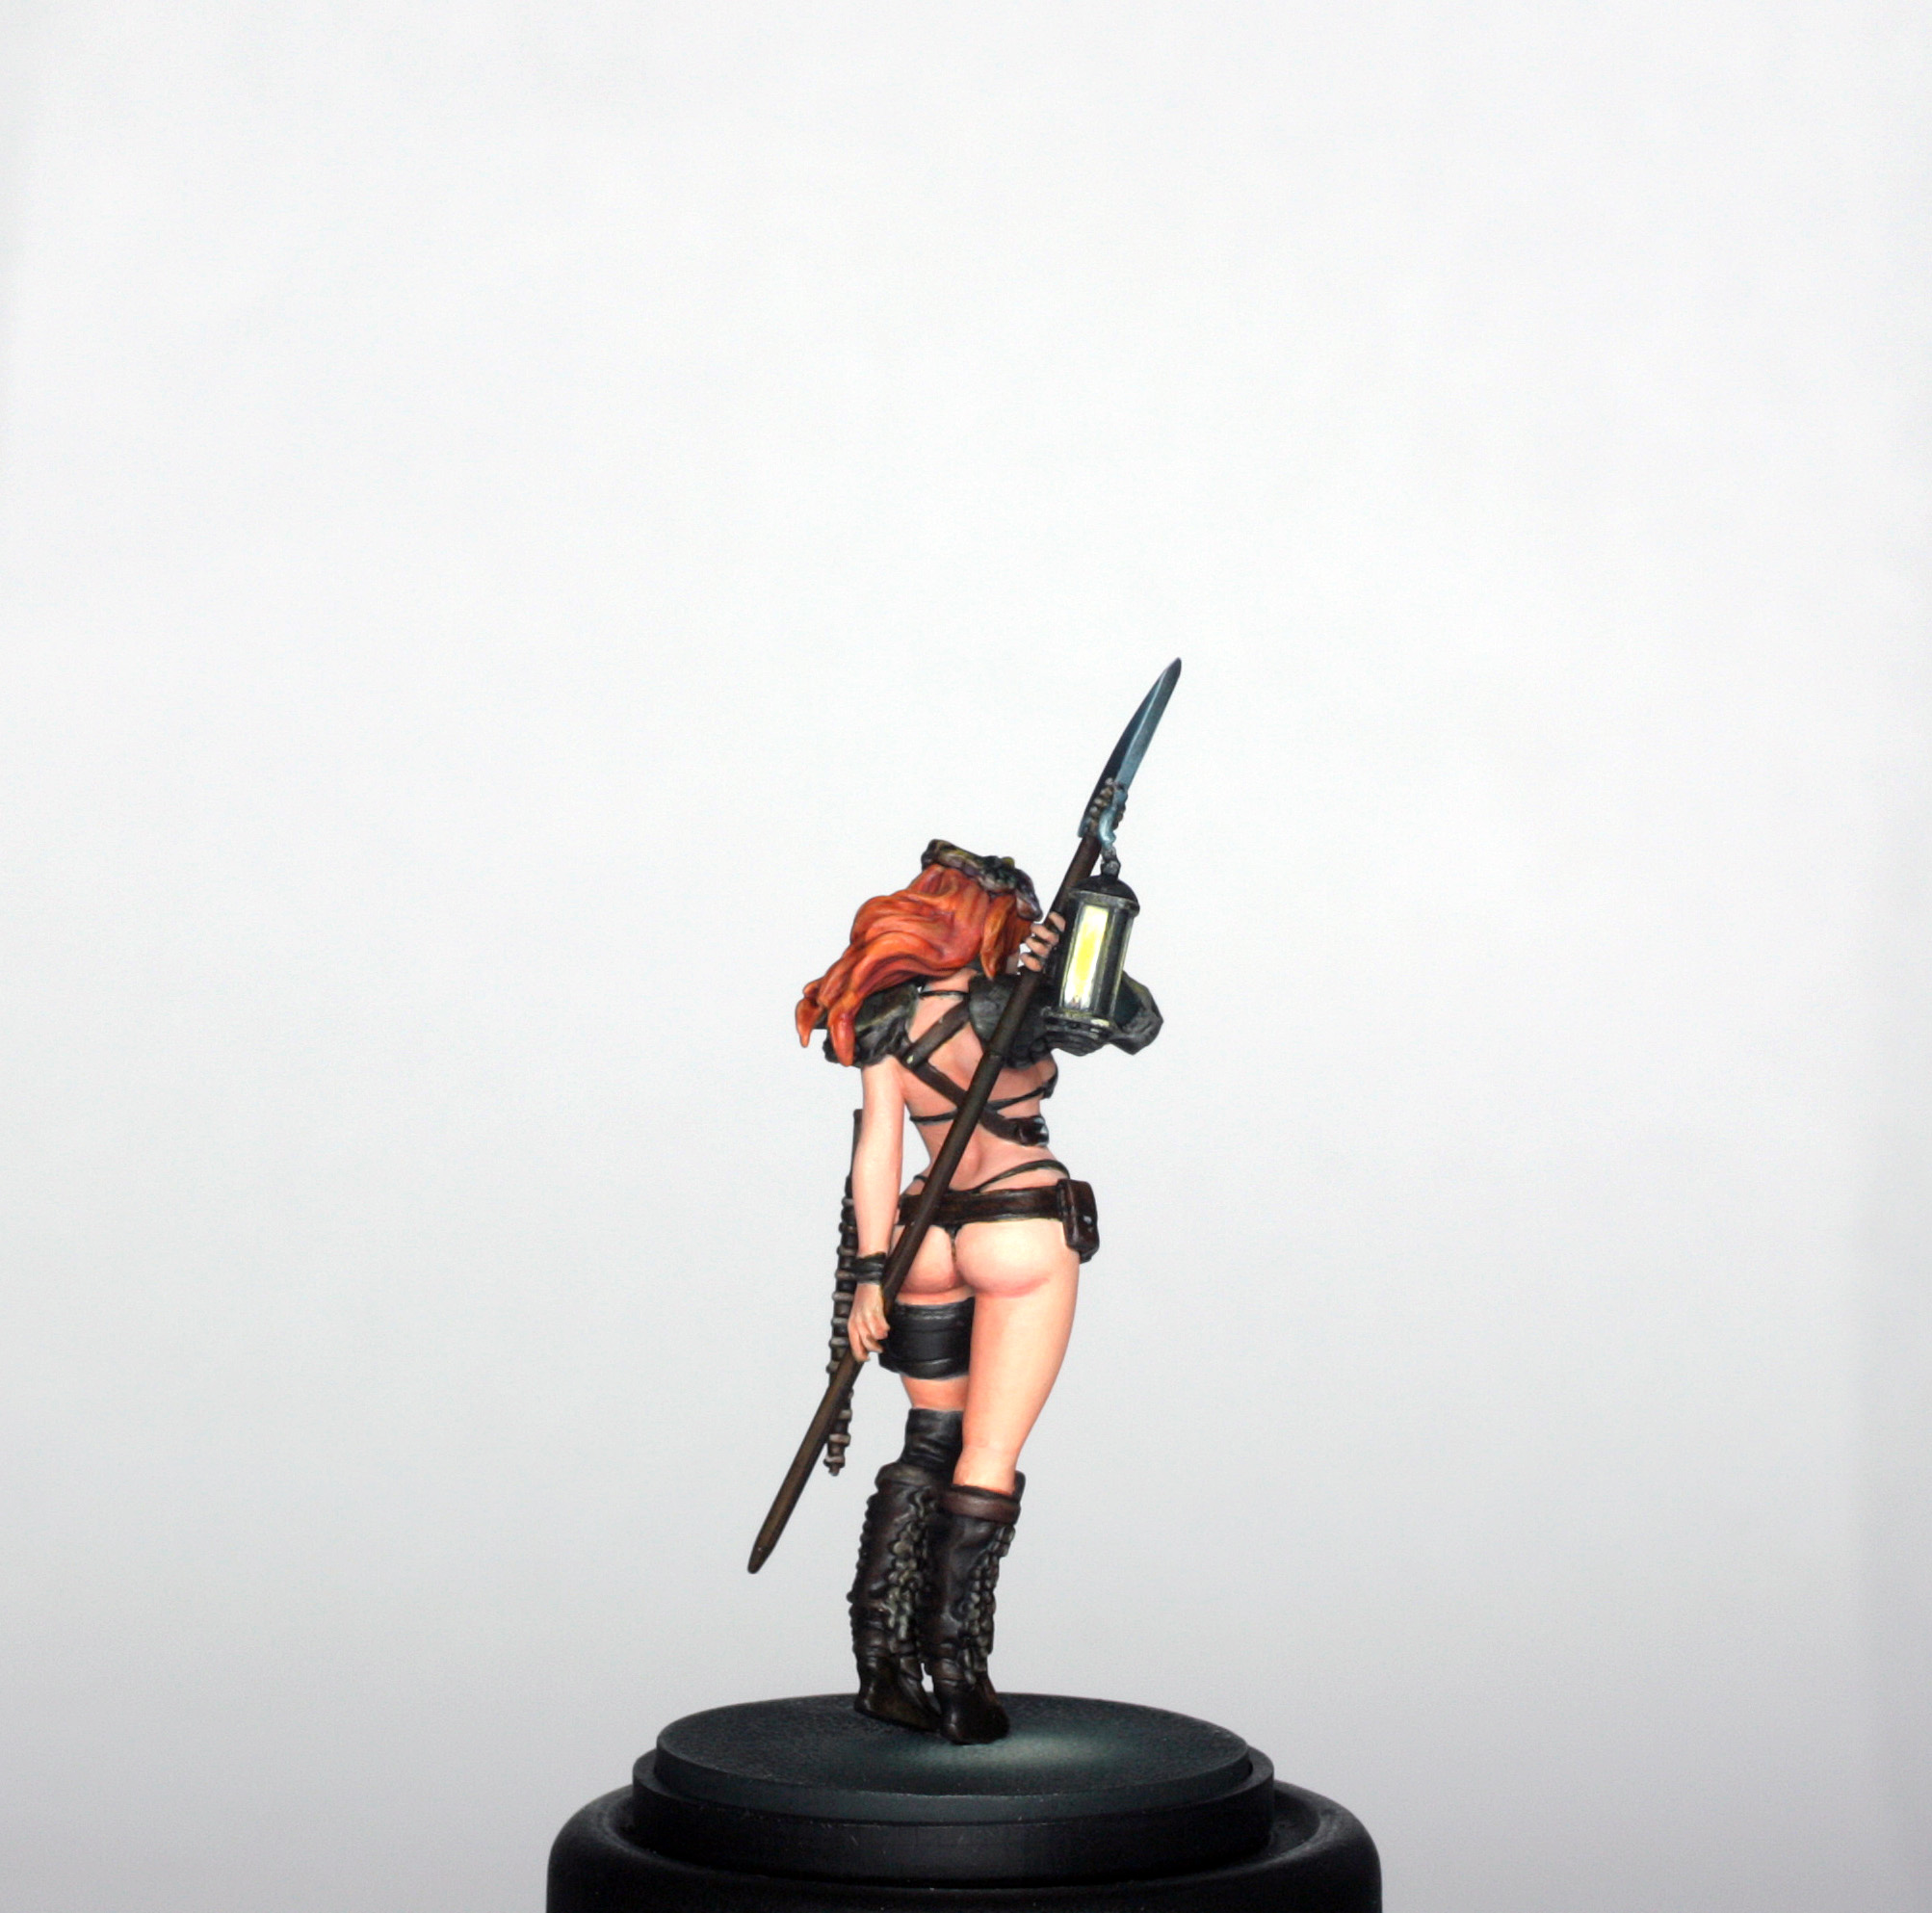
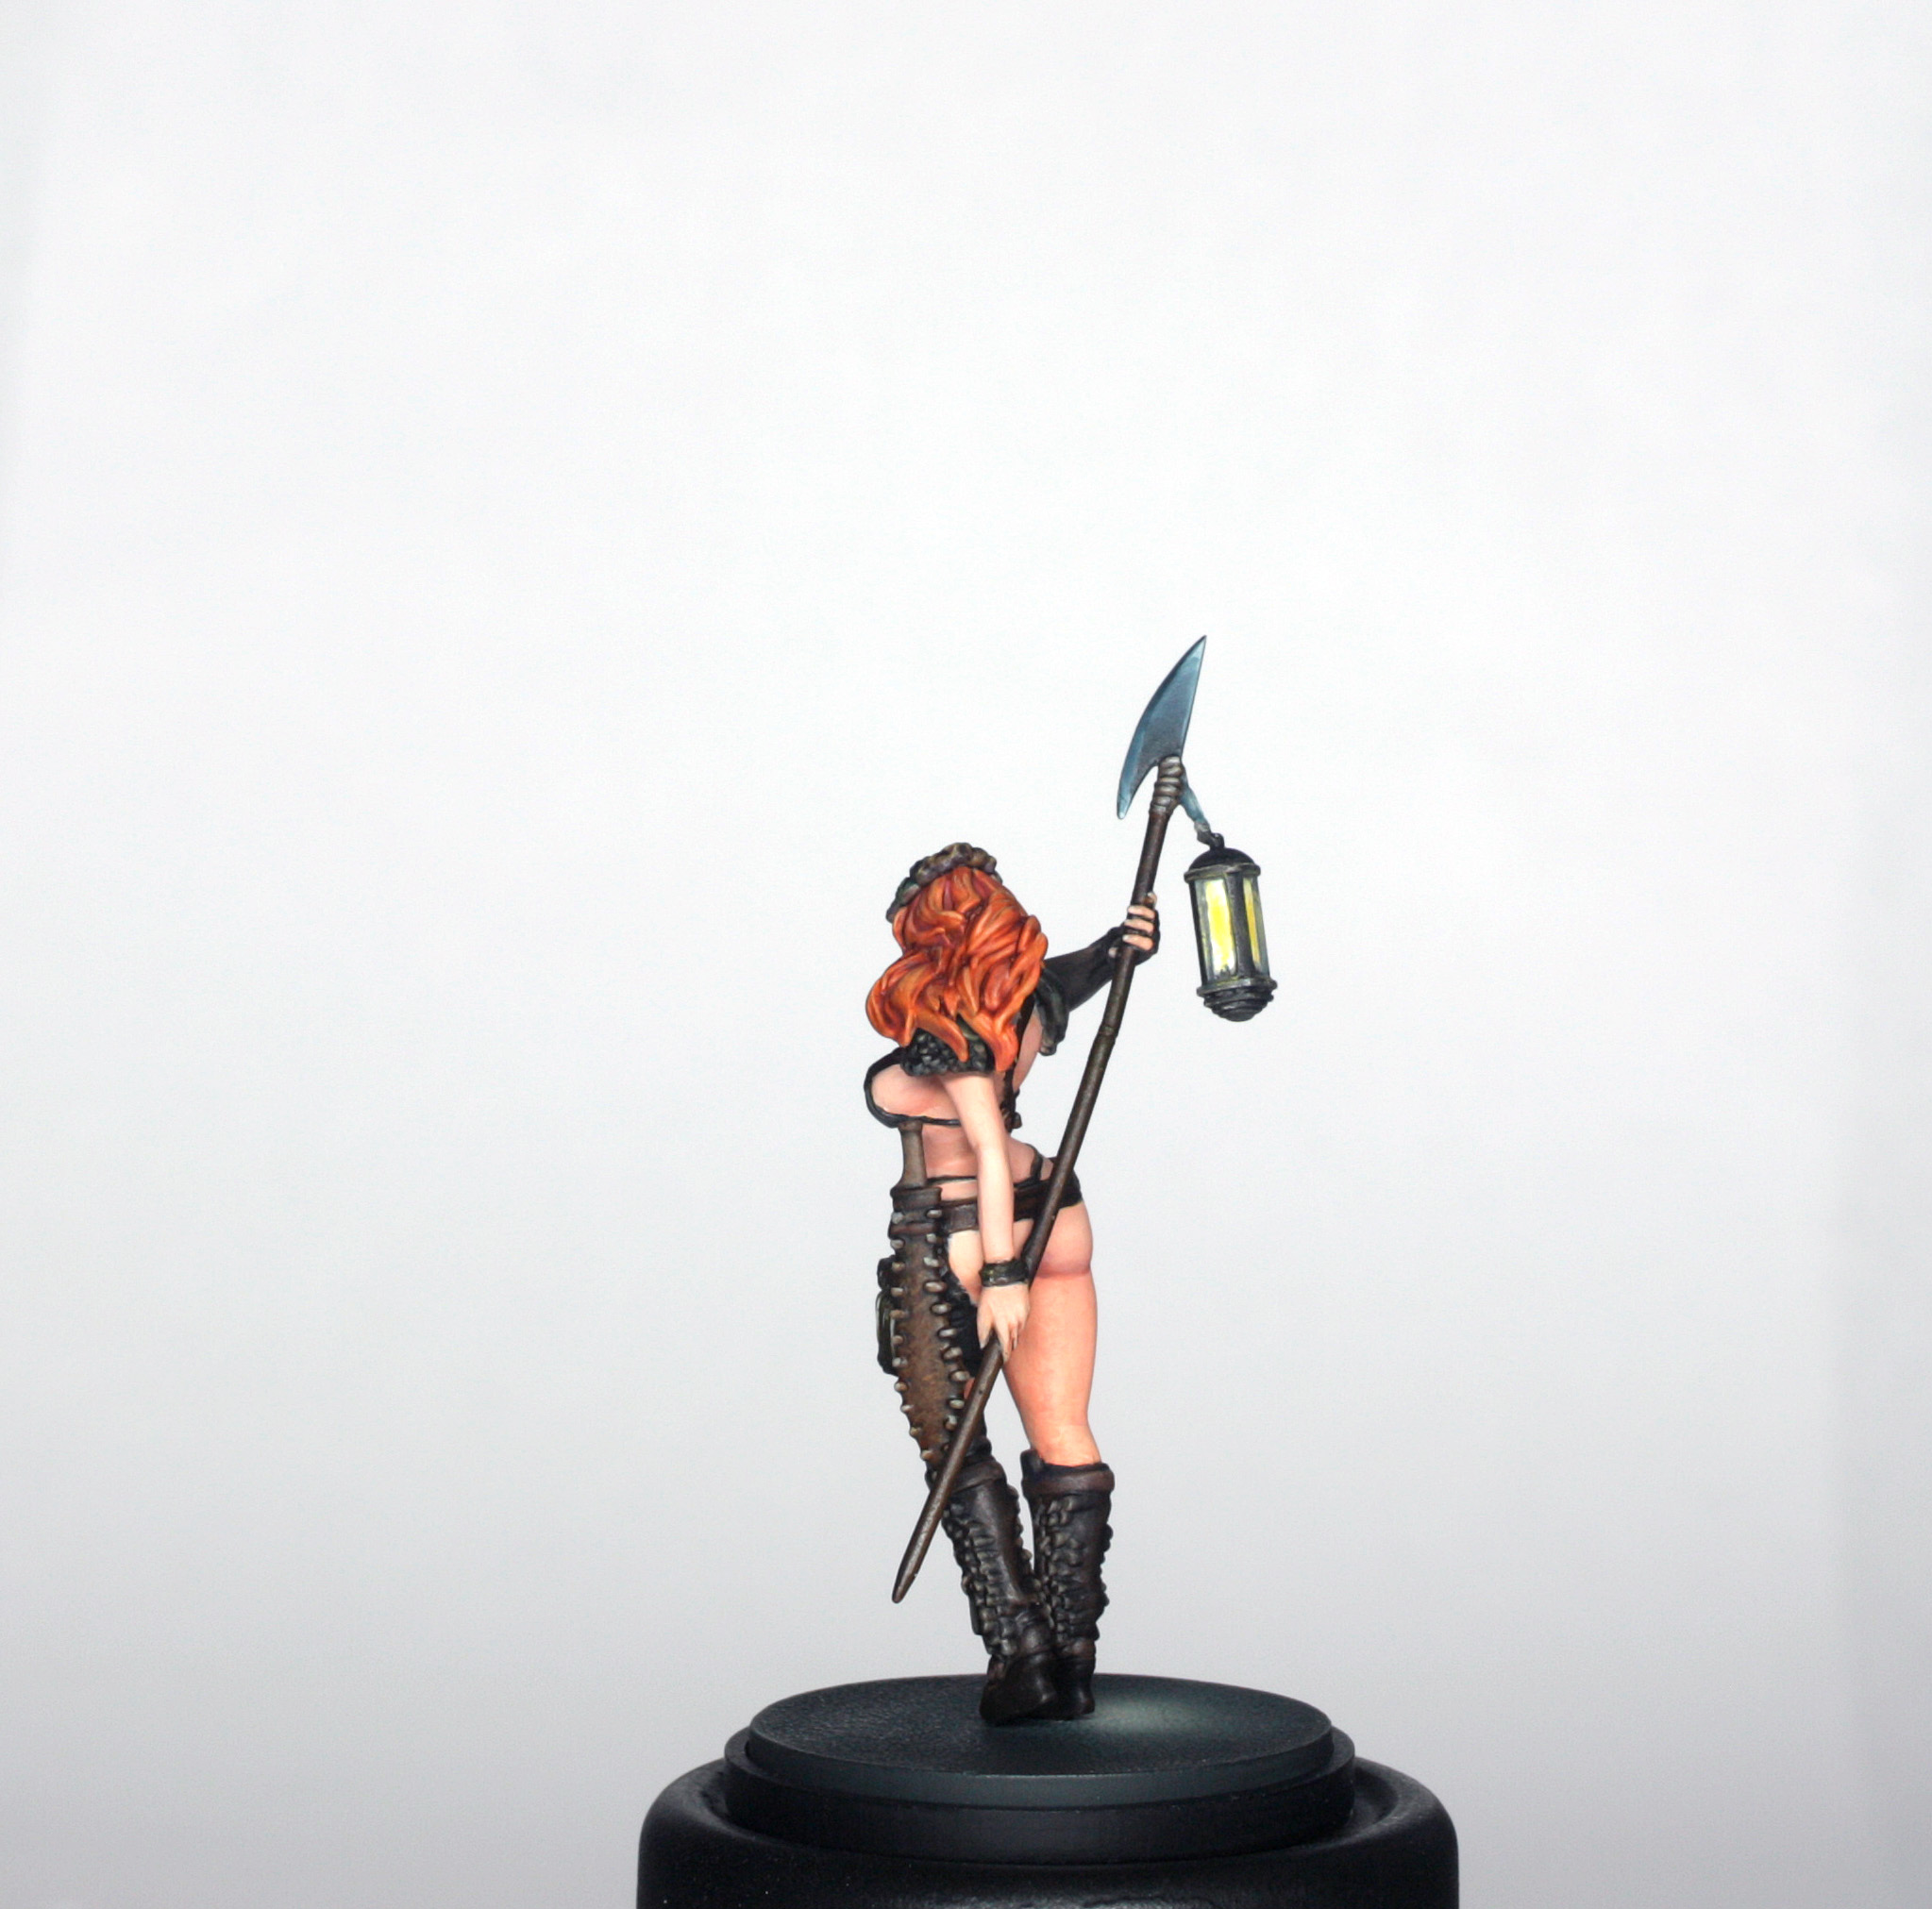
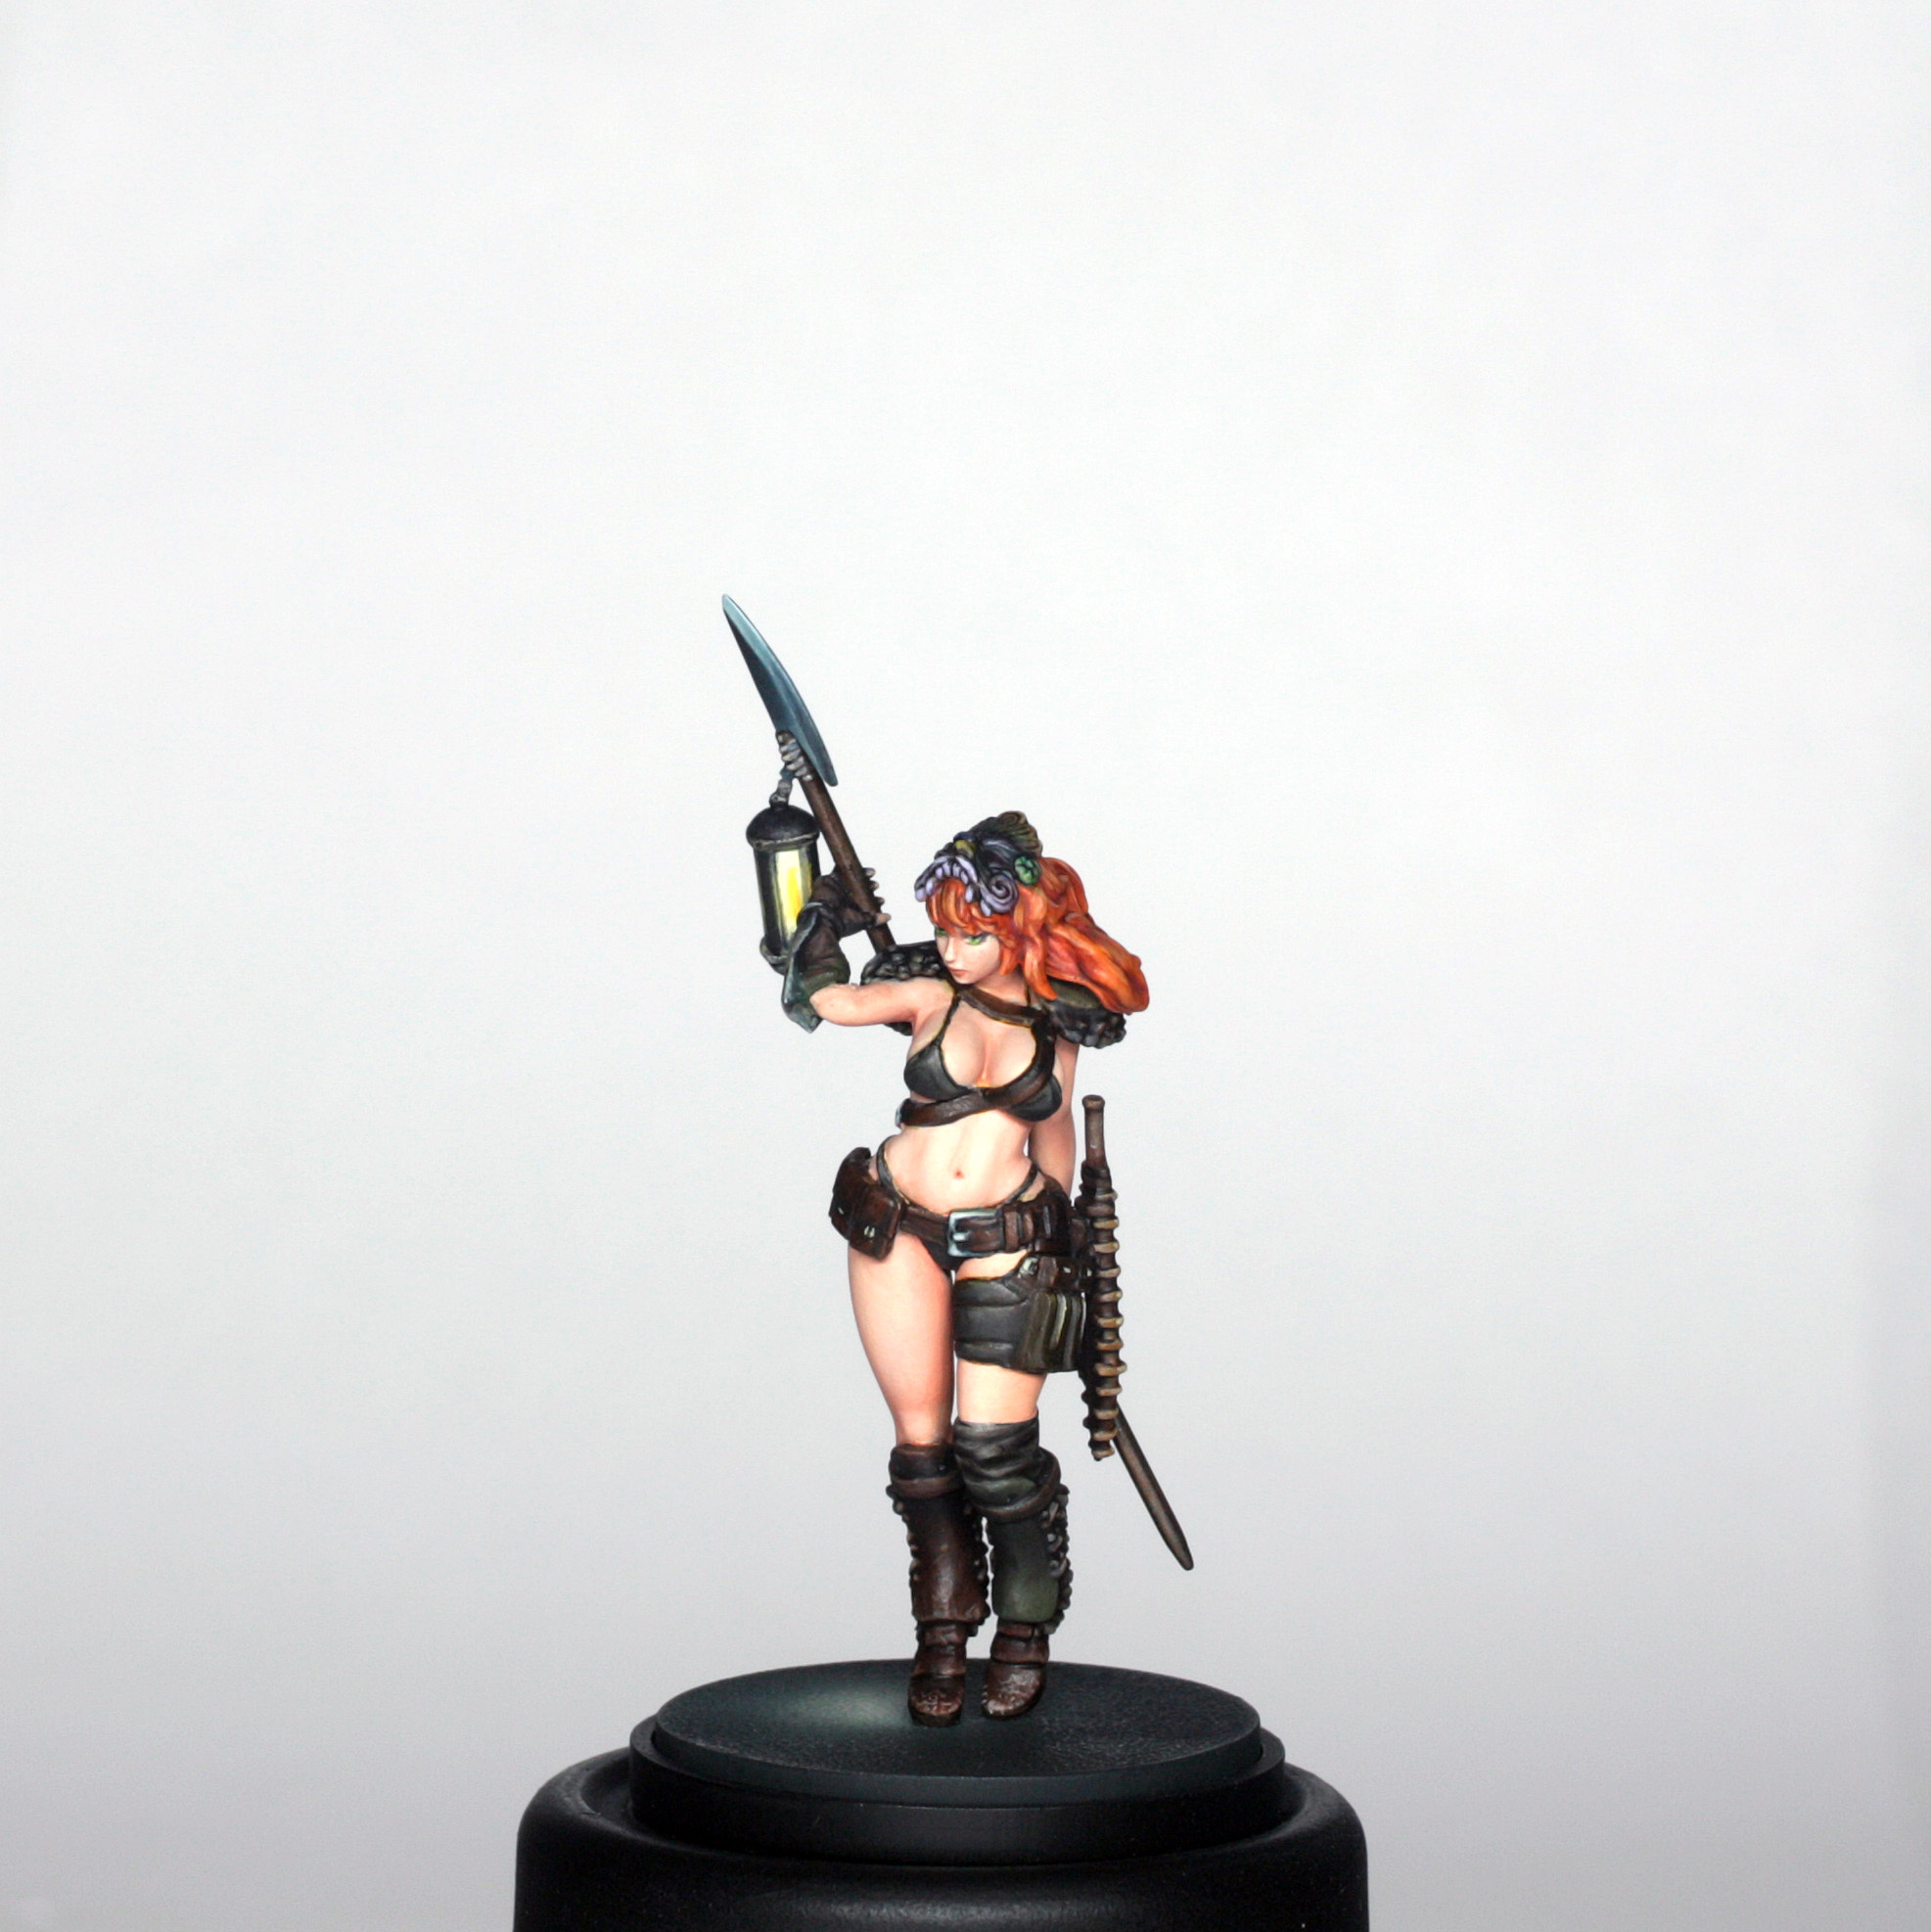
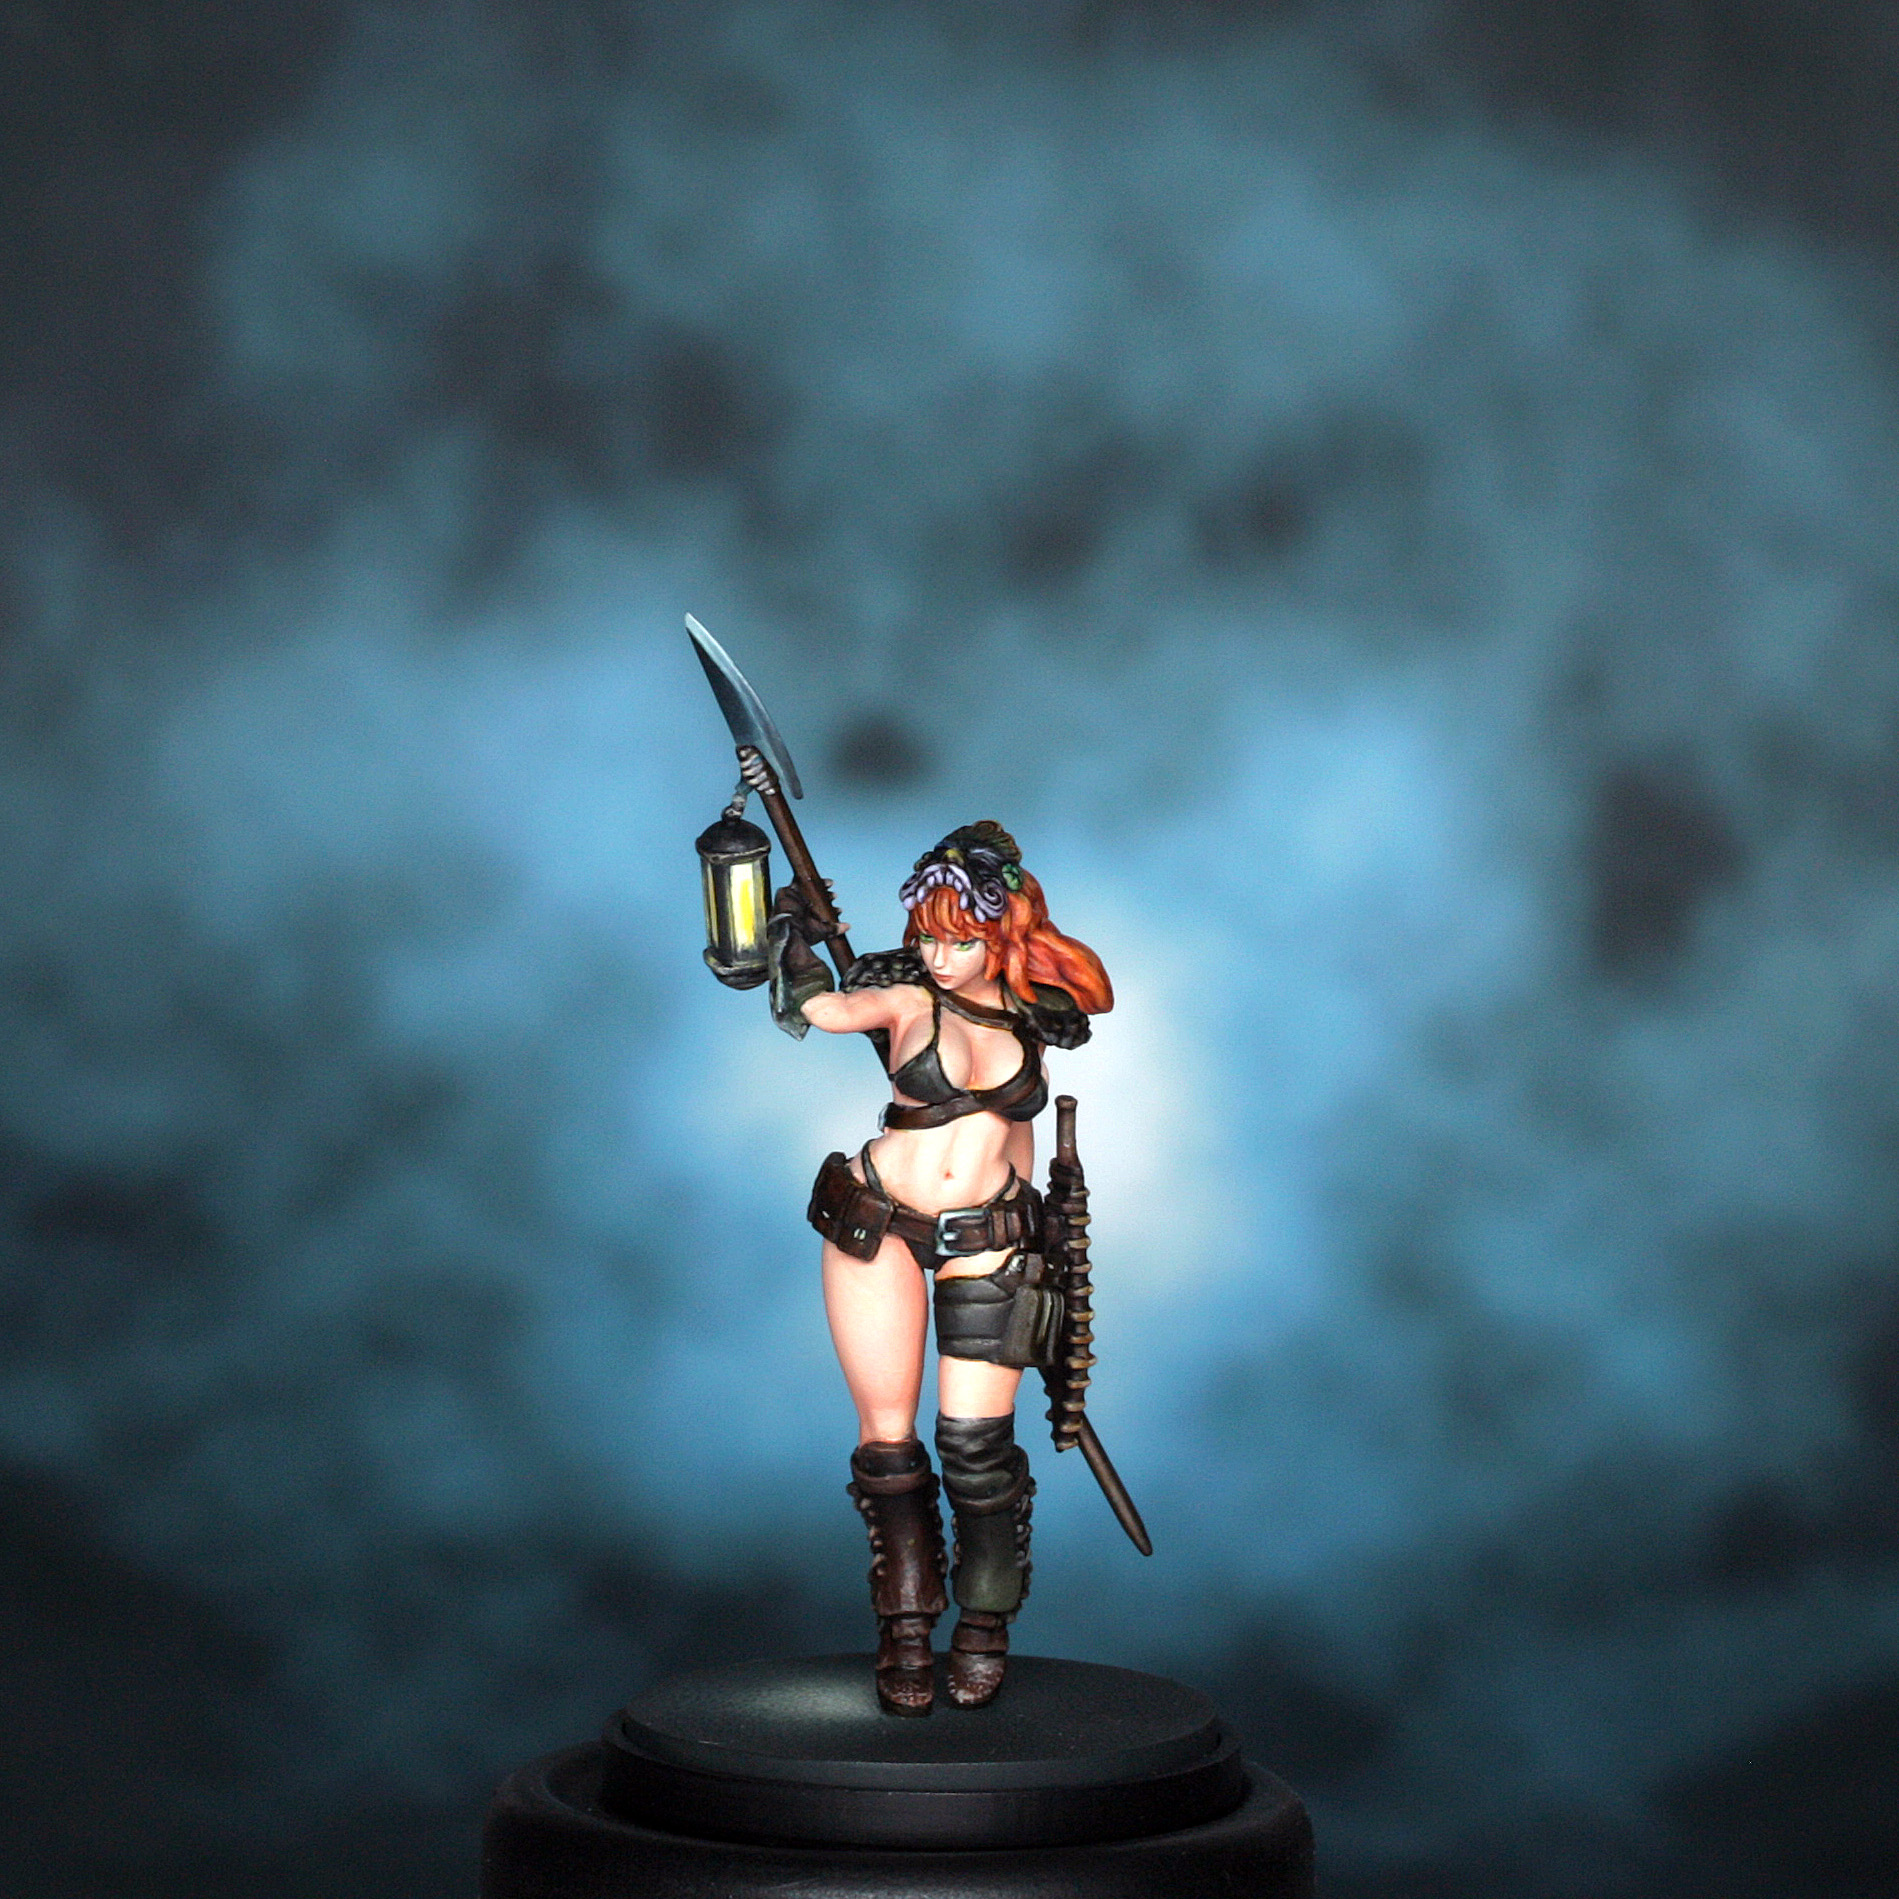
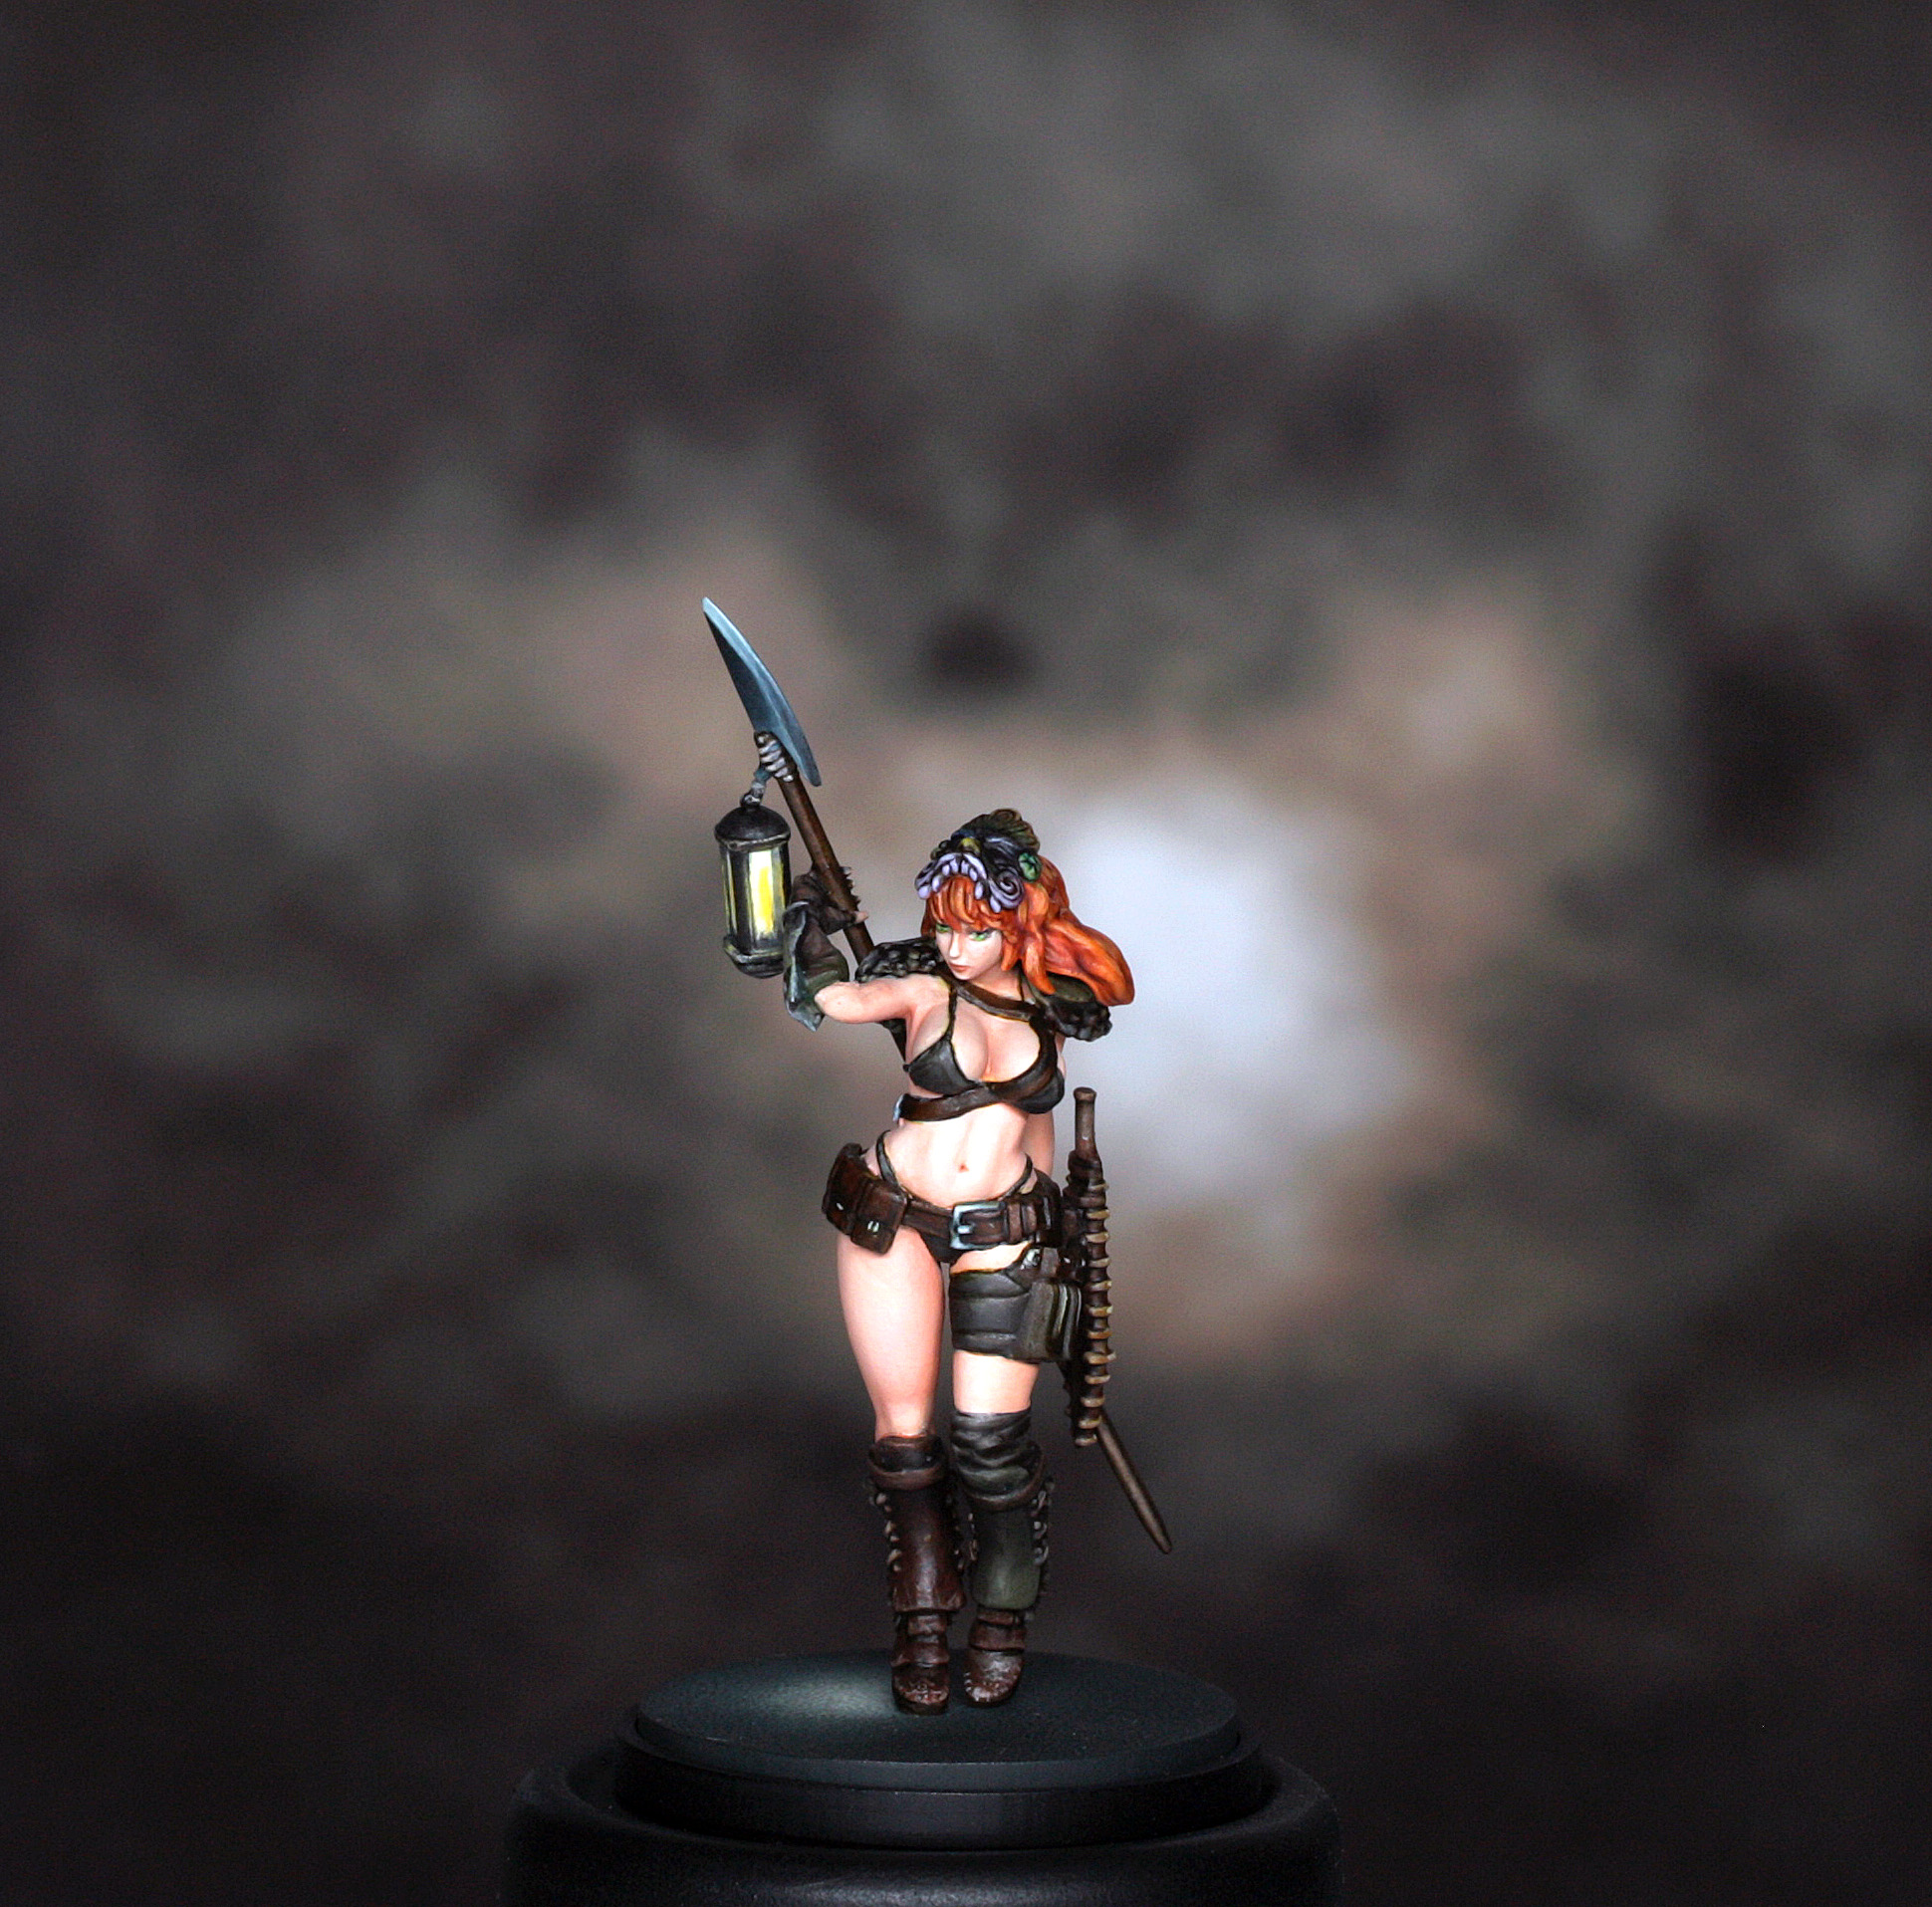
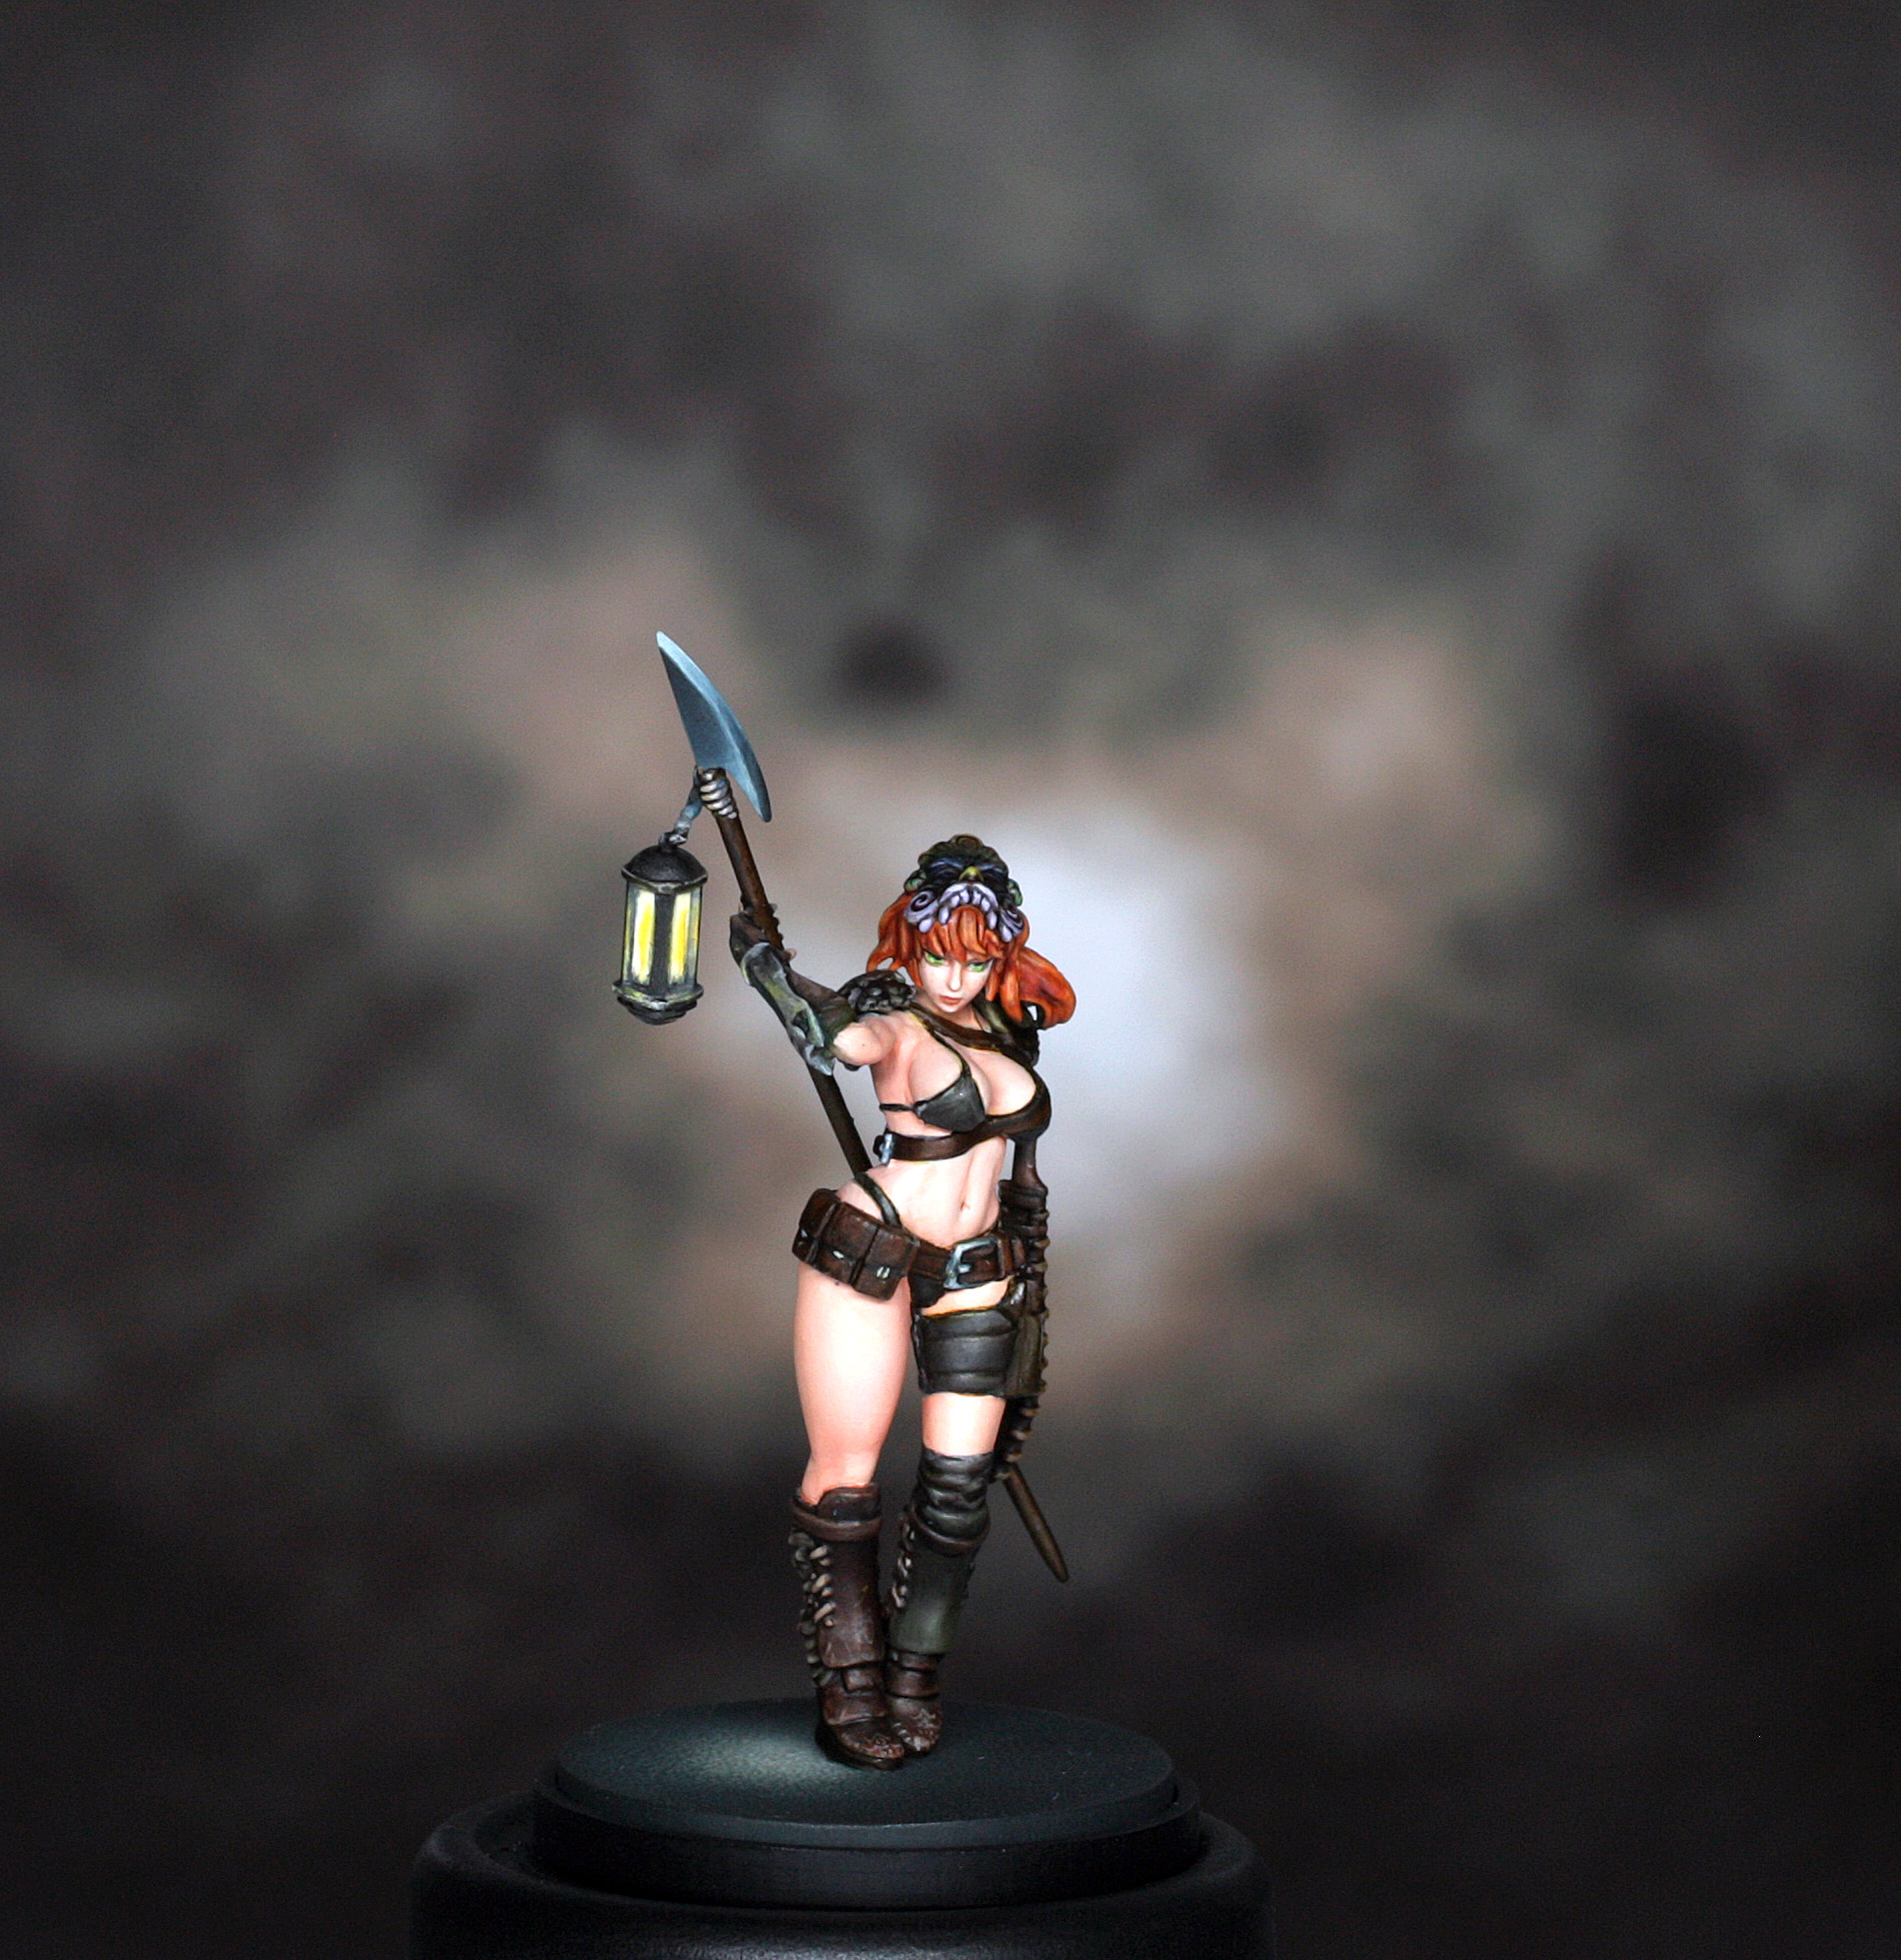
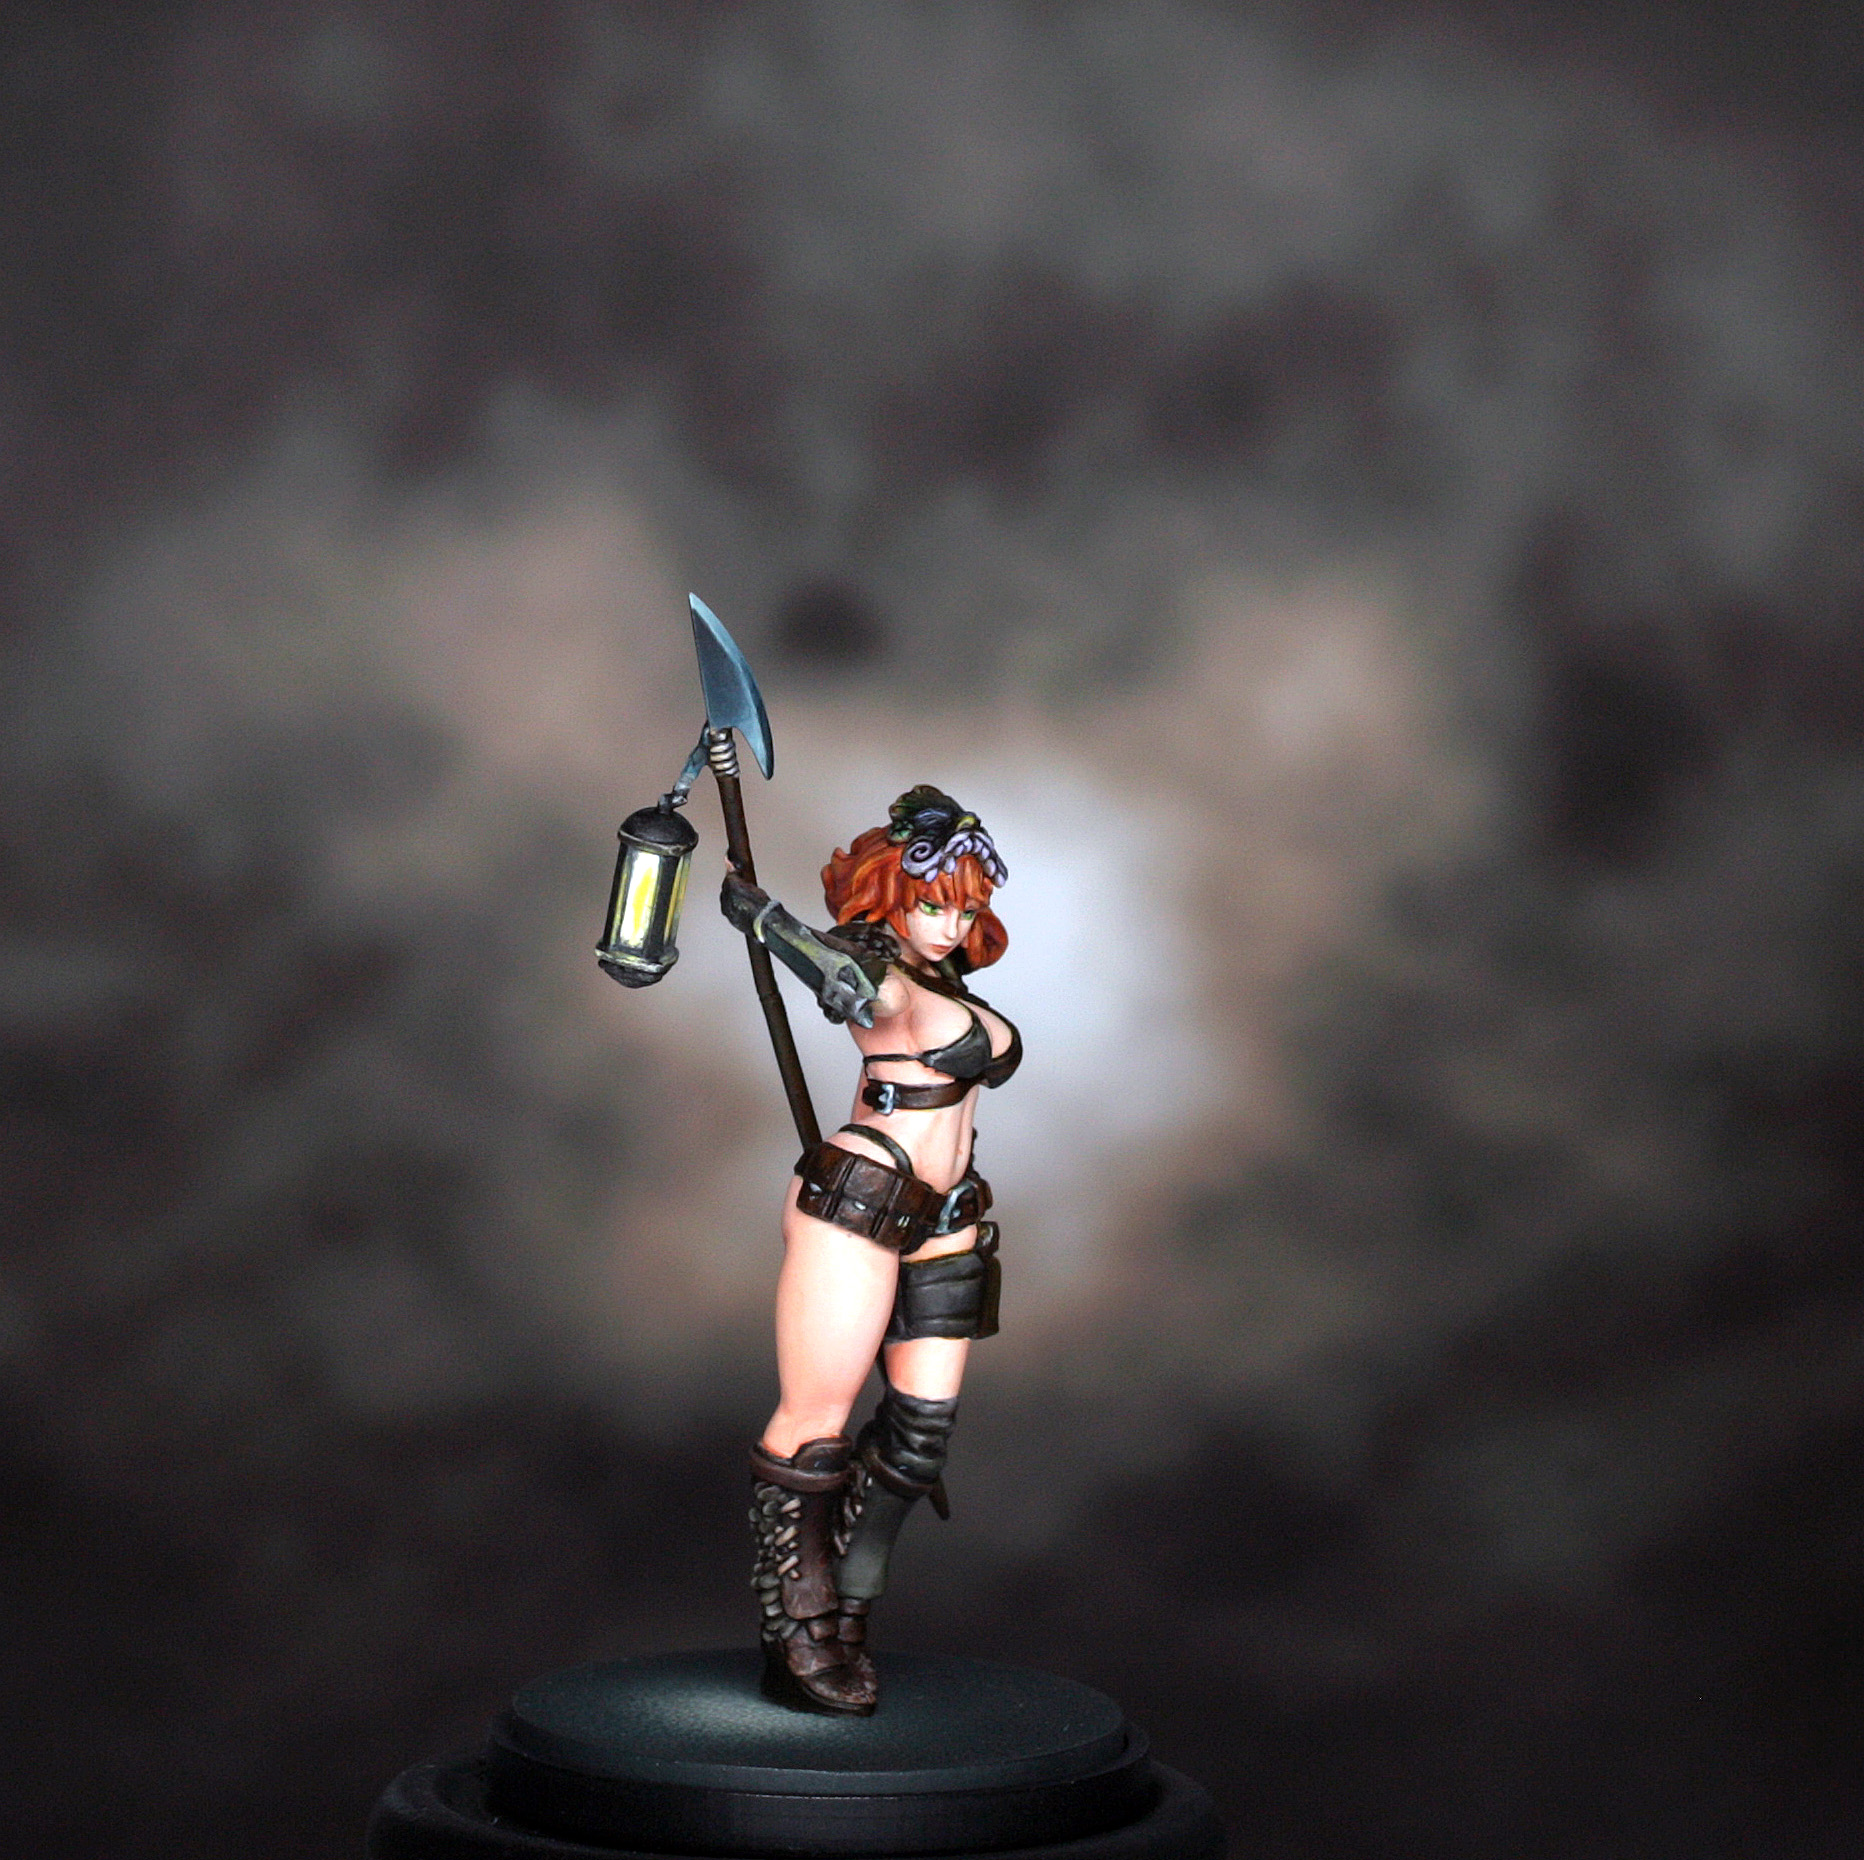
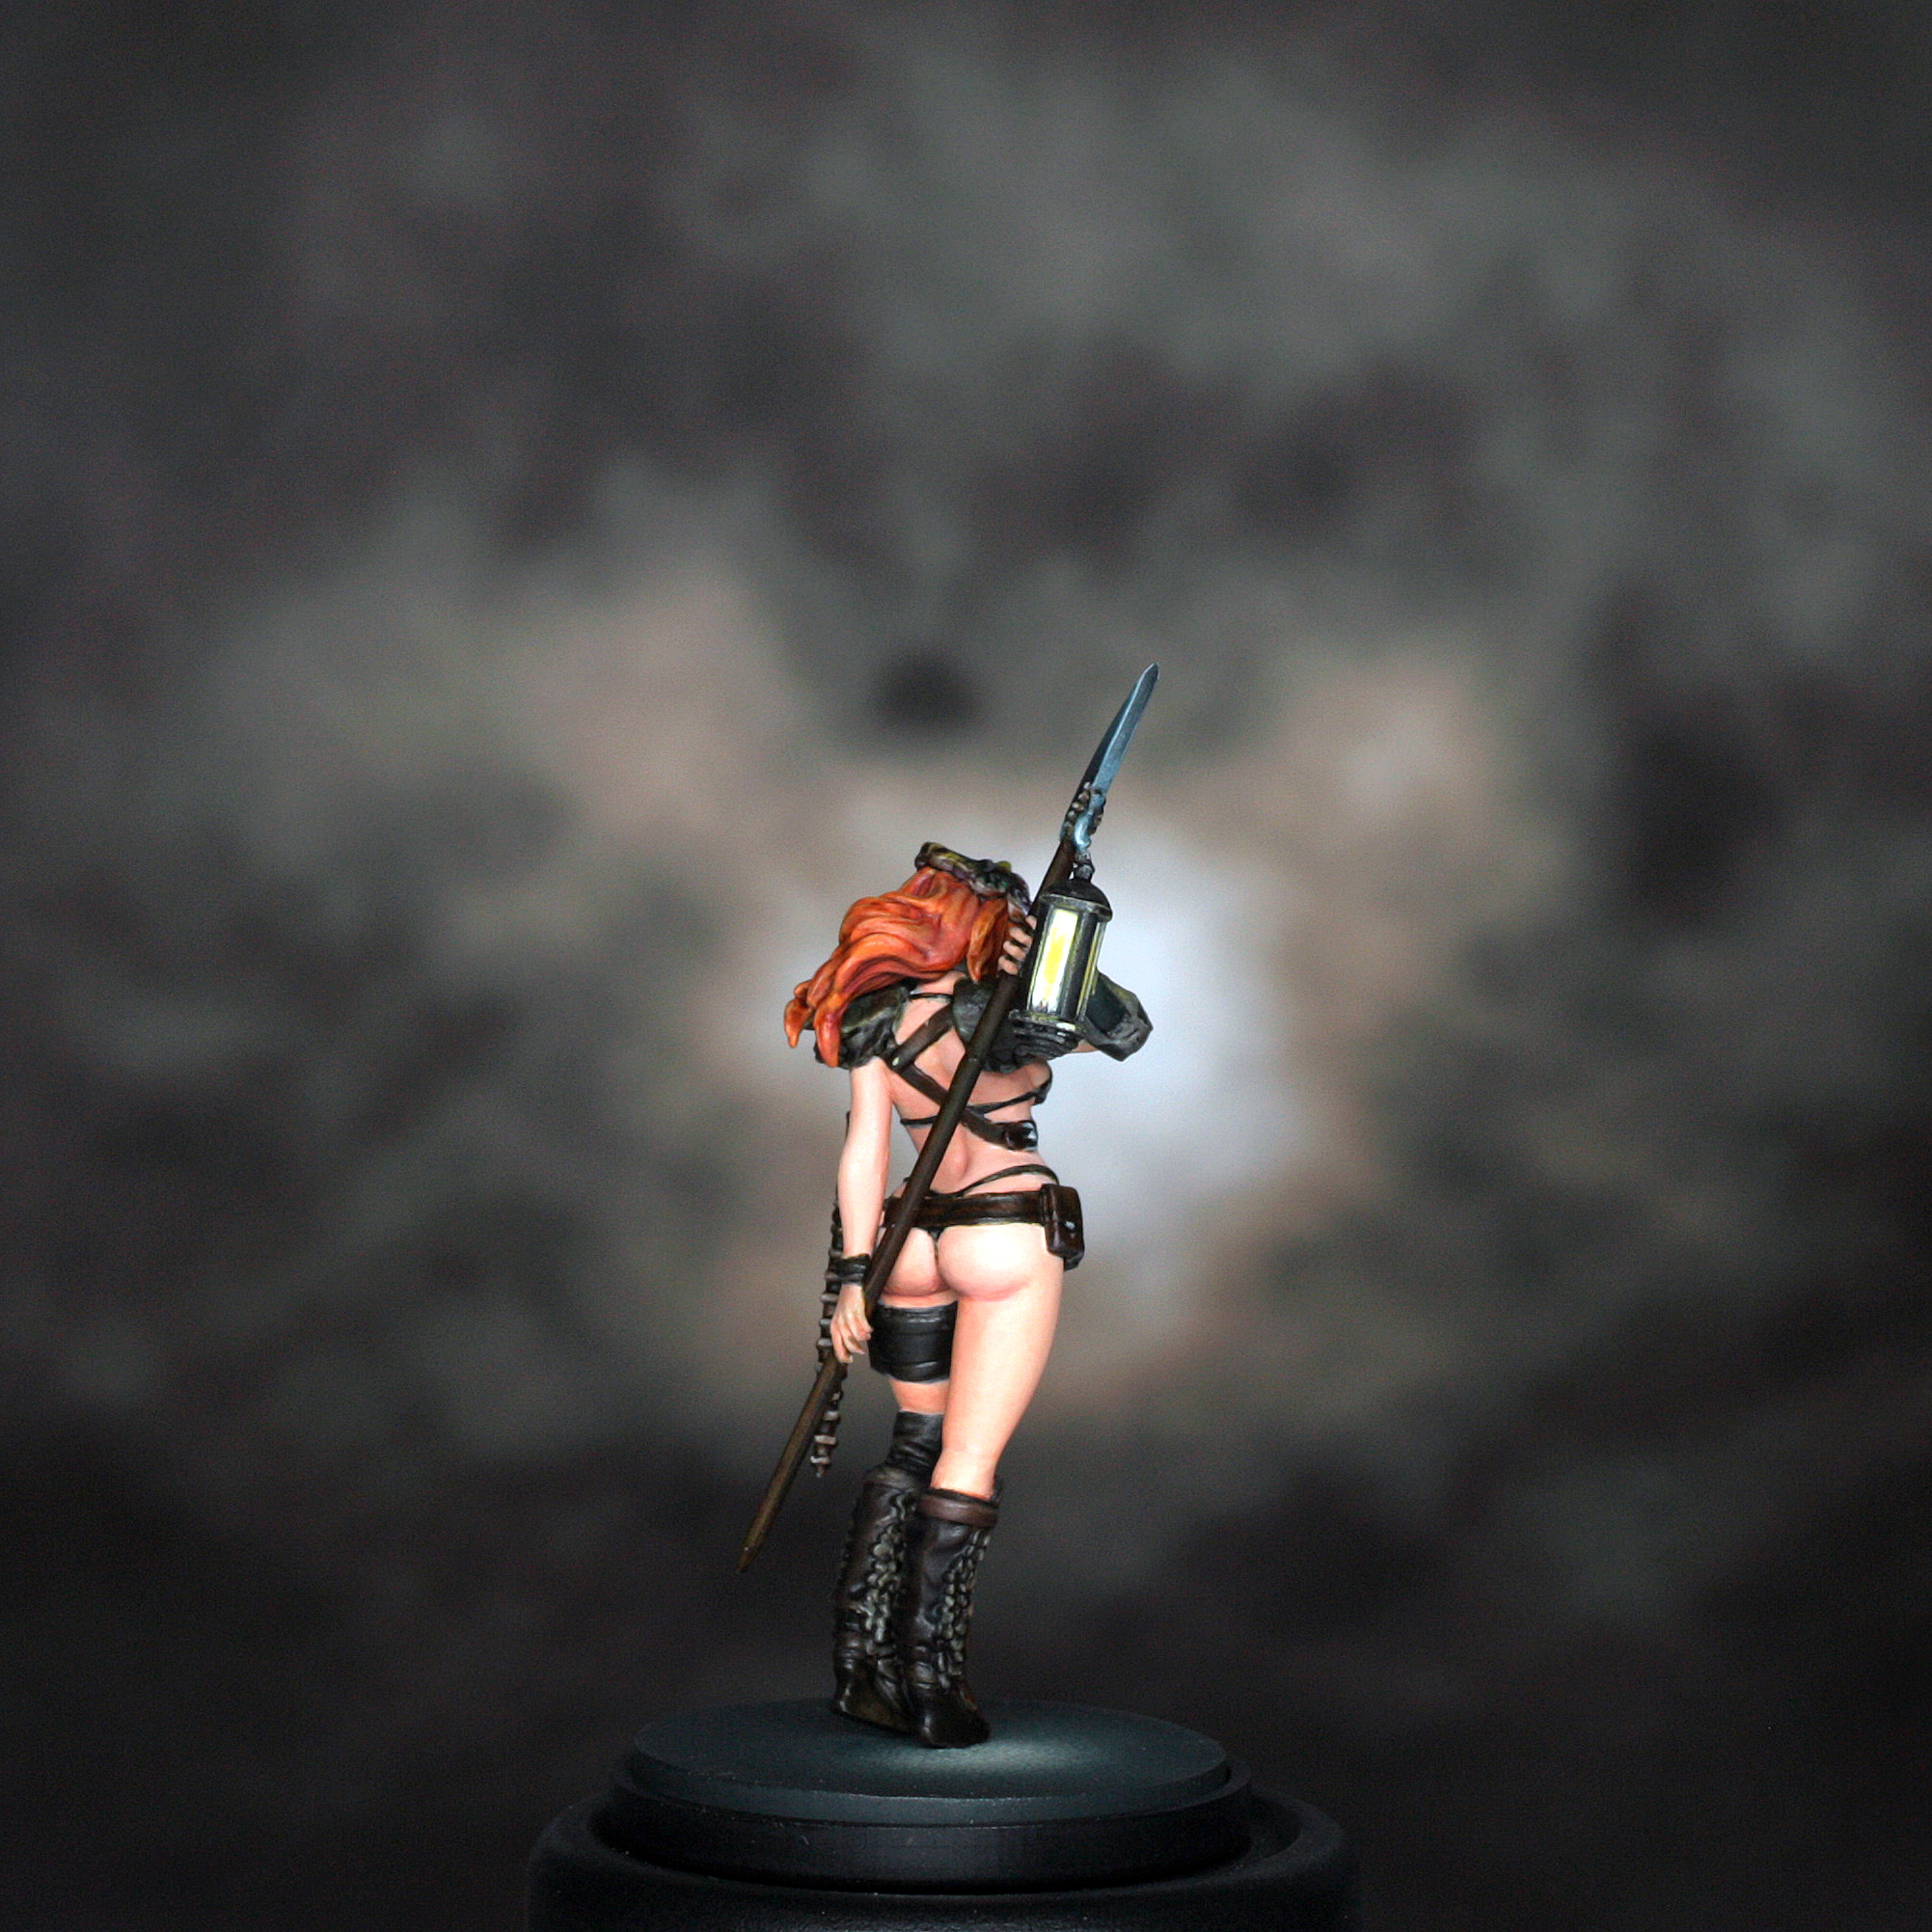
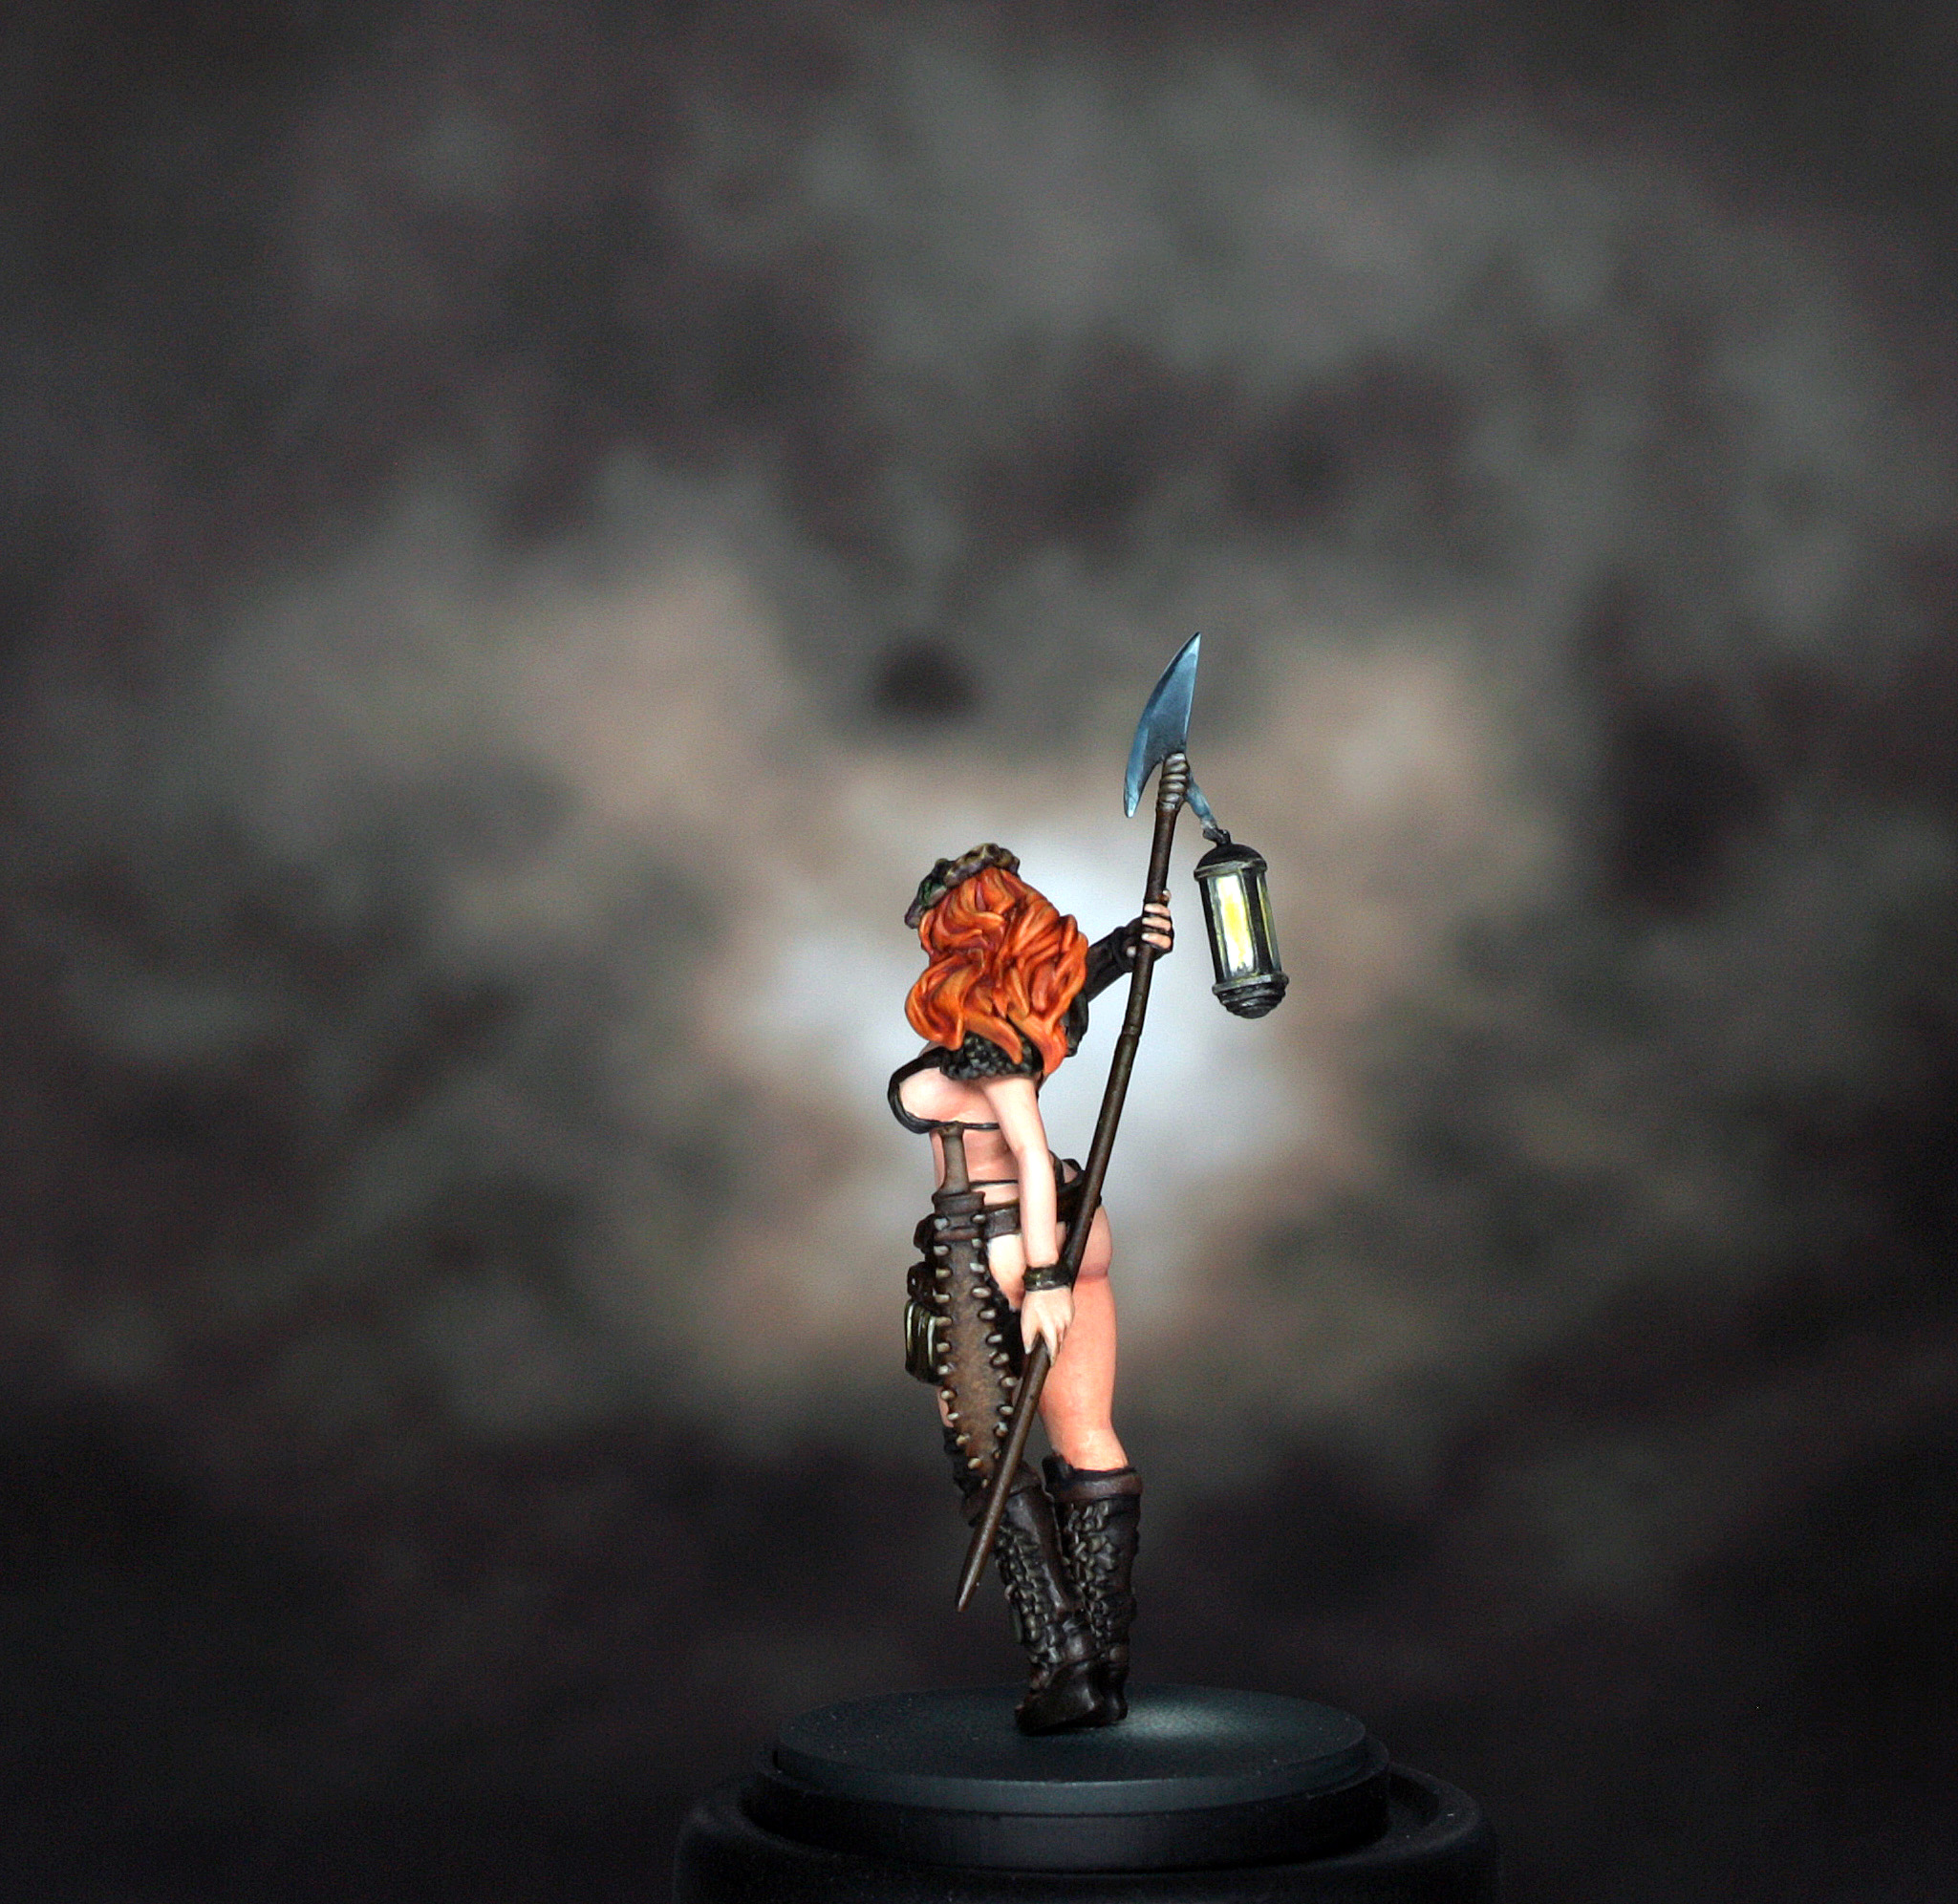
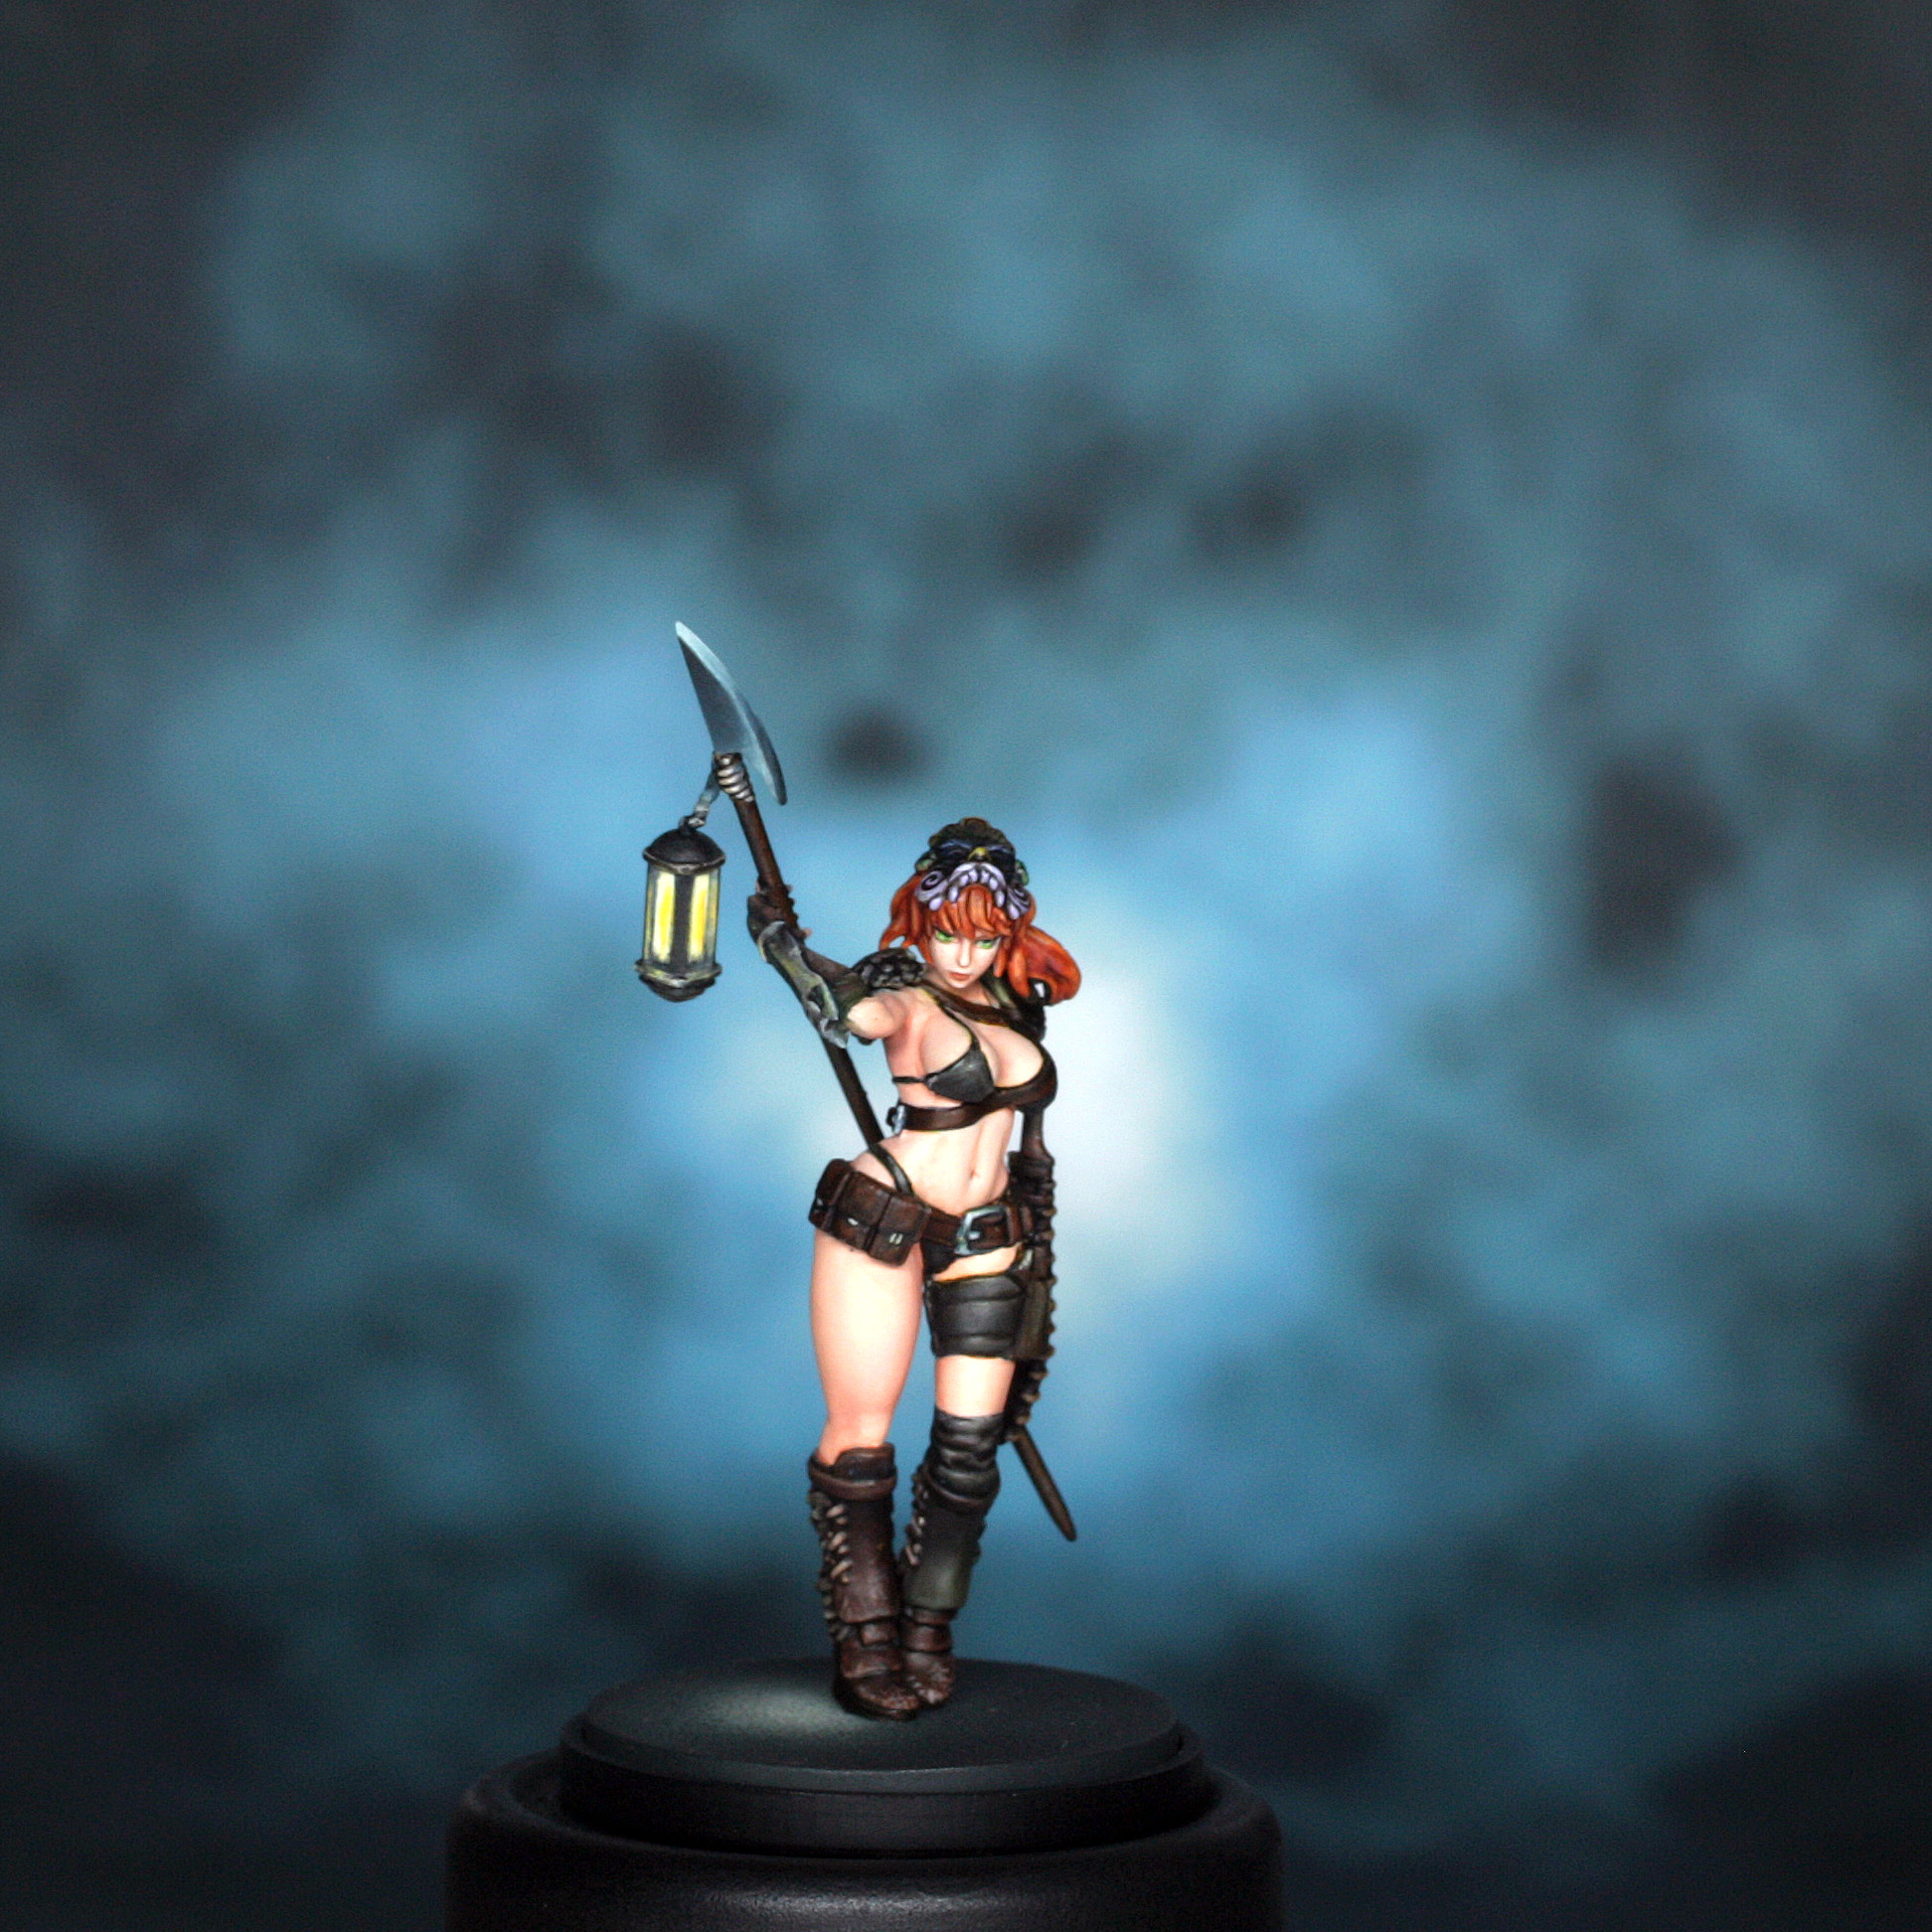
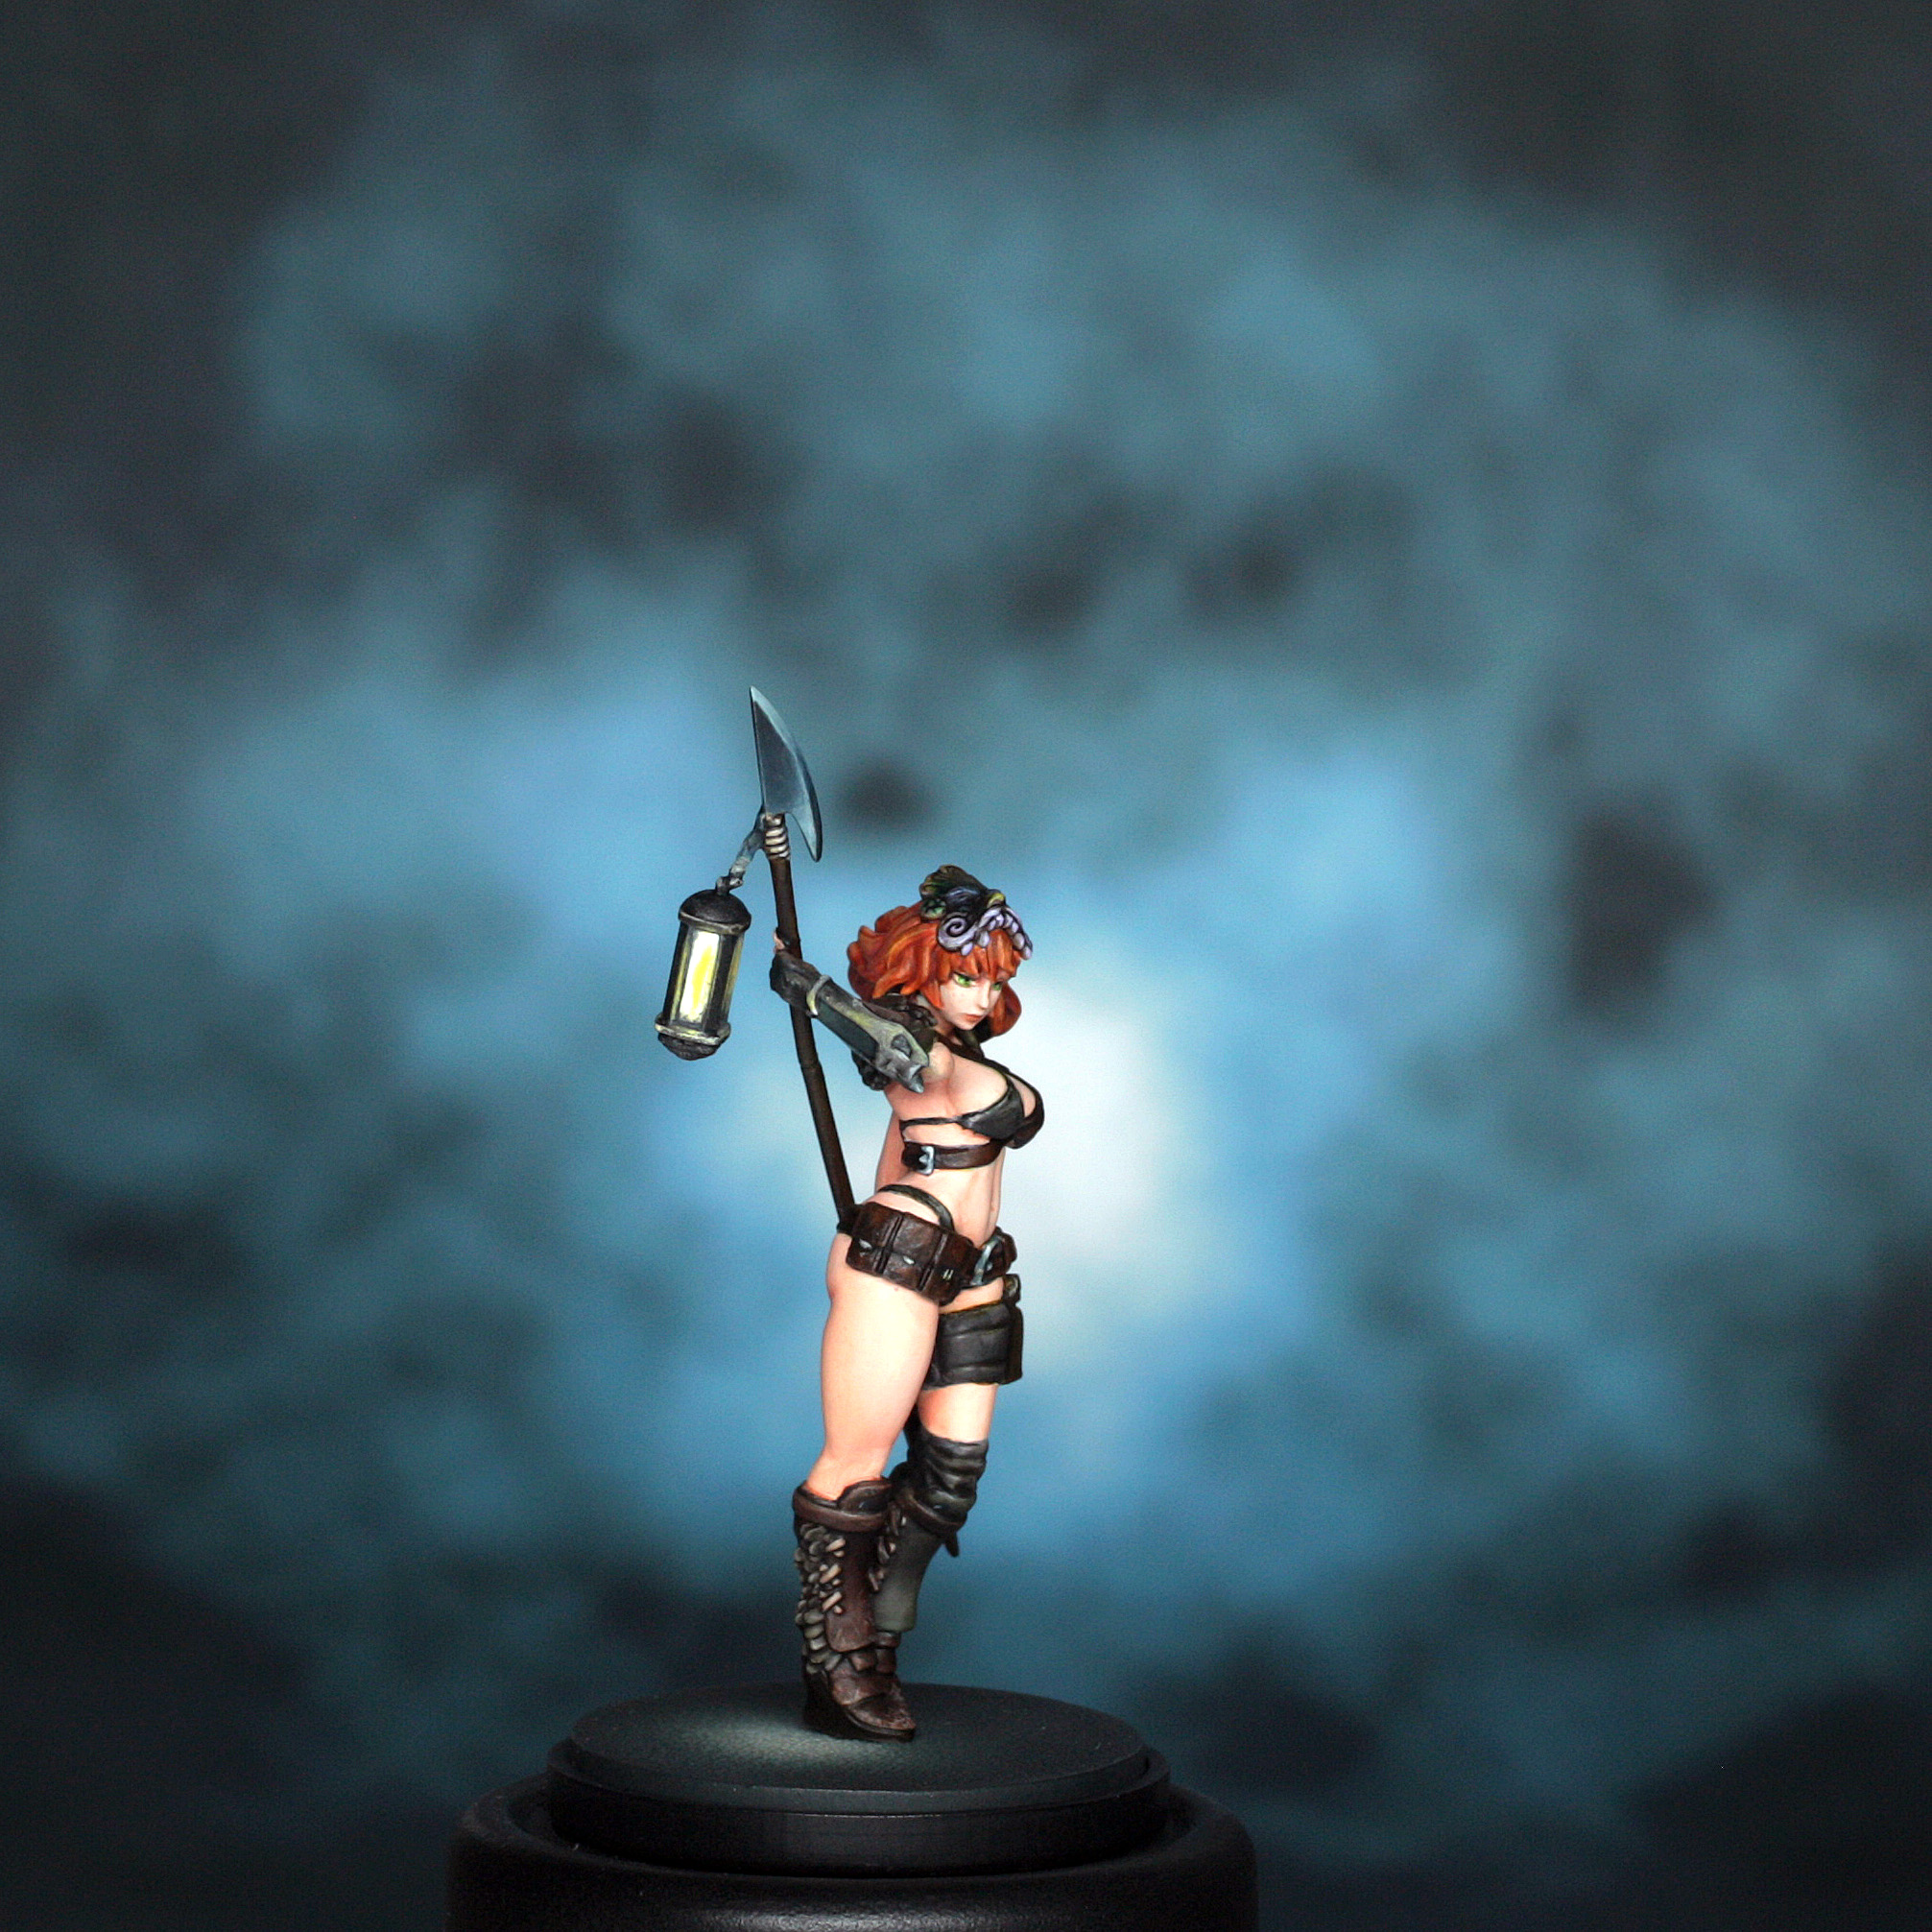
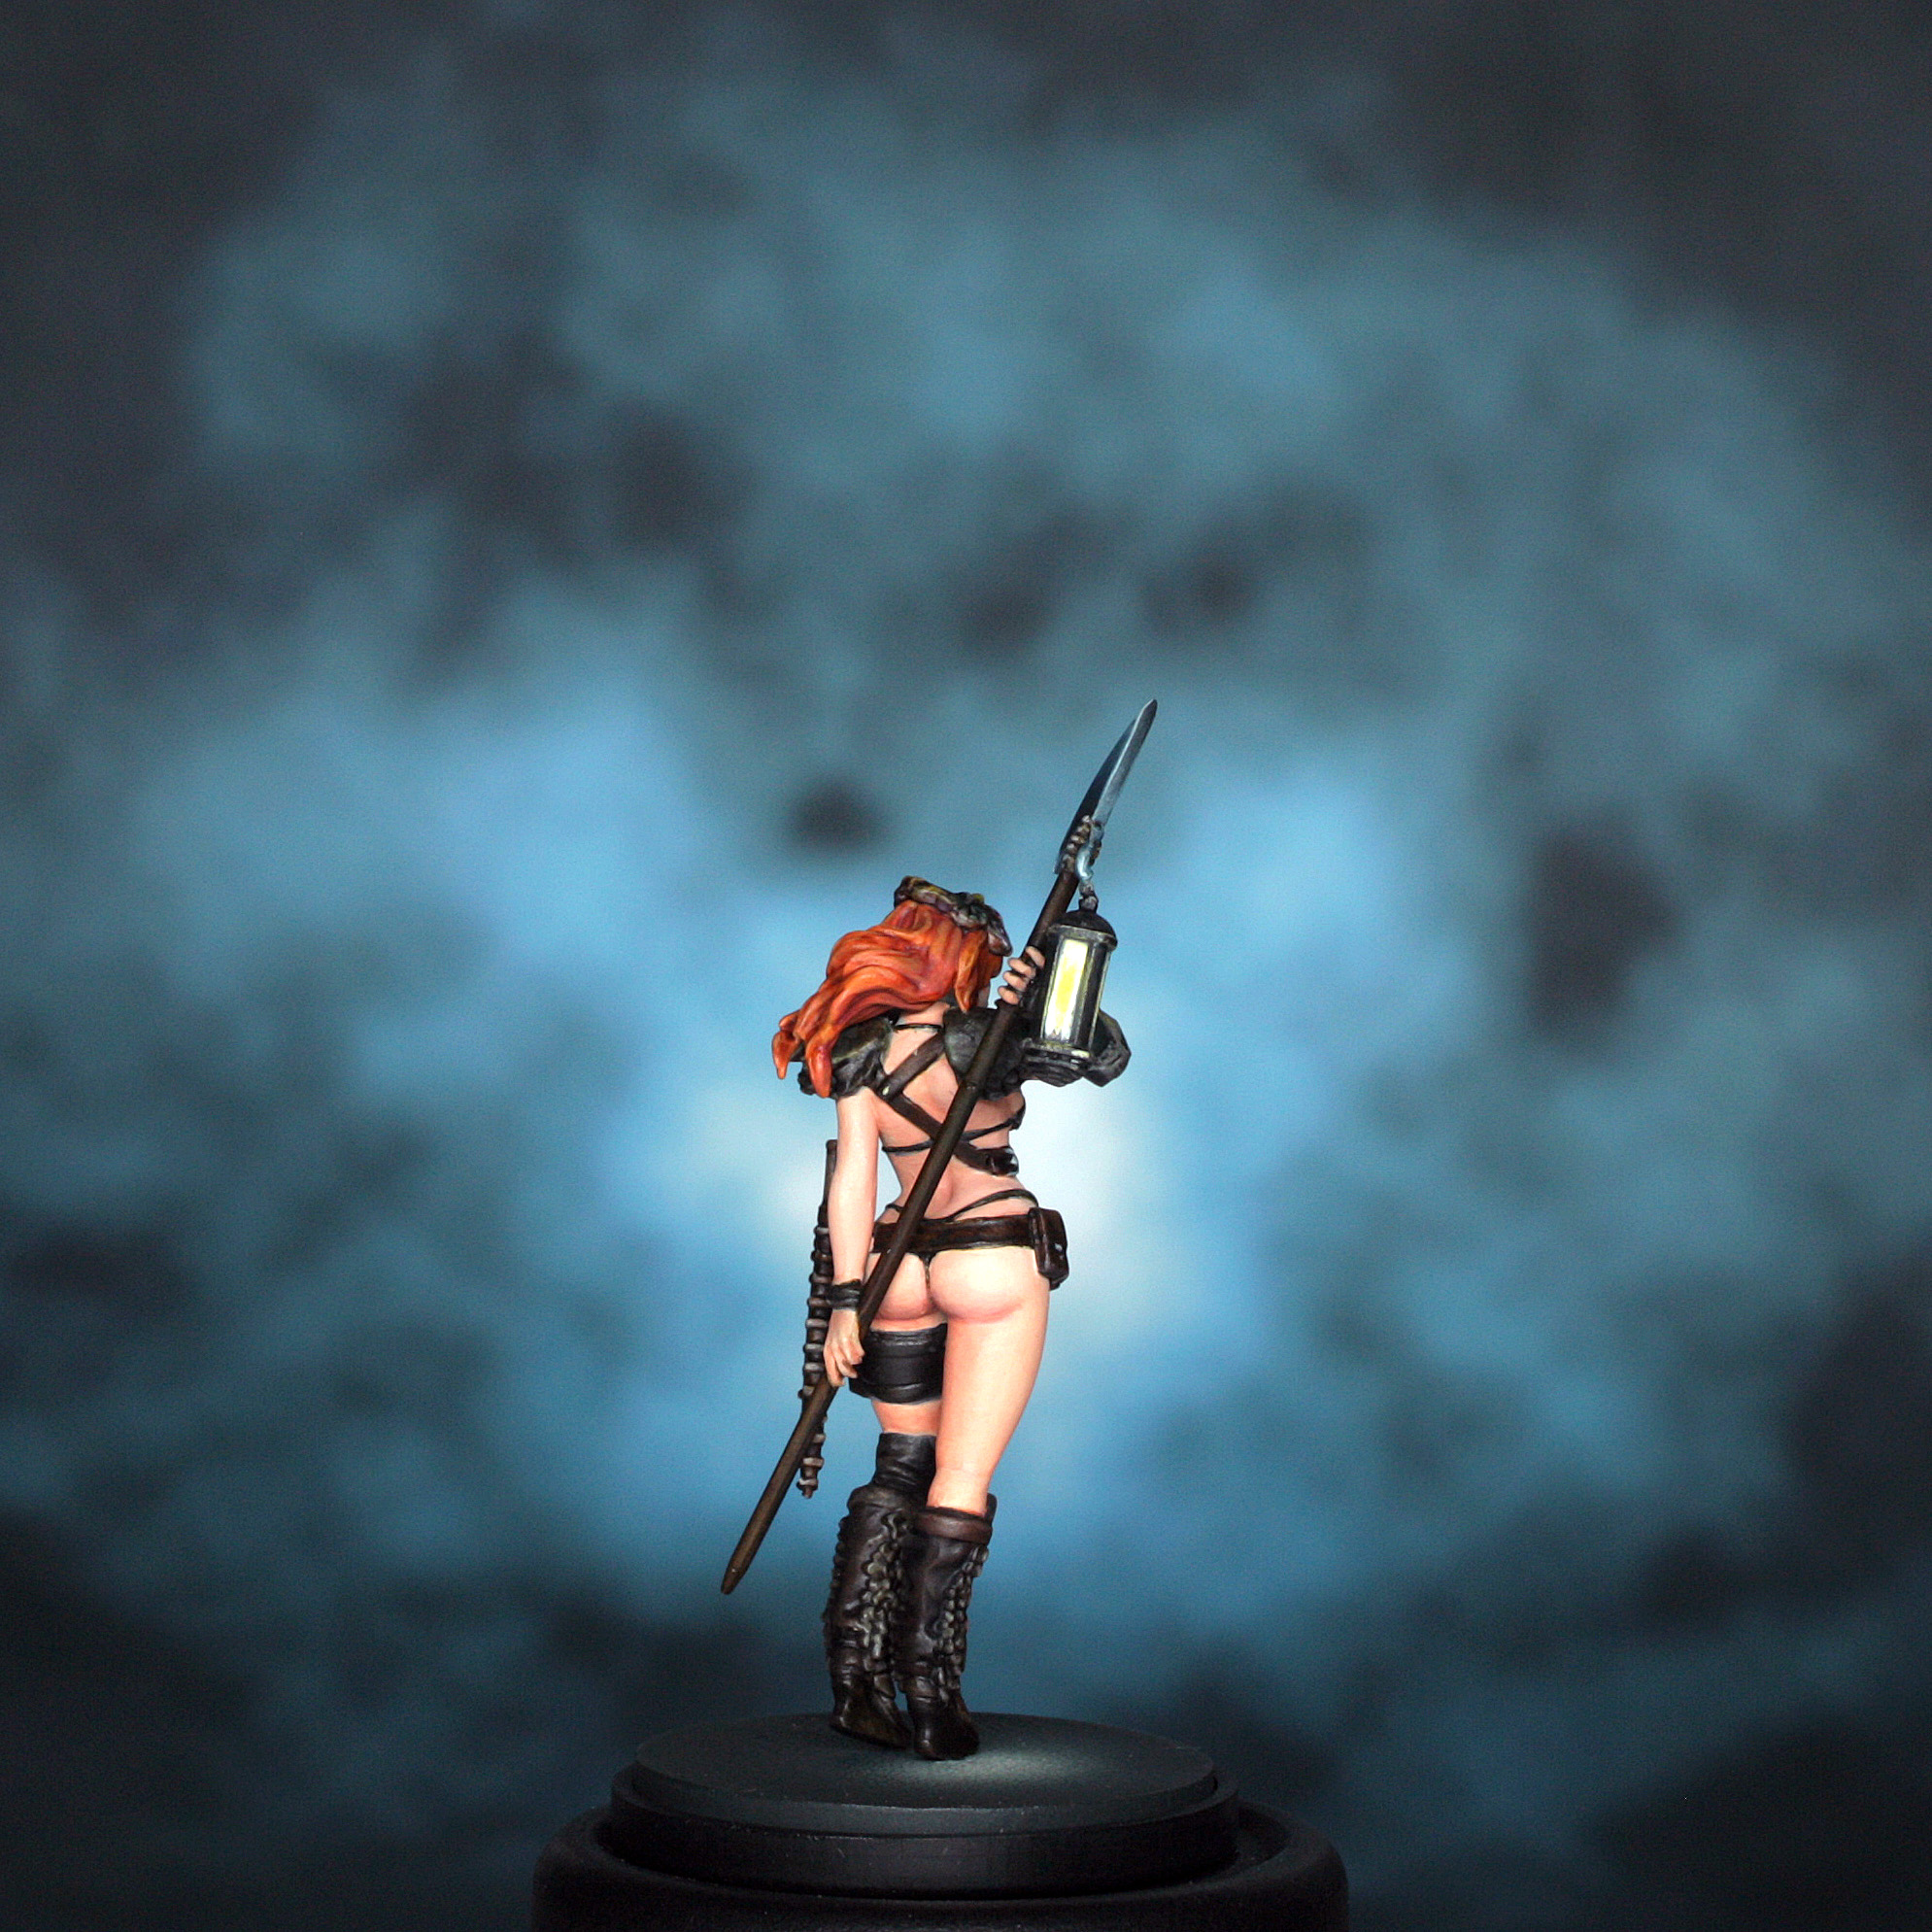
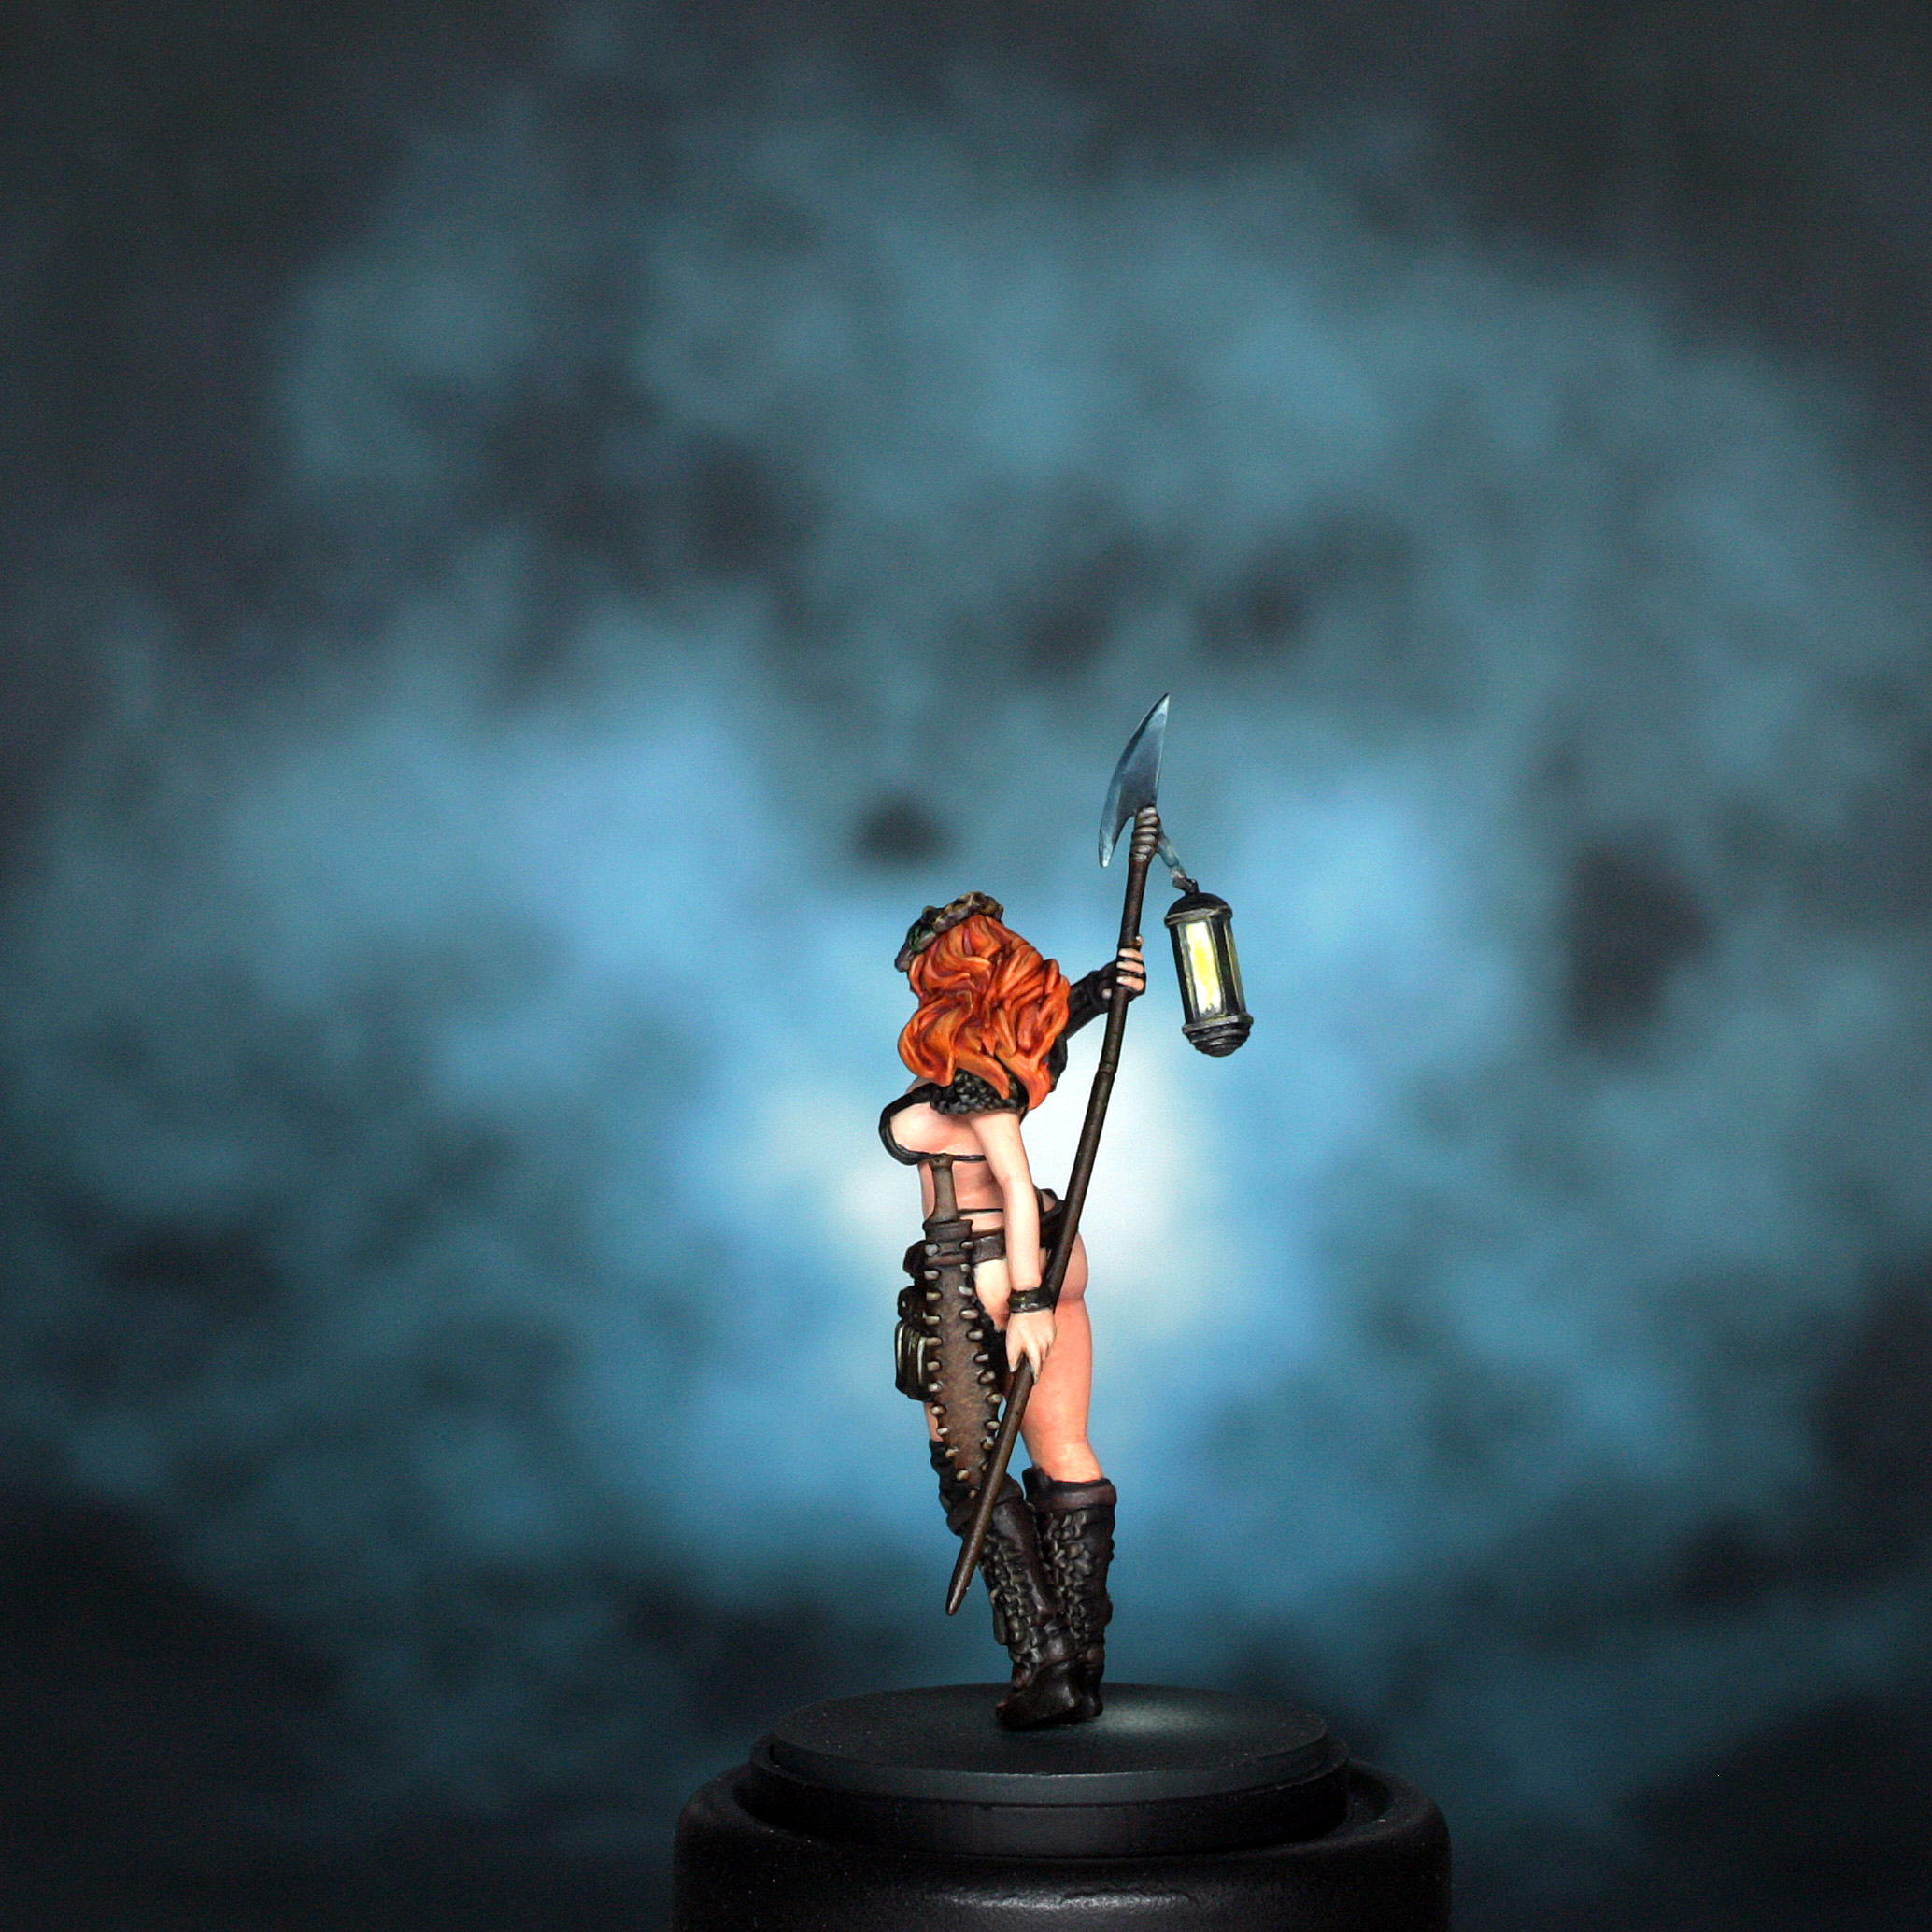
And so we have our 5th Pinup complete. The lovely pale skin and contrasting hair and eyes on this model make her stand out nicely, so much so that she has been one of my favourites to paint. I hope that you like her and be sure to give her a go too.
Studio Photos!!!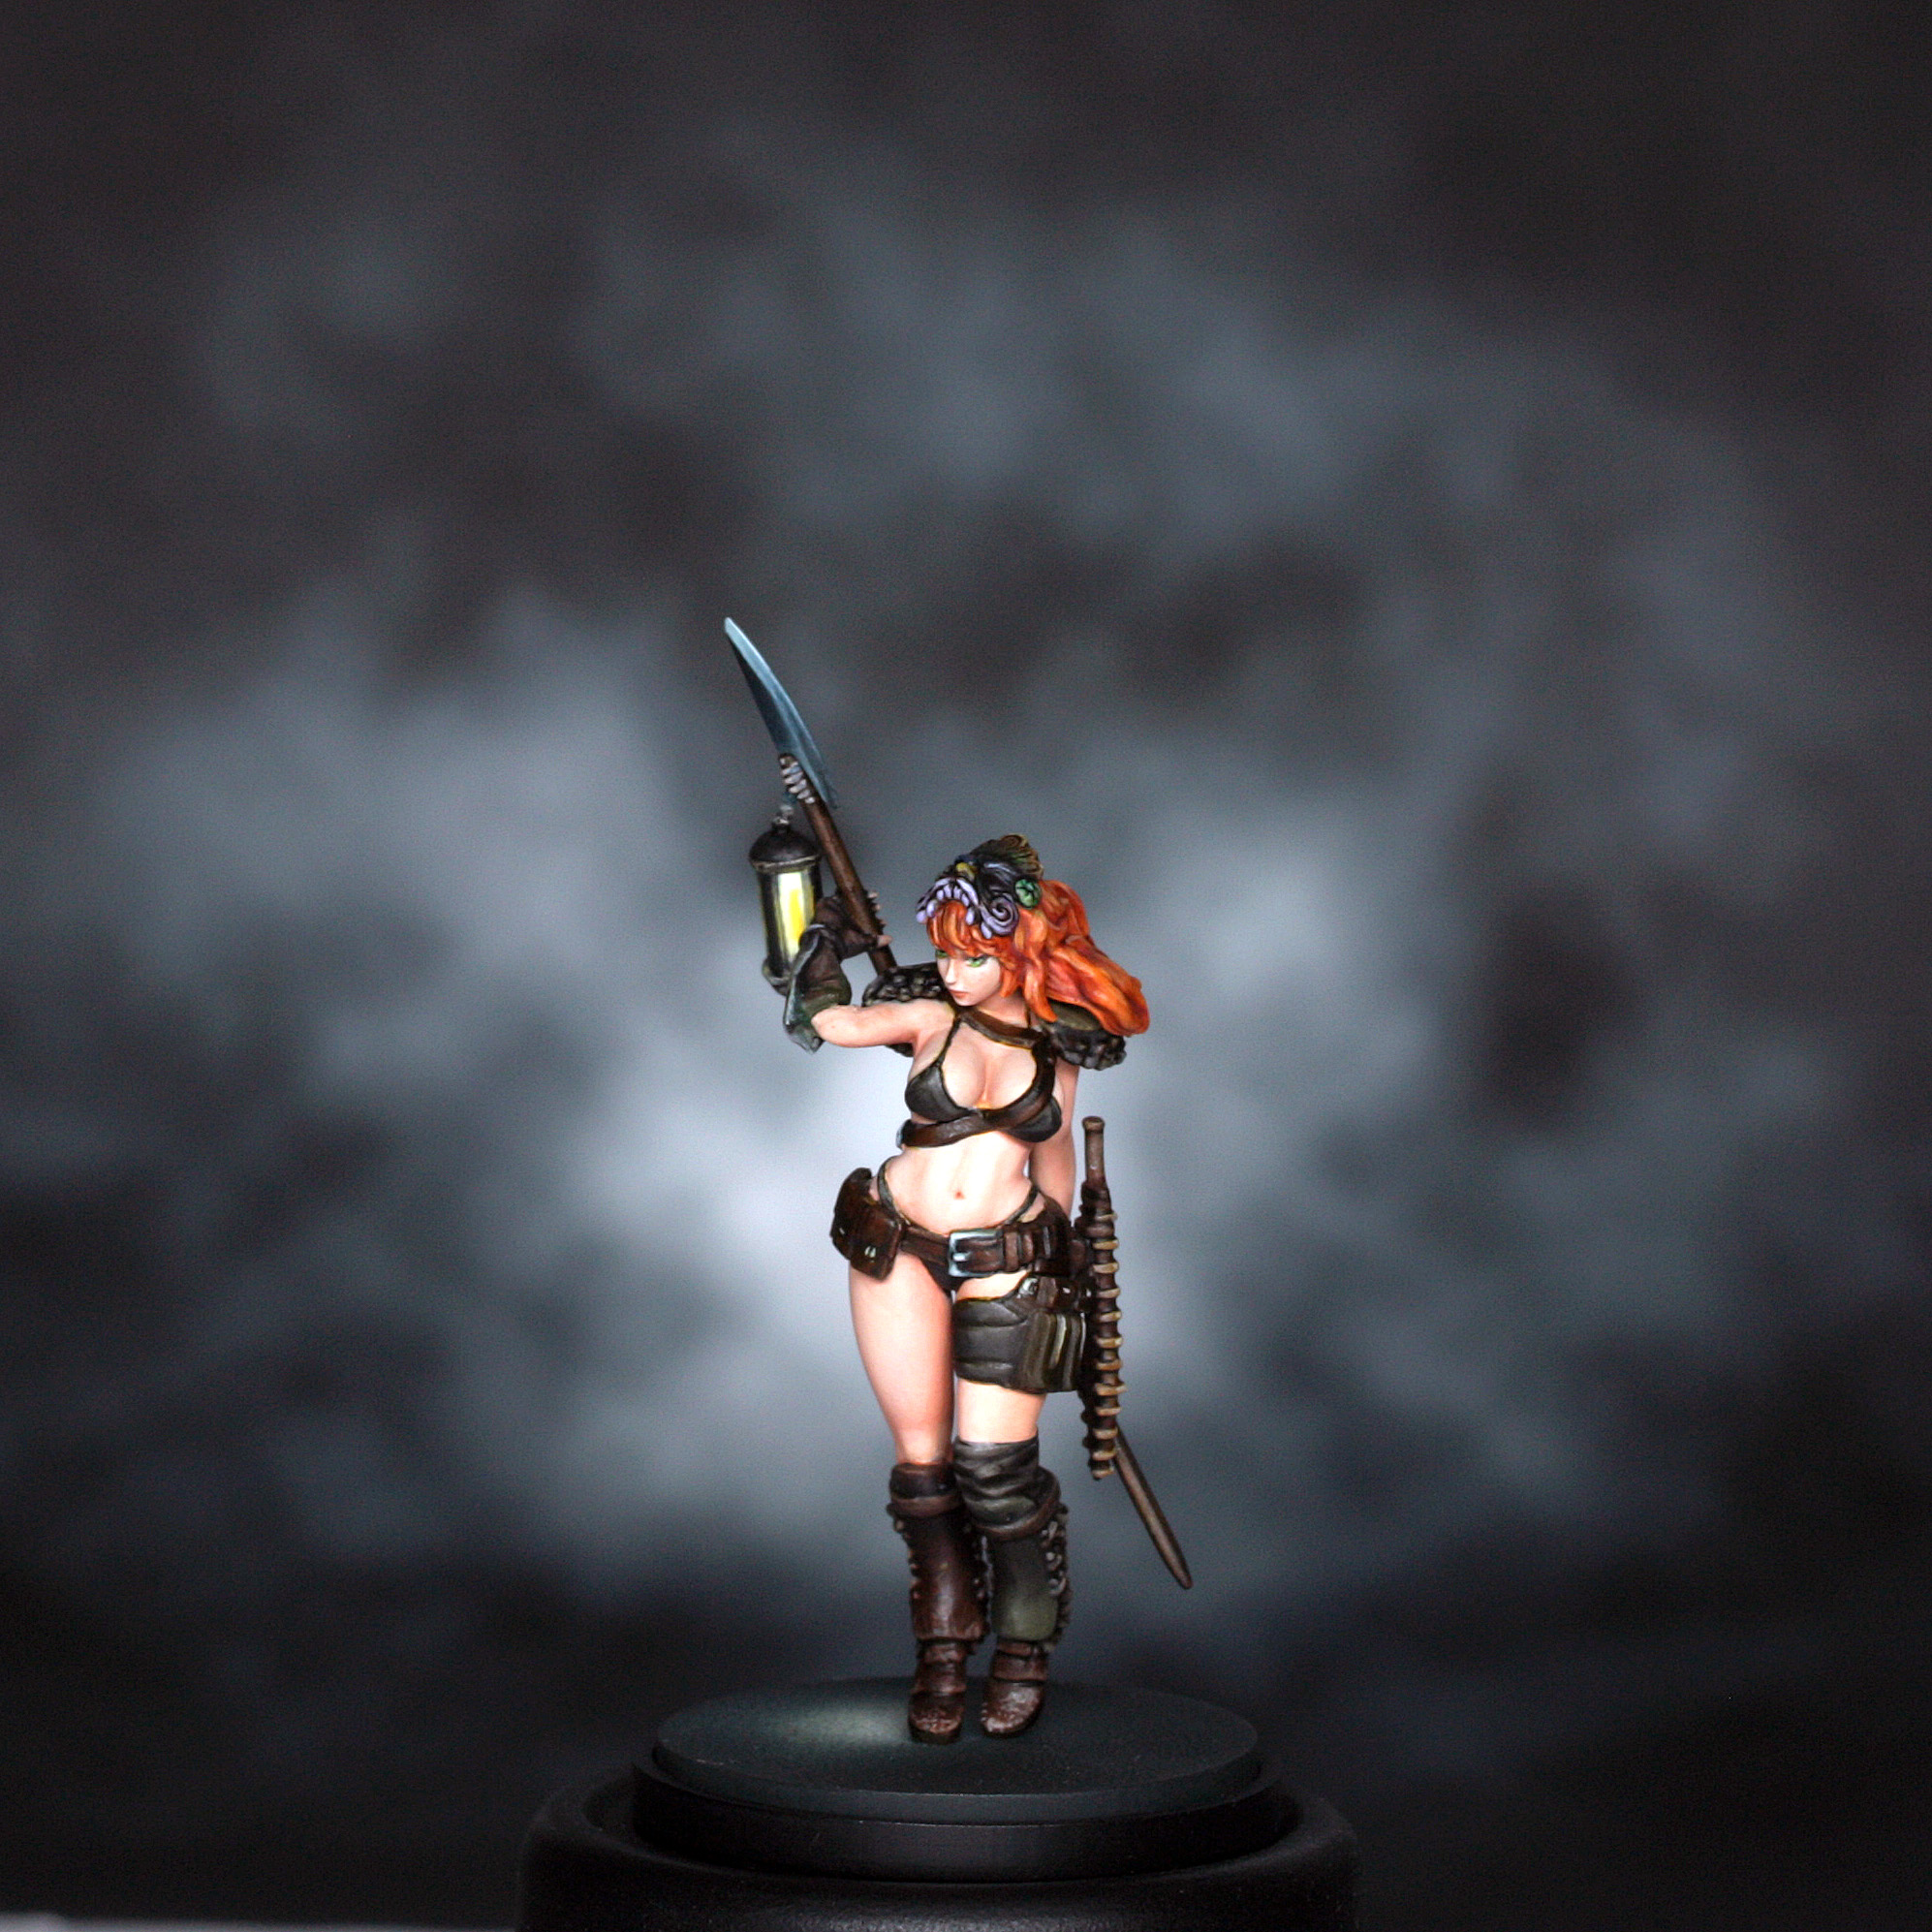


Until next time,
Scott ^_^